Creating email accounts in CWP is a straightforward process
Once your server is configured for email use, you can easily create email accounts for your domains to send and receive emails.
Prerequisites: #
- CWP installed and properly configured for email use (Postfix and Dovecot installed).
- A domain name configured on your CWP server. You can do that using these steps.
- Email DNS records (like MX, SPF, and DKIM) for your domain should be set to point to the server
- Access to either CWP Admin panel or user cPanel, where you will crate emails
A. Create Emails from Admin CWP #
Step 1: Log in to the CWP Admin Panel using these steps
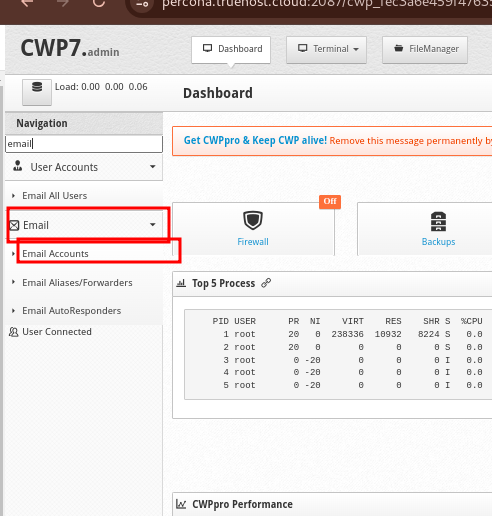
Step 2: Navigate to the Email Account Section.
- Once logged in, navigate to the Email section from the left-hand menu.
- Click on Email Accounts. This will open the email management page where you can create, edit, and manage email accounts for your domain(s).
Step 3: Create a New Email Account
- While on the Email Accounts page, you will see two button; Add new subdomain email and Add new domain mail.
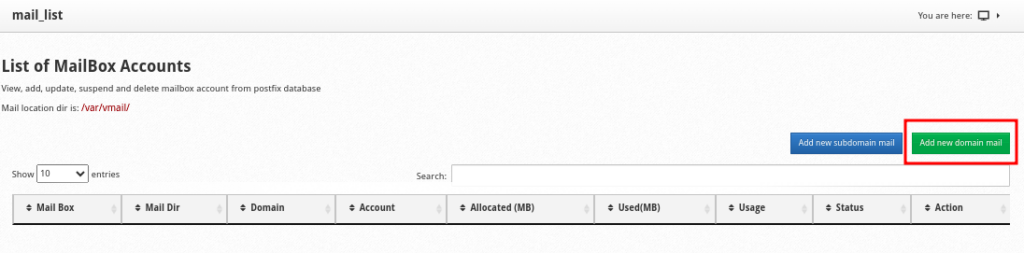
- Click to Add a new domain mail to get a form that need you to choose a user whose email details. From the drop-down provided, choose user for the domain that you want to create emails for.
- You will get an expended form to fill in more email details. The domain section has a drop-down that enables you choose the right domain, just in case that user owns multiple domains.
- Fill in all the details, ensuring to put a strong password and also save it for use
- Once done, click the blue button labeled Create Mail
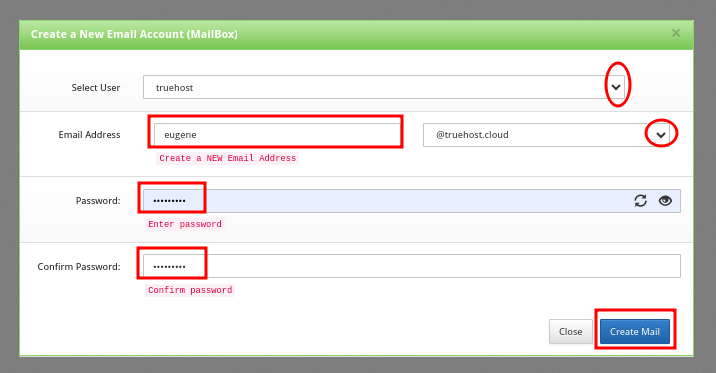
- You will see a Success message once the email has been created.
Step 4 : Access the Email Account #
- Once the account is created, you can access it using webmail using any of the URLs below.
https://yourhostanme/webmail e.g. https://percona.truehost.cloud/webmail

OR

http://your_server_ip/webmail e.g http://91.134.244.66/webmail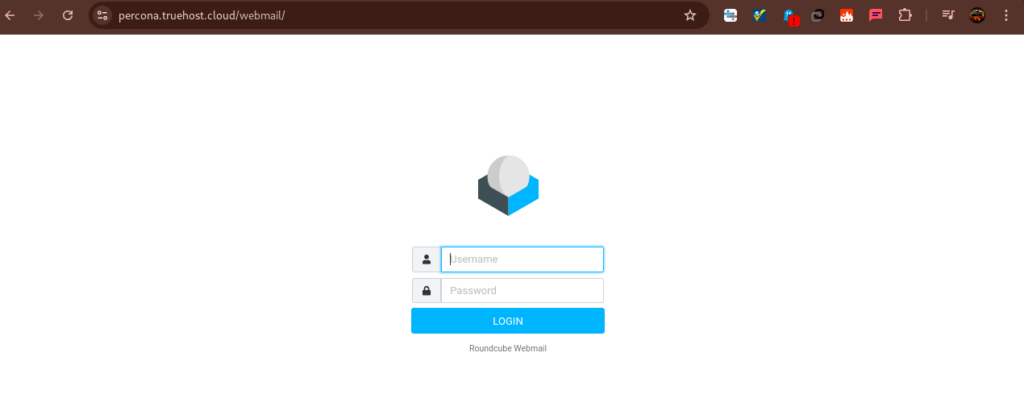
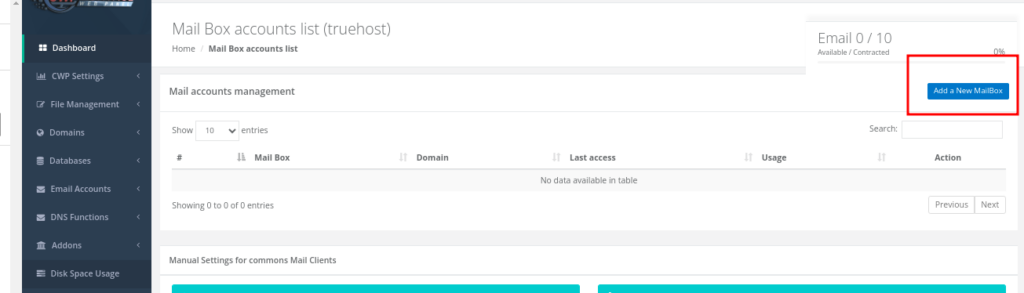
B. Create Emails from User CWP cPanel #
Step 1: Log in to the CWP User panel using these steps
Step 2: Navigate to the Email Account Section.
- Once you logged in using the user cPanel, you will see the Email Accounts option on the left side pane. Click on it, and again click on Email Accounts.

Step 3: Create a New Email Account
- While on the Email Accounts page, you will see a button labeled Add new Mailbox.
- Click Add new Mailbox to get a form that need you to input the email details; the email address that you want to create, a drop down to select the domain whose emails you want to create, just in case you have addon domains, a box to input the a password or to generate one, a section to specify the email disk quota allocation.
- Fill in the details then click on Add to create the mailbox.
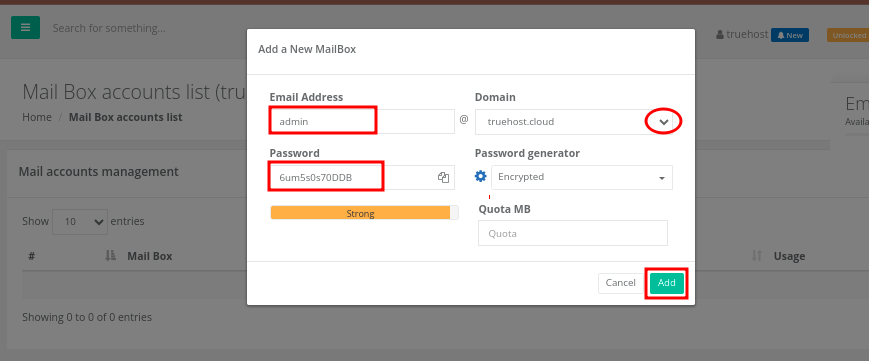
- You will see a Success message once the email has been created.
Step 4 : Access the Email Account #
- Once the account is created, you can access it using webmail using any of the URLs below.
https://yourhostanme/webmail E.g. https://percona.truehost.cloud/webmail

OR

http://your_server_ip/webmail, E.g or http://91.134.244.66/webmail