ConfigServer Security & Firewall (CSF) is a powerful firewall application that helps secure your server from unauthorized access and attacks. In CWP (CentOS Web Panel), you can easily install, enable, and manage CSF to safeguard your server.
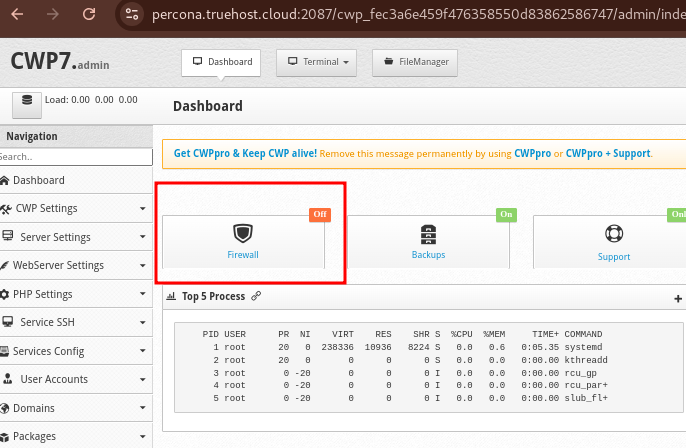
If CSF is not installed or is disabled, you will see the CSF Status as Off, on the landing page of CWP, as shown below;
Prerequisites: #
- CWP (CentOS Web Panel) installed on your server.
- Root access to your CWP server.
Step 1: Log in to the CWP Admin Panel using these steps. #
Step 2: Install CSF Firewall #
- If CSF Firewall is not already installed, follow these steps to install it.
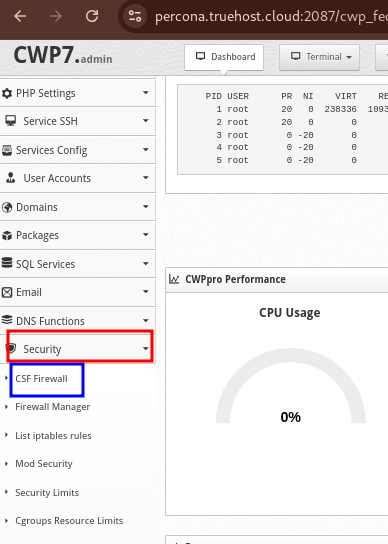
- From the left-hand menu, go to Security.
- Click on CSF Firewall.
- If CSF is not installed, you will see an option to Install CSF. Click on the button to begin the installation
- Wait for the installation to complete. Once it’s installed, the page will refresh, and you’ll be able to manage CSF settings.
Step 3: Enable CSF and LFD (Login Failure Daemon) #
- Once CSF is installed, follow these steps to enable it:
- Navigate to Security > CSF Firewall.
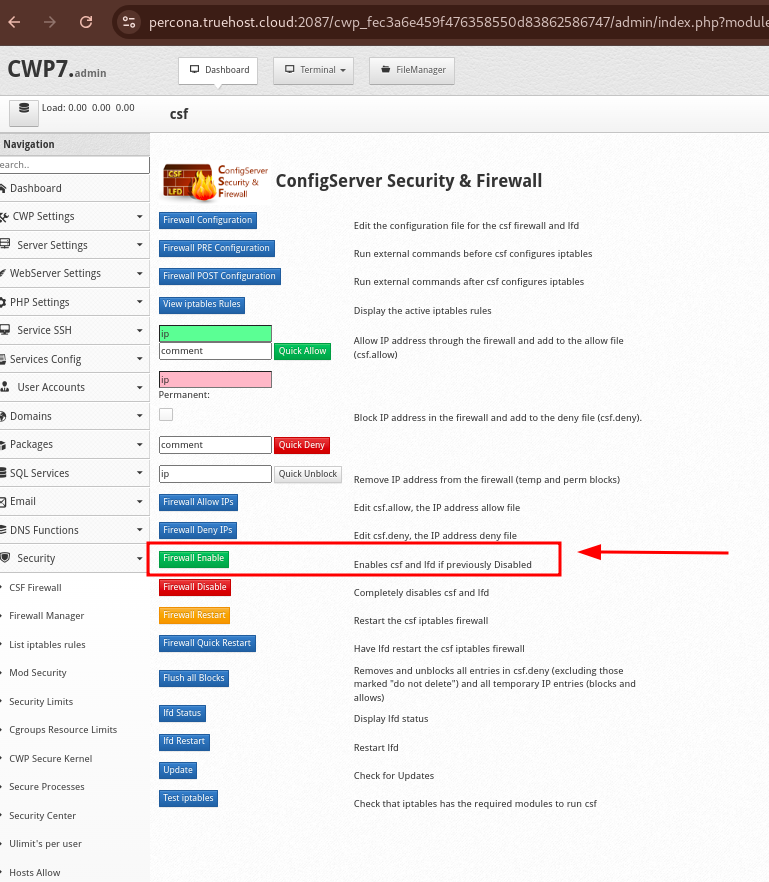
- On the CSF Configuration page, scroll down to find a button labled Firewall Enable and click o it to enable the firewall.
Step 4: Configure CSF Firewall Settings #
After enabling CSF, you can configure specific firewall rules based on your needs:
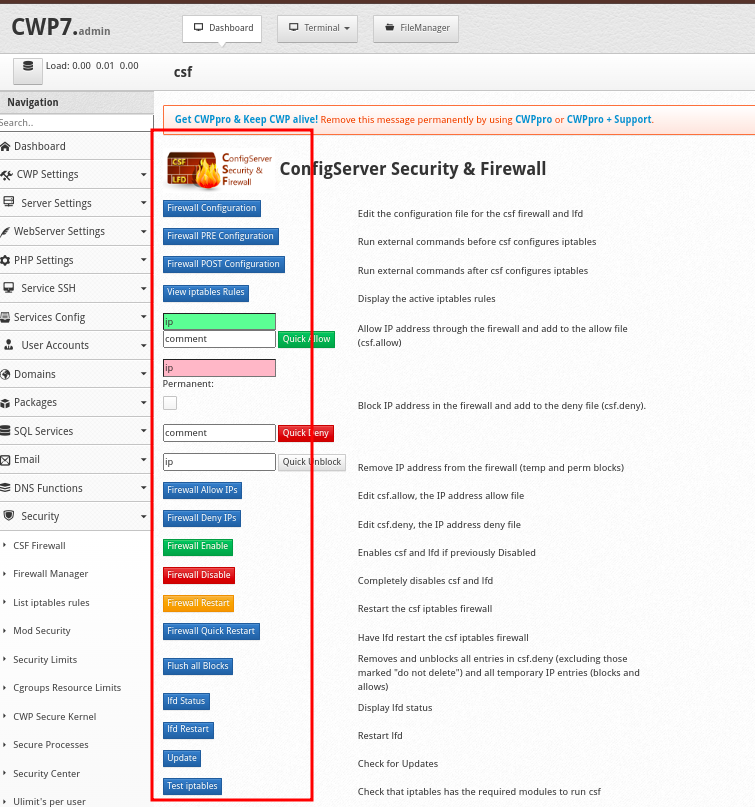
- Navigate to Security > CSF Firewall. You will various tabs and buttons
- Firewall Configuration: Allows you to modify CSF firewall settings such as port configuration, IP blocking, and more.
- CSF Allow/Deny IP: Lets you add or remove IP addresses from the allow/deny list.
- Advanced Settings: Provides more granular control over CSF behavior and security measures.
- For basic configuration, start with Firewall Configuration to define which ports should be open or closed. Common ports you might want to open include:
- Port 22 for SSH
- Port 80 for HTTP
- Port 443 for HTTPS
- To open or close a port, scroll to the section titled TCP_IN (incoming ports) and TCP_OUT (outgoing ports). Enter the port numbers separated by commas (e.g.,
22,80,443). - Click Save Changes once you’ve made your adjustments.

- Once the changes are saved, the system will automatically restart CSF and LFD services, to apply your changes
- You can also access the server via SSH and restart csf using this command
csf -rStep 5: Testing CSF Firewall
- You can also access the server via SSH and check the status of the firewall by running the following command from the terminal:
systemctl status csf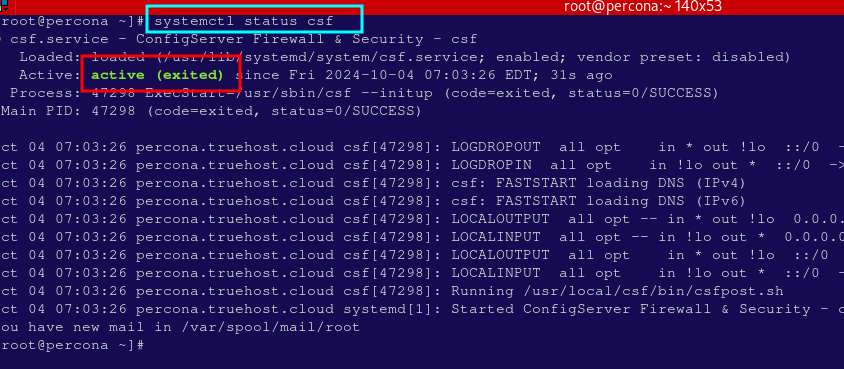
- You should also confirm that your services, such as SSH, HTTP, and HTTPS, are still accessible after enabling the firewall. Test by accessing your server’s IP and verifying that it’s functioning as expected.
Step 6: Managing CSF via CWP #
- You can manage CSF through the CWP panel or directly via the terminal. Some basic commands for managing CSF from the terminal include:
- Enable: csf -e
- Disable: csf -x
- Restart CSF: csf -r
- Check Status: systemctl status csf
- Start the firewall rules
- Flush/Stop firewall rules: csf -f
- Allow an IP: csf -a ip
- Add IP to the temporary deny list: csf -td
- Remove IP from temporary ban or whitelist: csf -tr ip
- Delete all IPs from temporary IP entries: csf -tf
- Ban ban IP (add to /etc/csf/csf.deny): csf -d ip
- Unblock blocked IP: csf -dr ip
- Unblock all IPs in /etc/csf/csf.deny: csf -dr
- Search the iptables and ip6tables rules for a match (eg IP, CIDR, Port Number): csf -g option
- Display a current list of temporary IPs that allow and deny TTLs and comments: csf -t