After creating email accounts on your CWP (CentOS Web Panel) server, you may need to manage these accounts—whether it’s to reset passwords, adjust quotas, delete accounts, or troubleshoot issues.
Prerequisites: #
- CWP installed and configured for email use.
- Email accounts created on your server.
- Access to CWP Admin or User panel where emails are created.
A. Managing from CWP Admin Panel #
Step 1: Log in to the CWP Admin Panel using these steps
Step 2: Navigate to the Email Account Management Section
- Once you’re logged in, go to the Email section from the left-hand menu.
- Click on Email Accounts. This will display all the email accounts that have been created on your server.
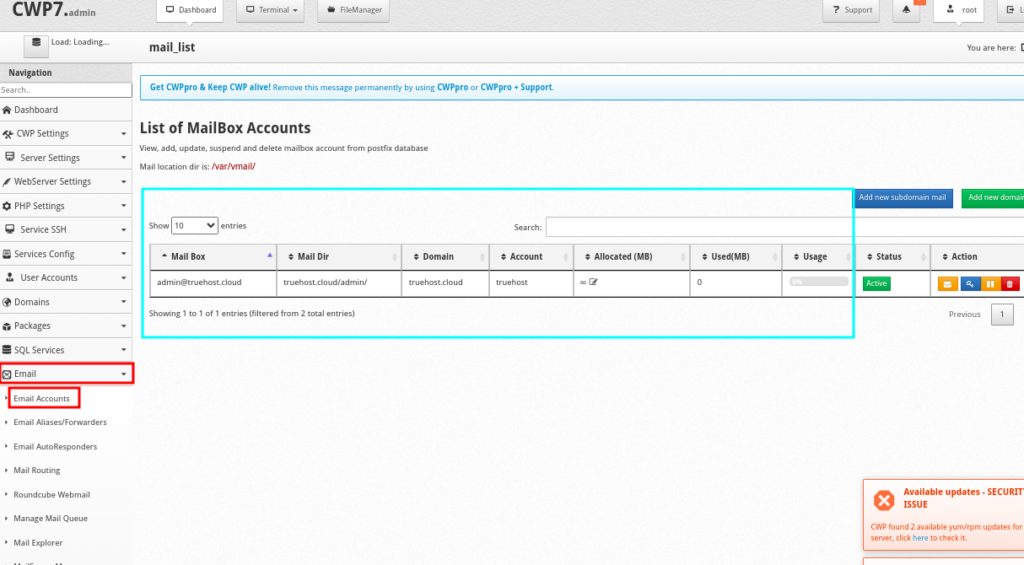
Step 3: Manage Email Accounts #
- On the Email Accounts page, you will see a list of all email accounts associated with each domain hosted on your CWP server.
- Each email account is displayed with its domain, email address, quota, and options for management.
- If you have so many emails, you can use the provided search box to search for a specific mailbox or for a domain in order to see all it’s associated mailboxes.

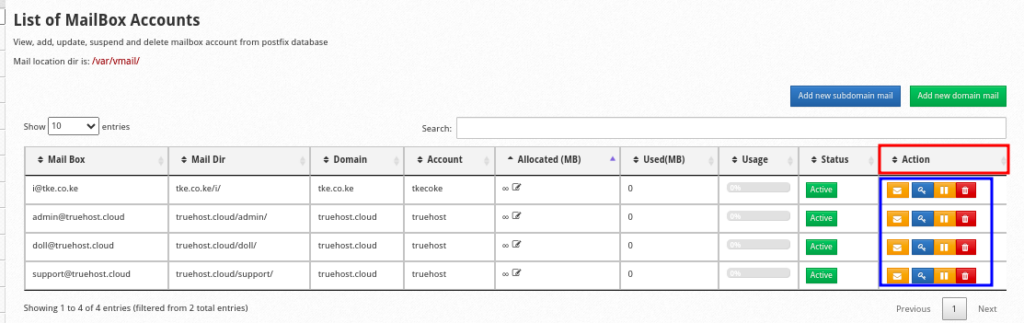
- The Actions column of each mailbox has a set of buttons on the extreme right, each for performing a different function. You can hover on each to see what it does. Below are the various functions
- Autologin – Click on it to automatically access webmail for that mailbox.
- Change Password – Click on it to update password for that mailbox
- Suspend – Click on it to suspend the emailbox, thus making it to not function
- Delete – You will delete the emailbox when you click on this button
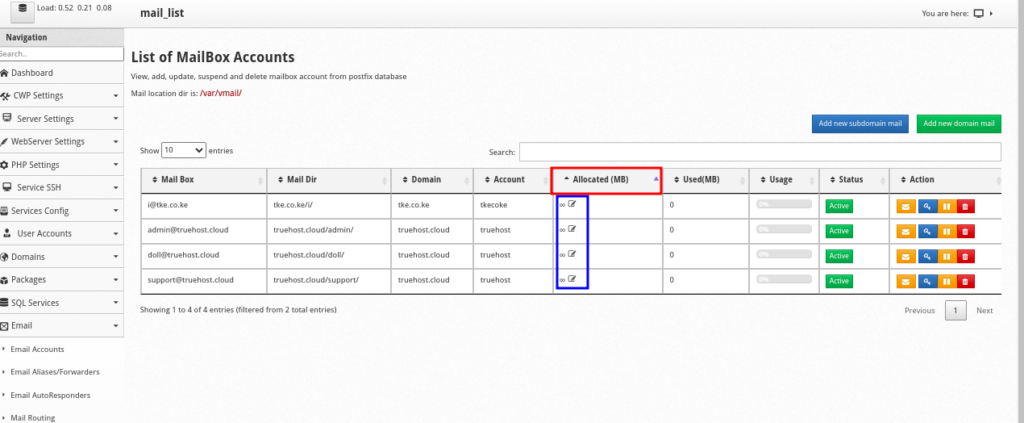
- Once you adjust the values, click on Update Mailbox button to save changes
- The Allocated (MB) column has edit icons that allow you to adjust disk quota for each email
- Once you update the value, click on Save to save changes.
You can always reach out to our support team or search our knowledgebase for further help on any issue that is not clear.