In CWP (CentOS Web Panel), a hosting package defines the resources allocated to a particular user or domain. These resources include disk space, bandwidth, number of email accounts, databases, and more. By creating hosting packages, you can easily manage and assign specific resource limits to each user on your server.
Prerequisites: #
- CWP installed on your server.
- Root access to your CWP server.
Step 1: Log in to the CWP Admin Panel using these steps #
Step 2: Navigate to Add a Package Section
- Once you are logged in, go to the left-hand side menu and select Packages.
- Again click on Packages.
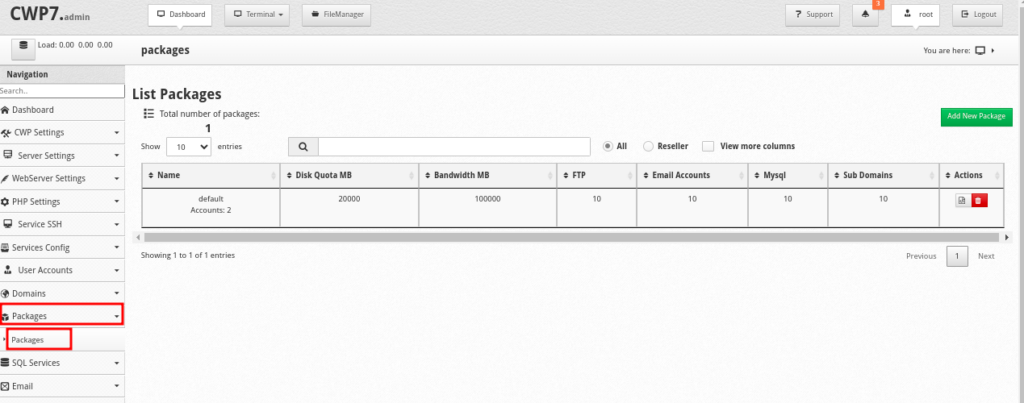
Step 3: Create a New Hosting Package #
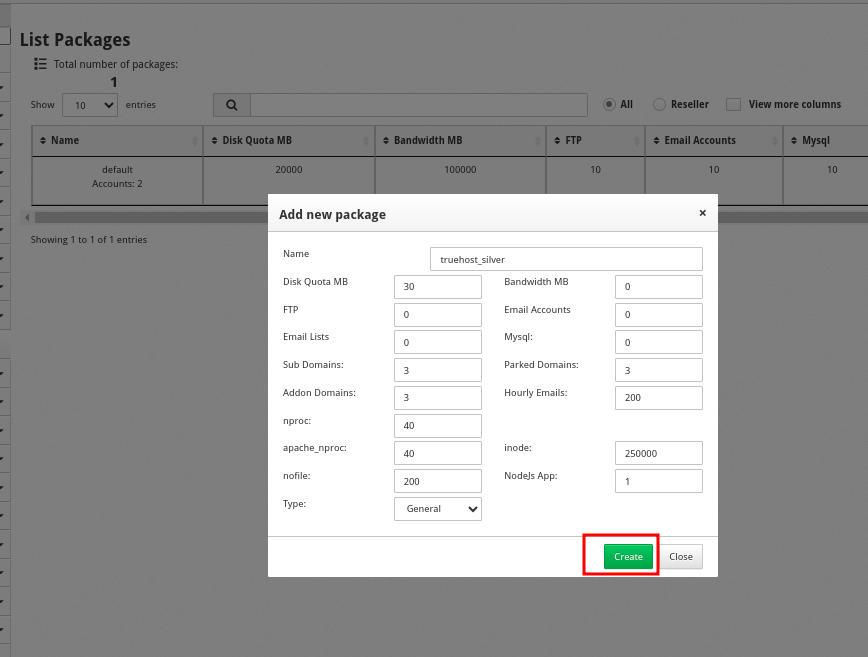
- You will now be presented with the hosting package configuration page. Here, you can specify the various limits and resources for the new hosting package.
- Input the package values as you desire;
- Package Name: Enter a name for your hosting package (e.g., “Basic”, “Pro”, or “Unlimited”).
- Disk Quota (MB): Define the amount of disk space (in MB) the package will allow. For example, you can set this to
5000for 5GB of disk space. - Bandwidth (MB): Set the bandwidth limit for this package (in MB). For example,
10000for 10GB. - Max FTP Accounts: Define how many FTP accounts the user can create.
- Max Email Accounts: Set the maximum number of email accounts allowed under this package.
- Max Email Lists: Define the limit for email lists.
- Max Databases: Set how many databases the user can create under this package.
- Max Subdomains: Specify the number of subdomains the user can create.
- Max Parked Domains: Set how many parked domains are allowed.
- Max Addon Domains: Define the number of additional domains allowed.
- Max Process Limit: Set a limit on the number of processes that the user can run.
- Inodes Limit: Specify the maximum number of inodes (file objects) that can be created.
Step 4: Save the Hosting Package #
- After configuring the package limits, review your settings to ensure everything is correct.
- Click Create at the bottom of the page to save the hosting package, as shown in the image above.
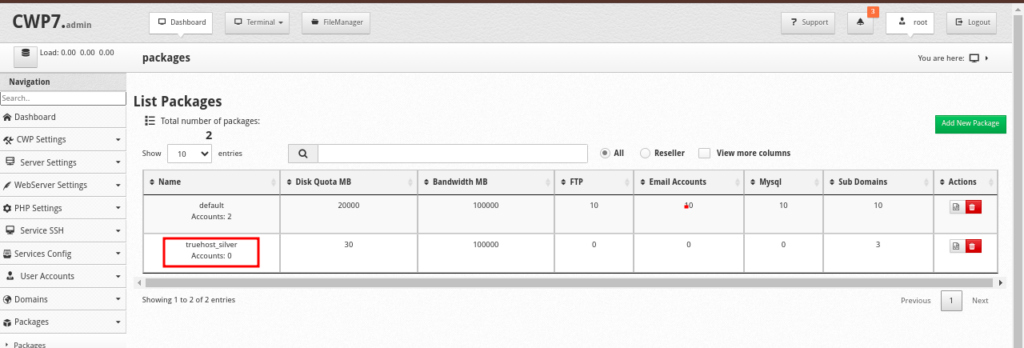
- Your package will now be listed alongside the default package, as shown below
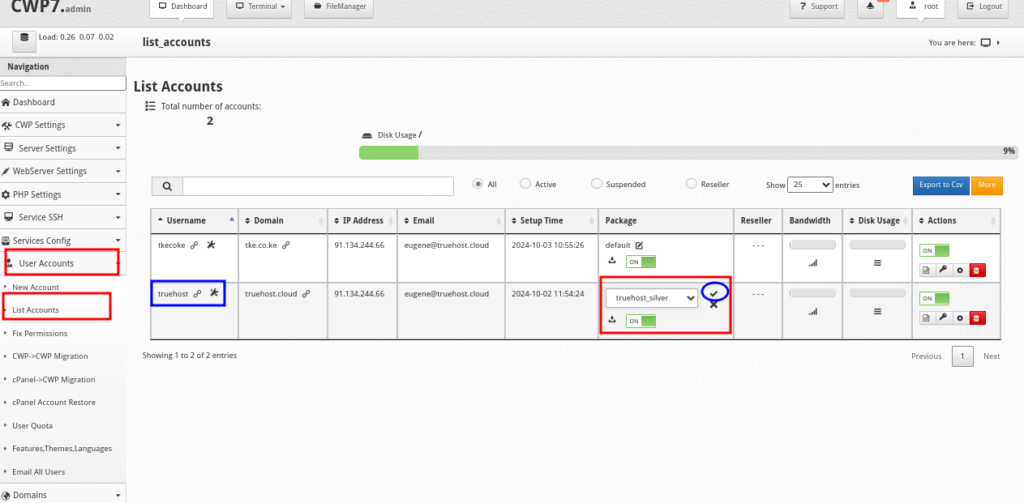
Step 5: Assign a Package to a User #
Once the package is created, you can assign it to new or existing users
- Go to User Accounts in the left-hand menu and choose New Account to create a new user and assign the package them.

- Alternatively, for an existing user, navigate to List Accounts and modify the user to assign the package. To save the update, click the tick, as shown in by the blue circle in the image below.
If your server is with Truehost Cloud, you can reach out to our support team or search our knowledgebase for further help on any issue that is not clear.