Setting the correct time zone on your server ensures that your system logs and time-based tasks (like cron jobs) run accurately based on the local time of your server’s location. Here’s a step-by-step guide on how to change the time zone on an Ubuntu server.
Prerequisites #
- Ubuntu server: Any version (18.04, 20.04, 22.04)
- Root or Sudo privileges: You need administrative access to modify system settings.
Step 1: Check the Current Time Zone #
- Use the command below to check
- The output will show the current system time, time zone, and other related details. Look for the line labeled
Time zone.
timedatectl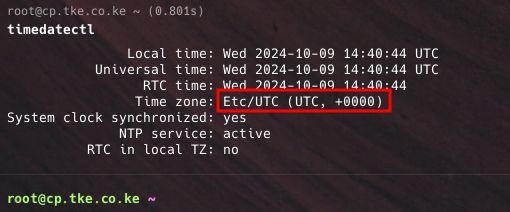
Step 2: List Available Time Zones #
- To set the time zone, you’ll need to know the correct name of the time zone you want to set.
- You can view the list of available time zones by running:
timedatectl list-timezones- This will display a comprehensive list of time zones, such as:
America/New_York
Europe/London
Asia/Tokyo
Africa/Nairobi- Scroll through the list to find your desired time zone.
Step 3: Set the New Time Zone #
- Once you’ve identified the correct time zone, use the
timedatectlcommand to set it. For example, to set the time zone to “Africa/Nairobi”, you would run:
sudo timedatectl set-timezone Africa/Nairobi- You can replace
Africa/Nairobiwith the appropriate time zone from the list.
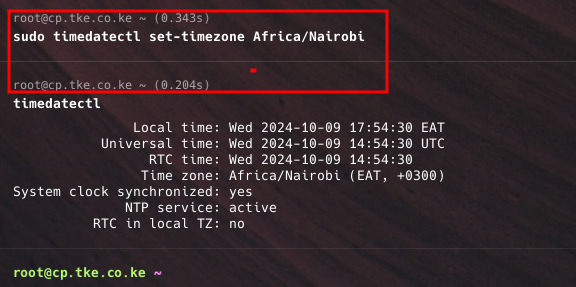
Step 4: Verify the New Time Zone #
- After changing the time zone, verify that the changes were applied successfully by running:
timedatectl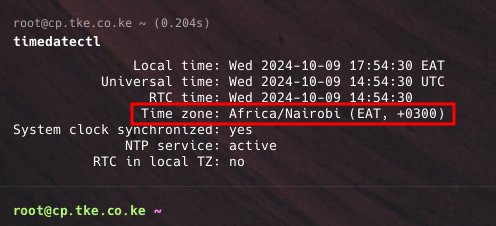
Step 5: Restart Services
- Most services should automatically pick up the new time zone. However, for certain applications (e.g., cron jobs or logging services), you may want to restart them to ensure they use the updated time zone.
sudo systemctl restart cron