MariaDB is a popular open-source relational database management system, widely used as a drop-in replacement for MySQL. This guide will walk you through the steps to install MariaDB on AlmaLinux.
This guide works on Almalinux 8. For Almalinux 9, please see this guide.
Prerequisites #
- AlmaLinux server: A system running AlmaLinux 8.x or higher.
- Root or Sudo privileges: You need administrative access to install and configure MariaDB.
- Internet access: Ensure your server has internet connectivity to download the MariaDB packages.
Step 1: SSH into your server using these steps #
Step 2: Update Your System #
- Before installing any new software, it’s always a good practice to update your package repository.
sudo dnf update -yStep 3 : Create a MariaDB Repository File #
- You need to manually create a MariaDB repository configuration file with the name
mariadb.repo, and you will crate it inside this directory /etc/yum.repos.d/ - Use the command below
vi /etc/yum.repos.d/mariadb.repo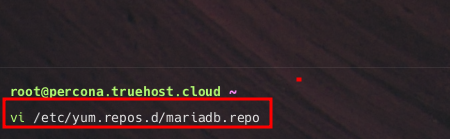
- This command will create a new repository file, Once it is created, you need to add the following configuration in that file, then
Saveandexitfile.
# MariaDB 10.11 RedHatEnterpriseLinux repository list - created 2024-10-11 12:35 EAT
# https://mariadb.org/download/
[mariadb]
name = MariaDB
# rpm.mariadb.org is a dynamic mirror if your preferred mirror goes offline. See https://mariadb.org/mirrorbits/ for details.
# baseurl = https://rpm.mariadb.org/10.11/rhel/$releasever/$basearch
baseurl = https://mirror.23m.com/mariadb/yum/10.11/rhel/$releasever/$basearch
module_hotfixes = 1
# gpgkey = https://rpm.mariadb.org/RPM-GPG-KEY-MariaDB
gpgkey = https://mirror.23m.com/mariadb/yum/RPM-GPG-KEY-MariaDB
gpgcheck = 1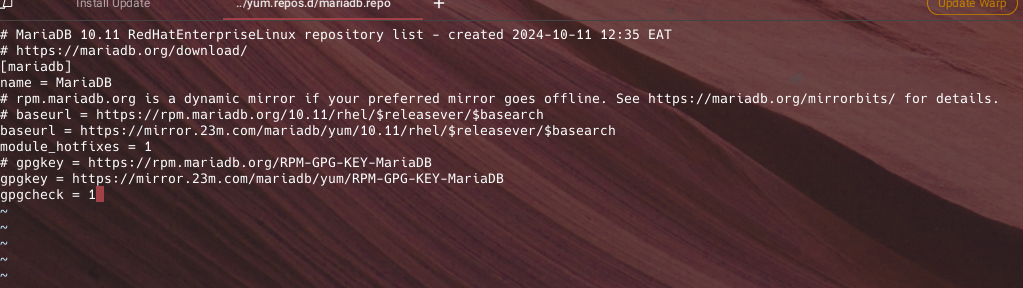
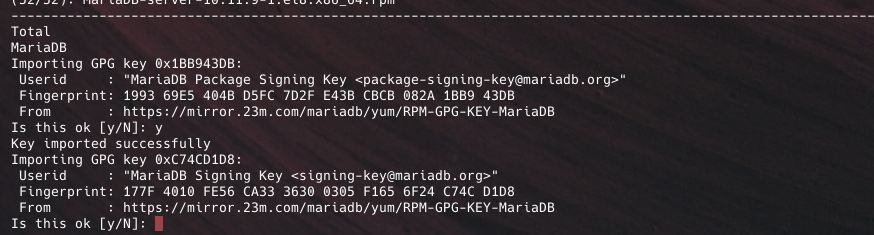
Step 3: Installing MariaDB Server #
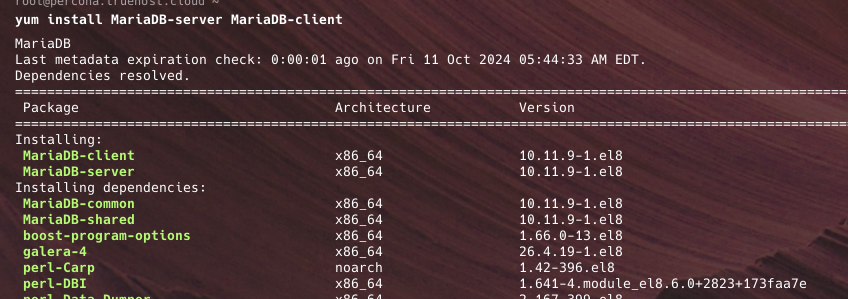
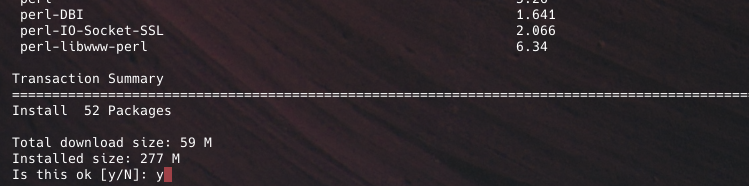
- Runt the command below to install MariaDB
yum install MariaDB-server MariaDB-client- You will be presented with a series of prompts. Respond with y to all.
- Once the installation process it complete, you can now check MariaDB version using this command below;
mysql -V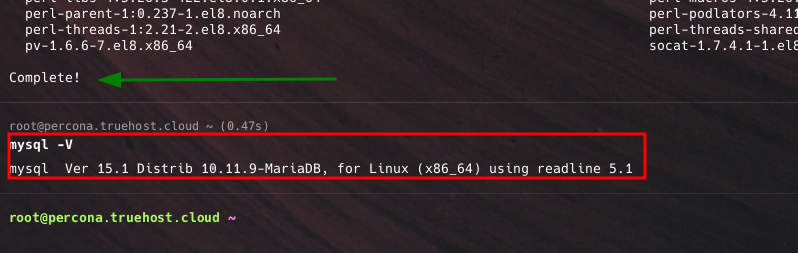
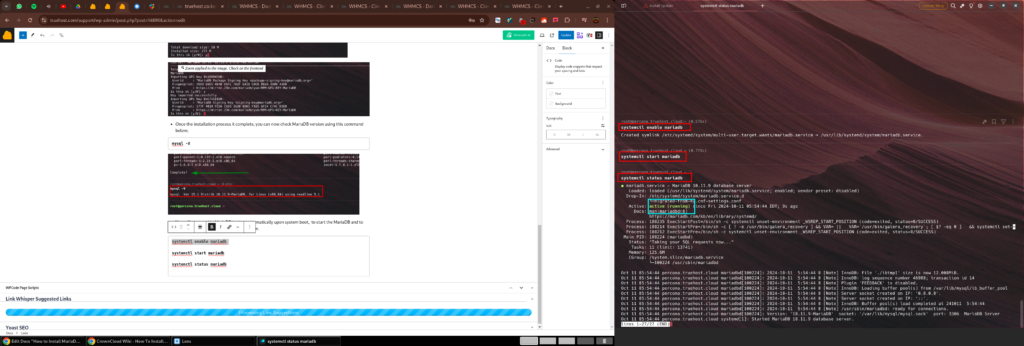
- You will now enable MariaDB to start automatically upon system boot, to start the MariaDB and to verify its status using the commands below.
systemctl enable mariadb

systemctl start mariadb

systemctl status mariadb
Step 4: Secure your MariaDB server
You can secure your MariaDB installation by following these steps
- Start the MariaDB shell using the command below;
mysql- Change the root user’s password using the command below. Replace your_new_password with your actual new password. Keep the password for later use.
ALTER USER 'root'@'localhost' IDENTIFIED BY 'your_new_password';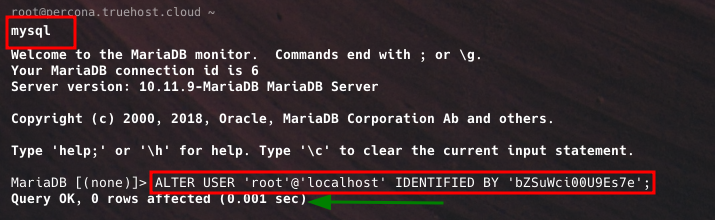
- Disallow remote root login for user root. This ensures that the root user can only log in from the localhost:
DELETE FROM mysql.user WHERE User='root' AND Host NOT IN ('localhost', '127.0.0.1', '::1');
- Remove the test database:
DROP DATABASE IF EXISTS test;
- Reload the privileges to apply the changes:
FLUSH PRIVILEGES;- Exit the MariaDB shell:
exit;
- You may now log in to MariaDB server using this command, then input the the password that you had set previously,
mysql -u root -pStep 5: Create new Database and User
You will need to crate a database and a user that accesses it. Let’s create a database called truehost_db and a user called truehost_tke
- First, log in as root user, using
mysql -u root -p- Run the commands below to create the database, database user and to grant the use access to the database.
- Replace truehost_db, truehost_tke and secretePasswordHere with your actual database name, usernaem and password for the user
CREATE DATABASE truehost_db;

CREATE user truehost_tke;

GRANT ALL ON truehost_db.* TO truehost_tke@localhost IDENTIFIED BY 'secretePasswordHere';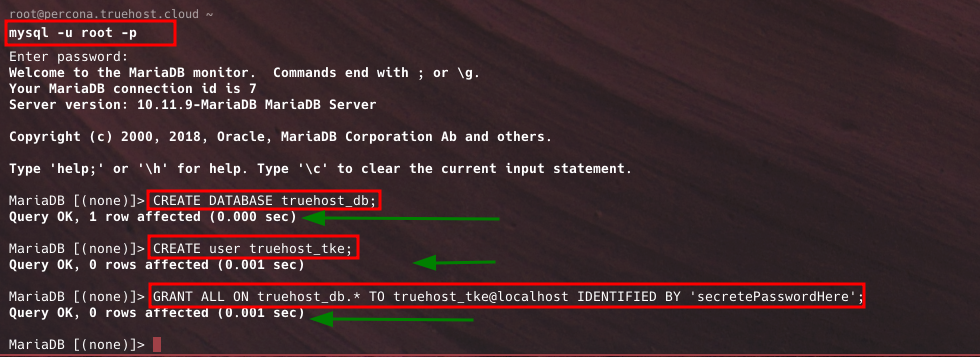
- You can check available databases. You will see your new database among the available.
show databases;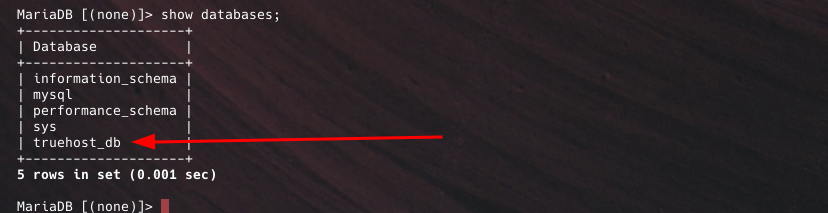
Step 6: Accessing the database
- You can now access MariaDB with the newly created Database and User as shown below,
mysql -u truehost_tke -p'secretePasswordHere' truehost_db
You may now use your database as you intended; maybe to connect it to a website.