Rescue mode is a valuable feature that allows you to recover your VPS from situations where it becomes unbootable or inaccessible. Truehost Cloud provides an easy way to enable rescue mode from the client area, allowing you to troubleshoot and fix issues without needing physical access to the server
Prerequisites: #
- An active Tcloud VPS hosted with Truehost Cloud.
- Access to your Truehost Cloud Client Area.
- A basic understanding of troubleshooting and recovery via SSH or the console.
Steps to Reinstall Your VPS OS: #
Please be guided bellow…
Step 1: Log in to the Truehost Cloud Client Area #
- Login using the login details that you set when sign up. If you have forgotten them, please contact our support team for help.
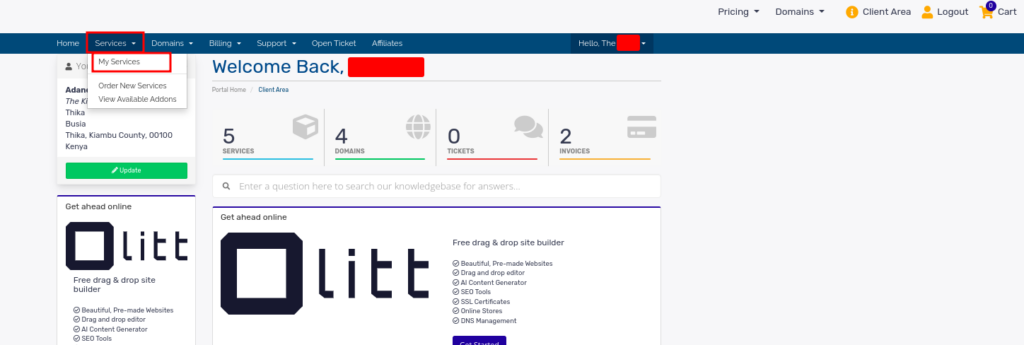
Step 2 : Access the VPS Management Section
- Once logged in, go to Services from the main dashboard.
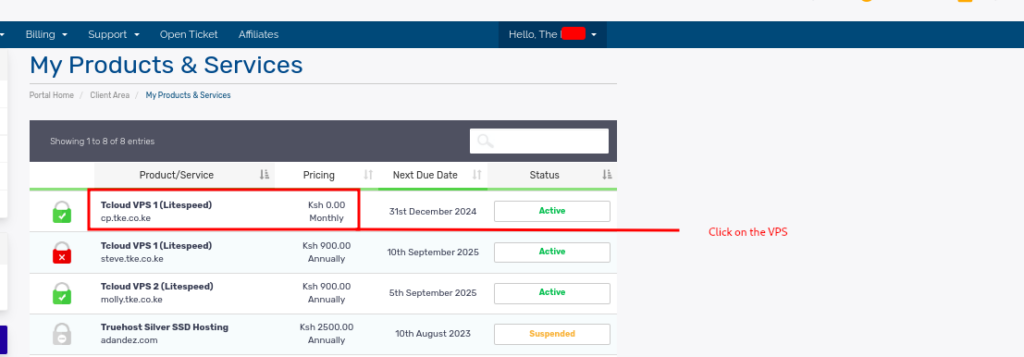
- Click on My Services to view your active services.
- Find your VPS service from the list and click on it to open the management interface.
Step 3: Launch the Virtualizor Mini Panel
- Within the VPS management page, scroll down to find the Virtualizor Mini Panel.
- Sometimes the panel could take up to 2 minutes to display
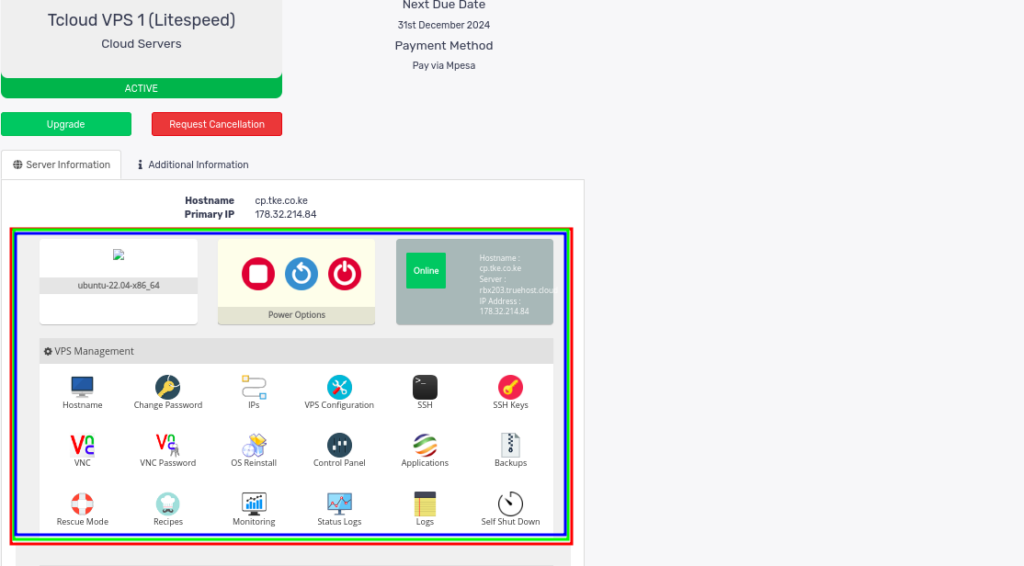
- You can check through various one-click functions given on the panel
Step 4: Navigate to the Rescue Mode Option
- From the various functions on the panel locate the Rescue Mode option.
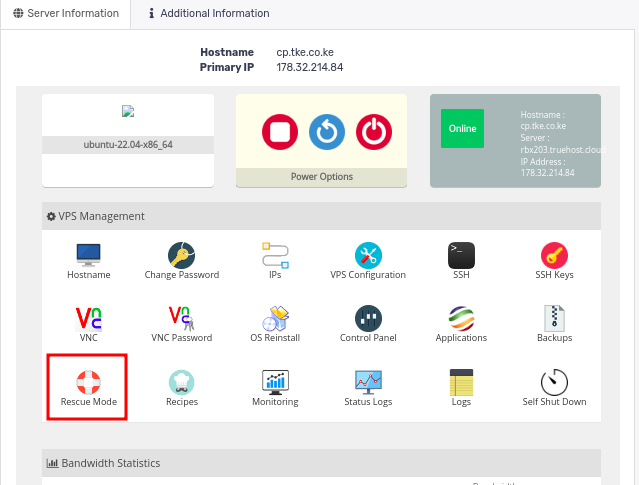
- Click on Rescue Mode to proceed.
- A dialog box with text boxes for inputting rescue root password will appear
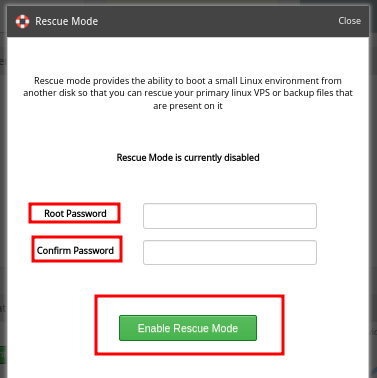
- Input the same password, in the two slots.
Step 5: Confirm the Reinstallation
- Once you have input the passwords, click on Enable Rescue Mode button
- You will see a pop up telling you that the process to set the VPS to rescue mode has been started in the background. Click on OK to close the pop up
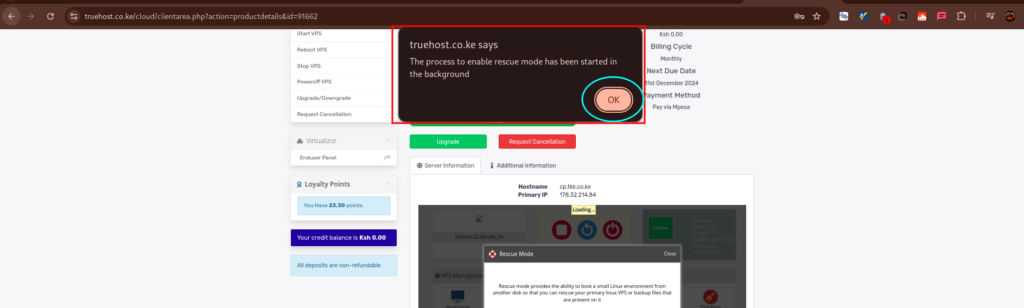
Step 6: Wait for the VPS to Enter Rescue Mode
- Sit back and wait for 5 minutes for the process to happen
- Once rescue mode is enabled, the system will reboot your VPS into the rescue environment.
Access Your VPS in Rescue Mode