Configuring DomainKeys Identified Mail (DKIM) and Sender Policy Framework (SPF) is essential for improving email deliverability and preventing phishing or spoofing attacks.
These protocols validate that emails are sent from trusted sources, thereby helping your emails avoid spam filters and maintain authenticity. Here’s a comprehensive guide on configuring DKIM and SPF for robust email security.
What are DKIM and SPF? #
- DKIM adds a cryptographic signature to emails, which receiving servers can verify. This ensures that the message has not been altered in transit and originates from a domain with an authorized key.
- SPF allows the domain owner to specify which IP addresses are authorized to send emails on behalf of their domain. This prevents unauthorized servers from sending emails as if they’re from your domain.
Step 1: Configure SPF #
Determine Authorized IP Addresses
Identify all IP addresses used to send emails on behalf of your domain. This includes:
- Your mail server IP.
- Third-party services (if applicable) e.g., Mailgun, SendGrid, Amazon SES, google workspace
Create an SPF Record
- An SPF record is a TXT record in your domain’s DNS settings.
v=spf1 +mx +a +ip4:203.0.113.2 include:_spf.google.com -all- In the above record
v=spf1: Indicates that this is an SPF record, version 1.ip4:203.0.113.2: Specifies an authorized sending IP address.include:_spf.google.com: Authorizes Google’s mail servers to send on behalf of your domain (useful if you’re using Google Workspace).-all: Denies any server not specified in the record from sending email on behalf of the domain.
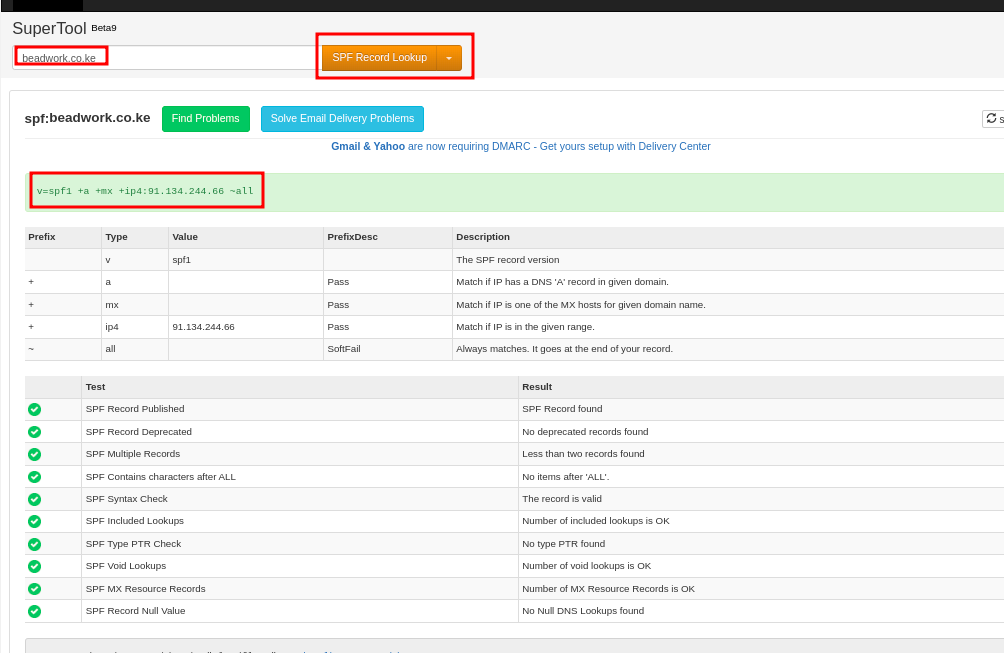
- I’m sending emails from server 91.134.244.66 thus nmy spf will look like below
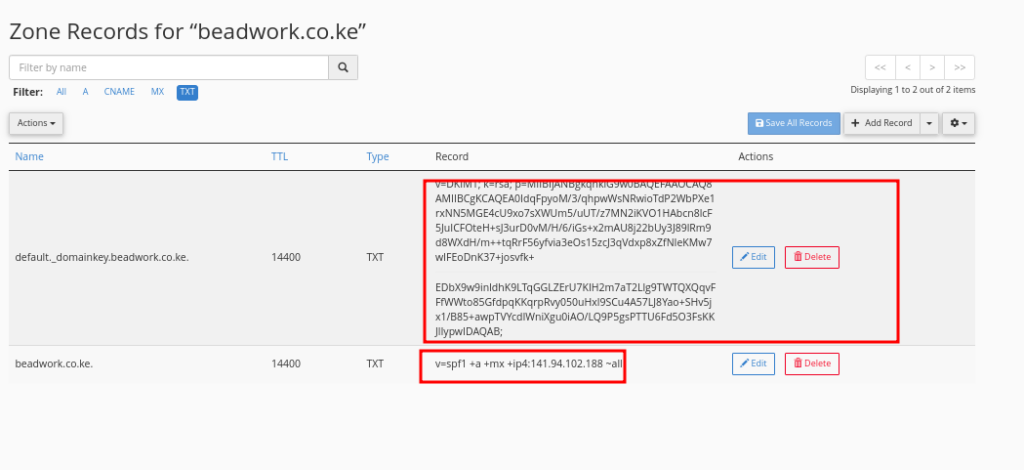
v=spf1 +mx +a +ip4:91.134.244.66 ~allAdd the SPF Record to Your DNS
- Log in to your DNS provider (e.g., Truehost Cpanel, Olitt DNS Manager, Cloudflare, etc).
- Locate the option to add a TXT record.For the name, you can leave it blank or use
@to apply to your root domain.
- Paste your SPF record in the value field.Save the record.

Step 2: Configure DKIM #
DKIM requires generating a public-private key pair, where the private key signs outgoing messages, and the public key is added as a DNS record
Generate DKIM Keys
This would differ depending on your email server software, here are general methods:
A. On Linux (Postfix): Use OpenSSL to generate keys.
mkdir -p /etc/dkim
openssl genrsa -out /etc/dkim/domain.private 2048
openssl rsa -in /etc/dkim/domain.private -pubout -out /etc/dkim/domain.public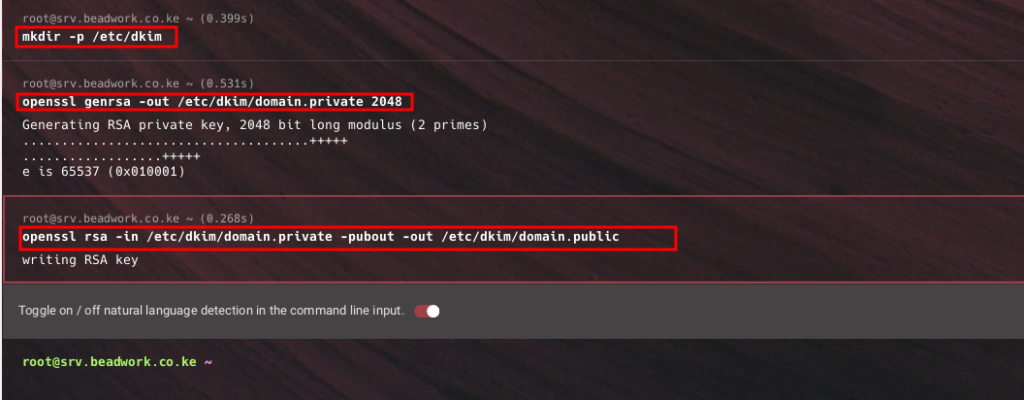
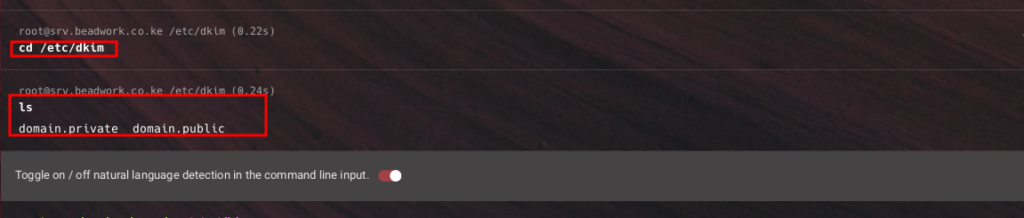
- Your keys are now in this directory /etc/dkim as in the image below.
B. Using cPanel or Plesk:
- Both cPanel and Plesk have built-in DKIM tools that automatically generate and publish the keys in DNS.
Add DKIM Public Key to DNS
- After generating keys, convert the public key into a TXT record.
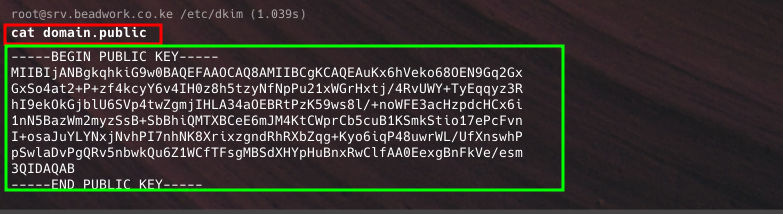
- Open the public key file and copy its contents.
- Create a new TXT record in your DNS (e.g., Truehost Cpanel, Olitt DNS Manager, Cloudflare, etc). with the following format:
- Name:
selector._domainkey, whereselectoris a unique identifier (e.g.,default,s1,dkim1). - Value to be as below. Replace
YourPublicKeywith the actual contents of your public key, omitting any line breaks or extra spaces.
- Name:
v=DKIM1; k=rsa; p=YourPublicKey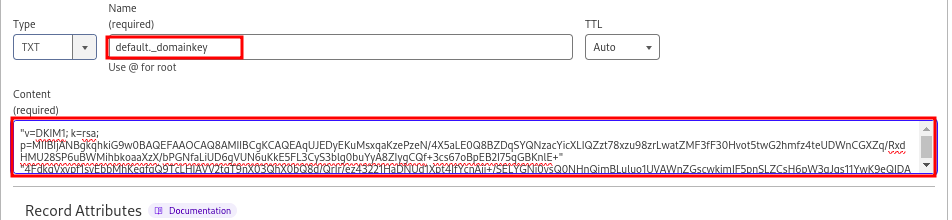
- Some DNS management platforms could need that you split your DKIM into two, it it is too long. See this documentation on why there may be need to split it.
You can use a DKIM Splitter to split the DKIM record before adding it to your DNS
Configure Your Email Server to Sign Emails with DKIM
- If you are using postfix, then install
opendkimand configure it to use the private key. - If you use Almalinux or other RHEL Bases systems use the command below
yum install opendkim opendkim-tools -y- If you use Ubuntu or other RHEL Bases systems use the command below
sudo apt install opendkim opendkim-tools -y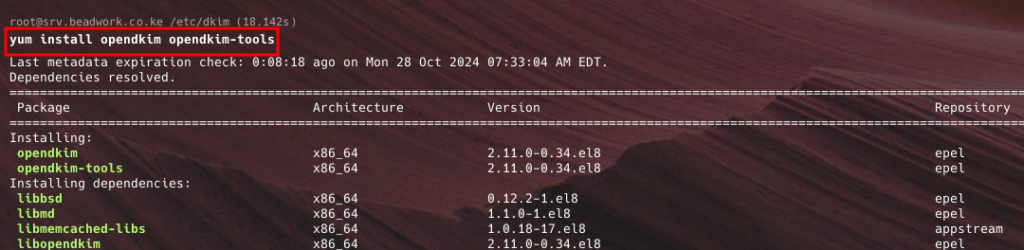
- Edit
/etc/opendkim.confto configure signing and adjust the following lines accordingly. They could be existing alreasy, so just edit them with relevant information as below.
Domain                 example.com
KeyFile                /etc/dkim/domain.private
Selector               default
Socket                 inet:12301@localhost
- Restart Postfix and OpenDKIM to apply changes:
sudo systemctl restart opendkim postfixStep 3: Verify SPF and DKIM Records #
- After setting up SPF and DKIM, you can verify them using tools like MxToolBox.
- SPF Verification: Run an SPF lookup at MxToolBox to confirm the record is correctly configured.
- DKIM Verification: Send a test email to a service like Mail Tester, which will analyze your DKIM signature.
By setting up SPF and DKIM, you’ll improve your domain’s reputation, reduce spam incidents, and protect your brand against phishing attacks. This configuration helps your legitimate emails reach recipients’ inboxes while filtering out unauthorized messages.