When you create a new Ubuntu server, performing a few essential configuration steps is crucial for both security and usability. These steps will enhance your server’s protection and give you a stable foundation for deploying and managing applications effectively.
Prerequisites #
- A server with Ubuntu Installed. We will use Ubuntu 22.04 here.
- Root SSH access to the server
Below are the steps that we will go through in this article;
- Logging in as root
- Creating a New User
- Granting Administrative Privileges
- Setting Up a Firewall
- Enabling External Access for Your Regular User
Step 1 — Logging in as Root #
To begin, you need to SSH into your server using as root. Please see these steps on how to
About the Root User: The root account has full administrative privileges, making it a powerful but potentially risky account to use regularly. To avoid accidental damage, it’s better to create a new user account with fewer privileges for daily use. We will create a user called tke
Step 2 — Creating a New User #
Once logged in as root, you can create a new user for regular use. In this case, replace tke with your desired username:
adduser tke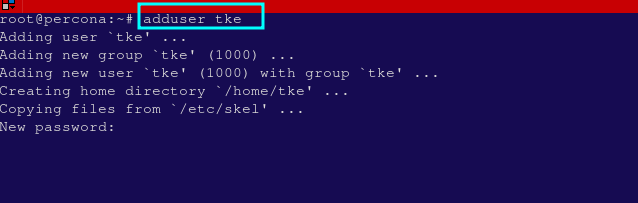
You will be asked to set a password for the new user, and optionally, you can fill in other user information. You can skip any fields by pressing ENTER.
Step 3 — Granting Administrative Privileges #
Next, grant administrative privileges to your new user by adding them to the sudo group, which allows the user to run commands with elevated privileges using the sudo command.
Run the following command to add your new user (replace tke with your username):
usermod -aG sudo tkeNow, your new user can execute administrative tasks by prefixing commands with sudo.
Step 4 — Setting Up a Firewall #
Ubuntu includes a firewall tool called UFW (Uncomplicated Firewall), which you can use to block unwanted traffic and allow access to necessary services.
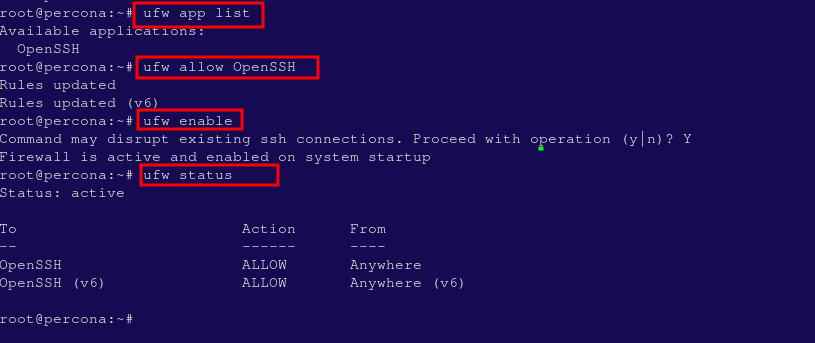
Check which applications are available for firewall configuration by typing:
ufw app listThe output should show that OpenSSH is listed, which is essential for maintaining SSH access.

Allow SSH connections through the firewall by typing:
ufw allow OpenSSHNow enable the firewall:
ufw enableYou can verify the firewall status with:
ufw statusThe firewall will now allow SSH connections while blocking other types of connections by default.
Step 5 — Enabling External Access for Your Regular User #
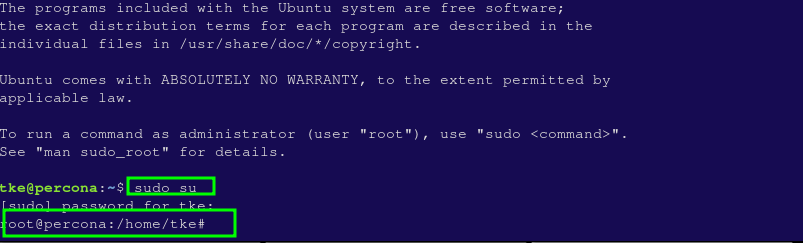
Now that your regular user is set up, you need to ensure that you can log in using that account. Depending on whether your root account uses a password or SSH key, follow one of the steps below:
If the root Account Uses Password Authentication:
You can now log in as your new user by opening another terminal session and using:
tke@your_server_ipAfter entering your password, you will be logged in as your regular user.

If the root Account Uses SSH Key Authentication:
You can optionally set up SSH keys for your server using these steps
If you logged in as root using SSH keys, you need to copy your SSH key to the new user’s account. Use the following command to transfer the SSH configuration to the new user (make sure to replace tke):
rsync --archive --chown=tke:tke ~/.ssh /home/tkeNow, open a new terminal session and log in using SSH:
ssh tke@your_server_ipYou should be logged in without entering a password.
By following these steps, you’ve created a secure and well-configured Ubuntu server that’s ready for further development or deployment tasks.