In Plesk, you can select different PHP handlers depending on what is installed. The installation is done by the admin of the server from the main account. Below are some f the handlers
- Apache module: A stable and simple option but lacks flexibility in handling multiple PHP versions.
- FastCGI application: Offers better performance for high-traffic websites. Truehost Windows shared servers have this enabled
- FPM served by Apache/Nginx: Provides advanced resource management and best performance, ideal for high-traffic websites.
- CGI application: Slower, but may be necessary for specific cases.
Step by Step on How to Enable PHP Handlers in Plesk #
- Log into Plesk:
- Access your Plesk control panel.
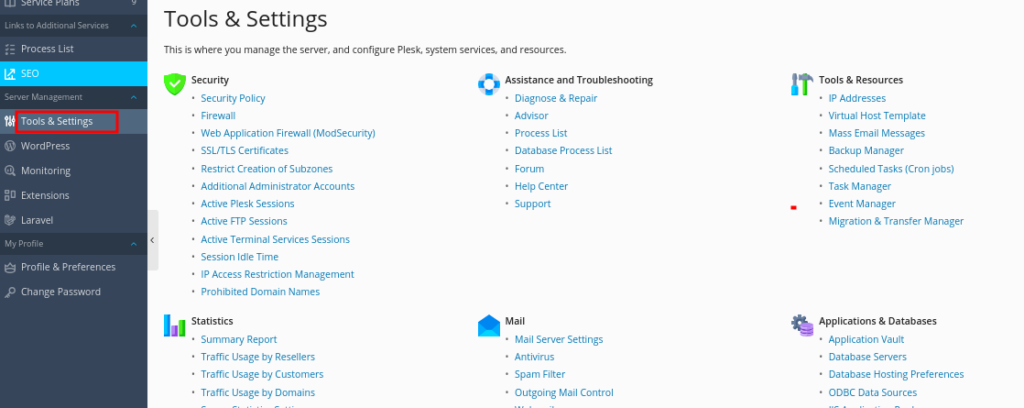
- Navigate to Tools & Settings:
- On the left-hand side menu, click on “Tools & Settings” under the “Server Management” section.
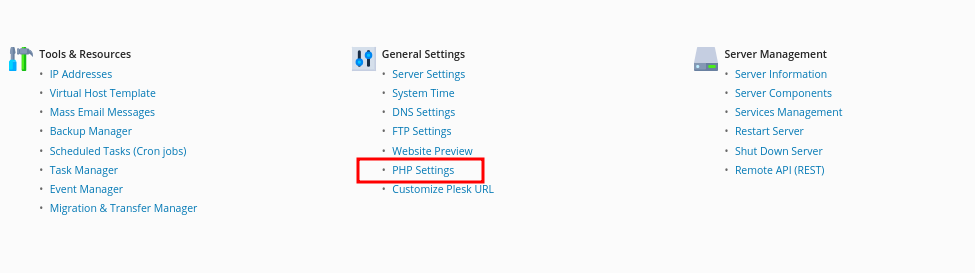
3. Access PHP Settings:
- In the “General Settings” section, click on “PHP Settings”.
- Here, you will see the list of installed PHP versions and handlers that are currently available on your server.
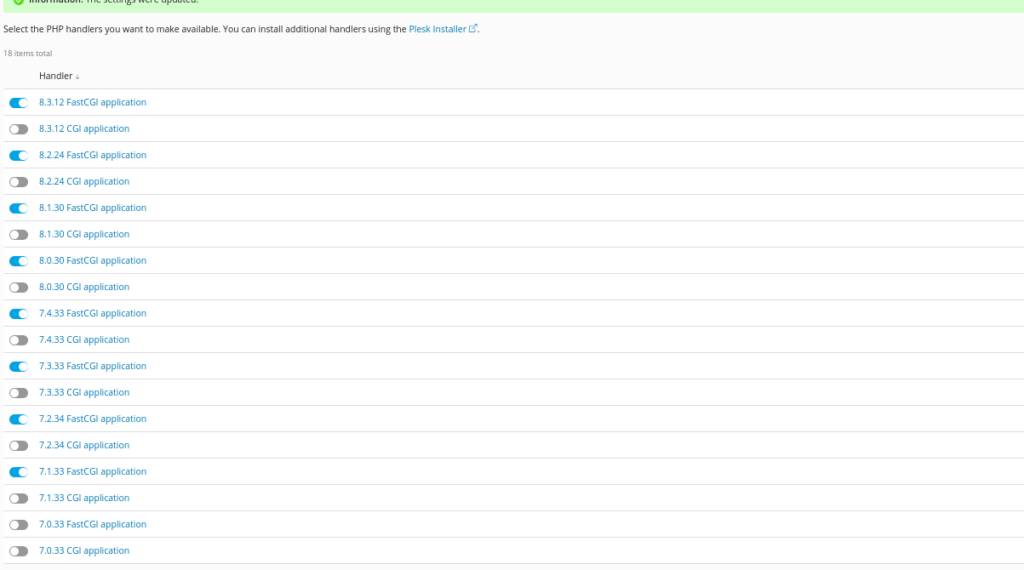
- Using the toggle buttons on them left side of each PHP handler, you can toggle OB or OFF the handlers that you want to avail or disable for your users, respectively.
4. Install PHP Handlers (if not installed):
- To install additional PHP versions or handlers, you need to add them via the Plesk Installer:
- The page in the above step has a shortcut to the Plesk installer as in the image below

- If you do not have the shortcut, then Go to “Tools & Settings” > “Updates and Upgrades”.
- In the Plesk Installer, click “Add/Remove Components”.

- Expand the “Plesk hosting feature” section and find the available PHP versions.
- Select the versions you want to install, ensuring the FPM, FastCGI, or CGI handlers are included.
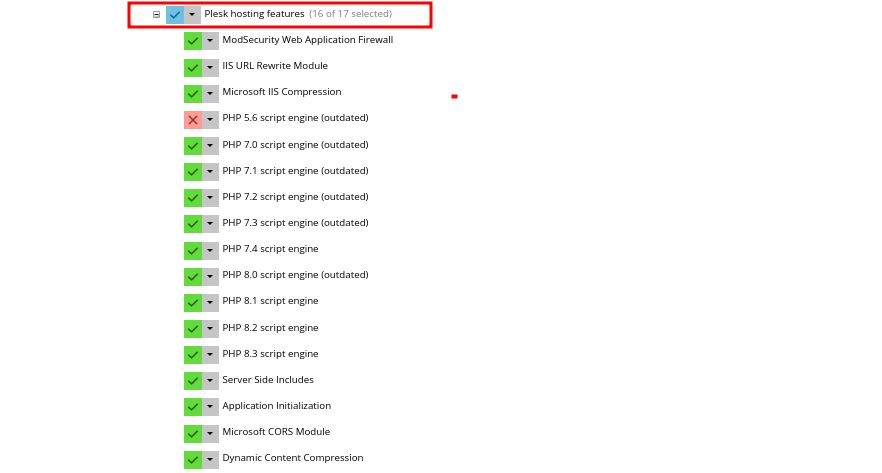
- Click “Continue” to install the selected components.

5. Enable PHP Handlers for a Domain:
- To enable a PHP handler/version for a specific domain, please proceed as guided in this article.