Proxmox Virtual Environment (PVE) offers powerful support for containers, a lightweight and efficient virtualization technology. Containers in Proxmox, implemented using Linux Containers (LXC), allow you to run multiple isolated environments on a single physical host. Unlike traditional virtual machines, containers share the host’s kernel, making them faster to deploy and requiring fewer resources.
With Proxmox, you can easily create, manage, and monitor containers using its intuitive web interface or command-line tools. Containers are ideal for running applications or services in isolated environments, with benefits such as quick startup times, low overhead, and simplified management. This makes them a perfect choice for hosting services, development, or testing in environments where performance and resource efficiency are critical.
Proxmox also supports advanced features like snapshots, backups, and resource limits for containers, ensuring flexibility and control in your infrastructure.
Steps on how to Create Containers in Proxmox #
Below steps will guide you on how to create a container;
Step 1: Download Proxmox Container Image #
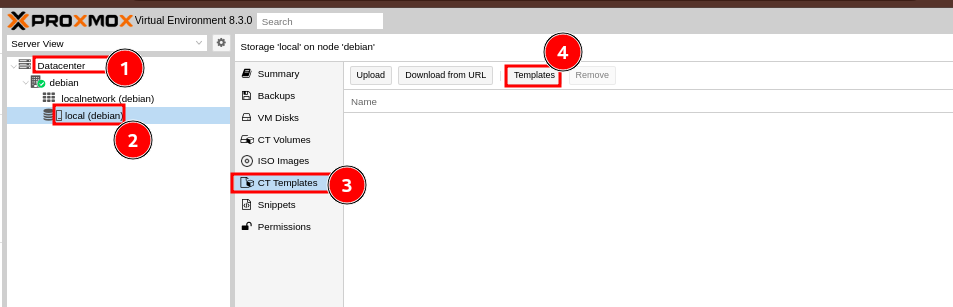
- Log in to Proxmox dashboard then navigate to proxmox >> local (proxmox). If you installed proxmox on Debian, you will see the options as debian >> local (debian)
- On the left side pane, click on CT Templates then click on Templates
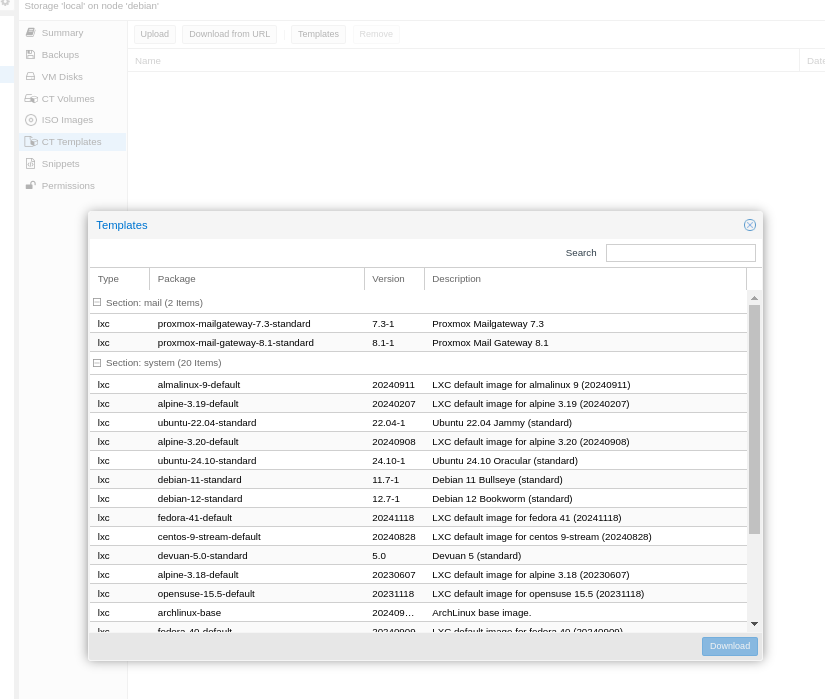
- You will see a pop up with a list of Container Templates, which basically are container images in form of tar archives with everything that is needed by a container to run.
- You can also see the list of available templates from the proxmox shell, using this command below
pveam available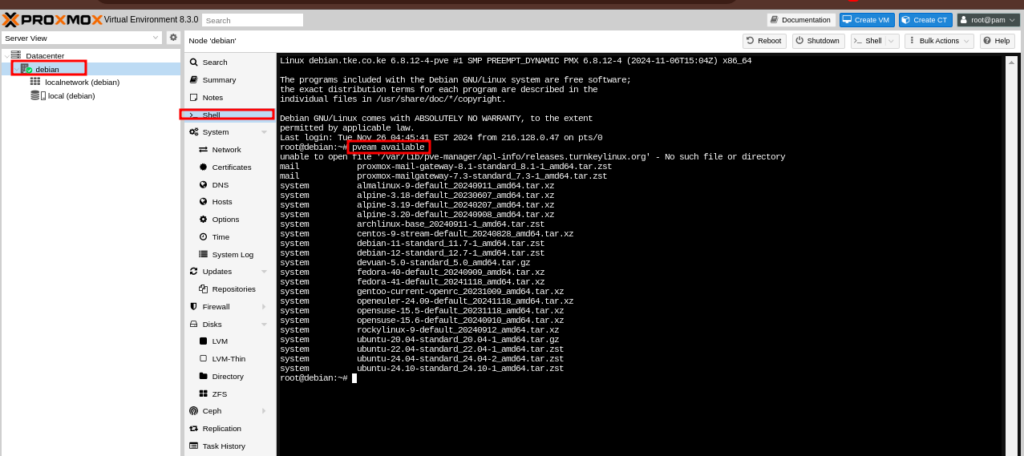
- Once you have identities the container that you want to deploy, you can deployb it by clicking on it and then on Download button.
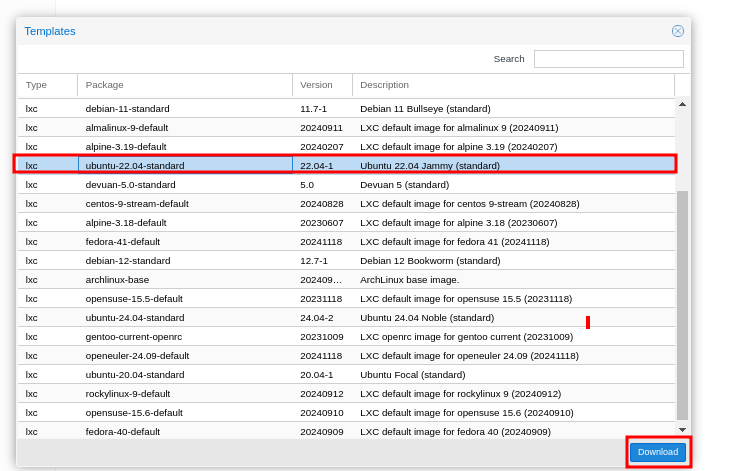
- Let’s deploy the ubuntu-22.04-standard_22.04-1_amd64.tar.zst
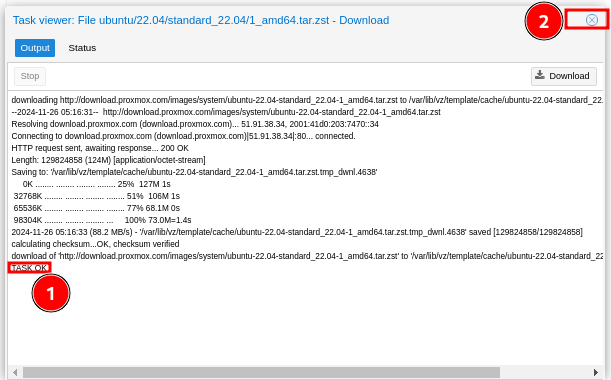
- During the download process, you will see a pop-up viewer that shows progress of the process. Upon completion, you will see a message saying TASK OK.
- The container is downloaded in the system, in this directory /var/lib/vz/template/cache
- At this point, close the pop-up viewer.
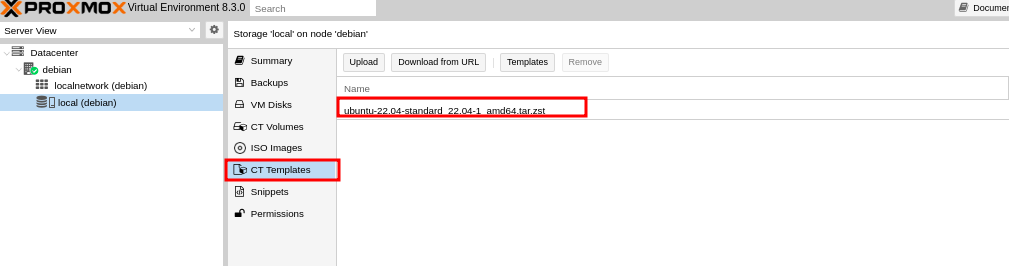
- You will now see the container, in the CT Templates section
- You can also use the proxmox shell to confirm the downloaded container image using the command below;
pveam list local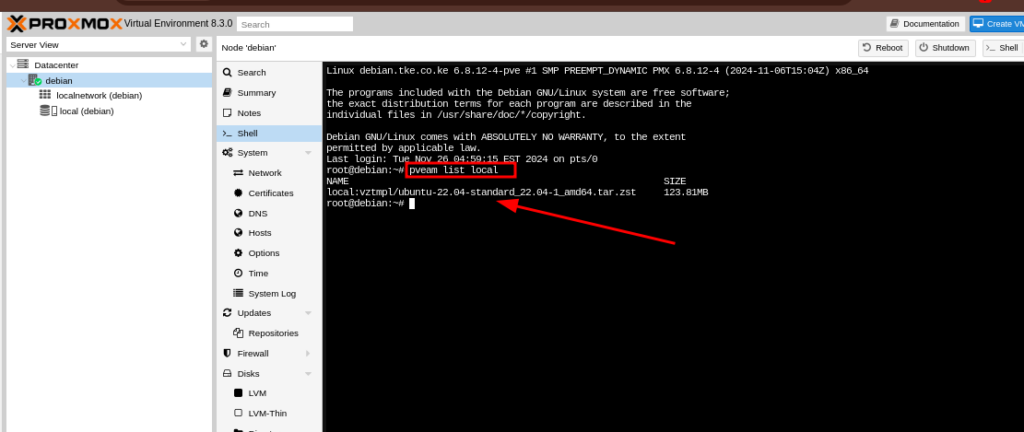
- Also using the proxmox shell, you can download another image using this command below. Replace fedora-40-default_20240909_amd64.tar.xz with the image that you want to download.
pveam download local fedora-40-default_20240909_amd64.tar.xz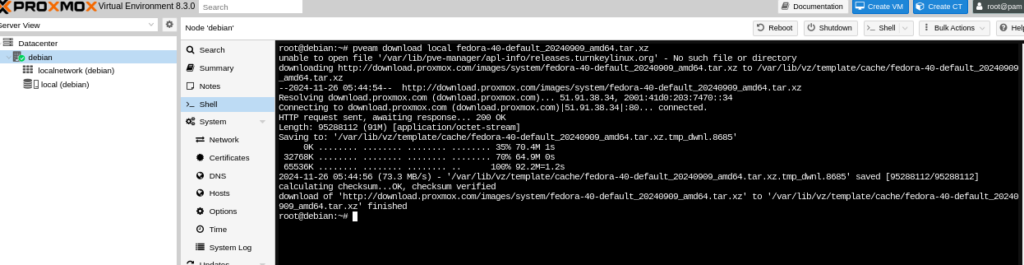
Step 2: Create Proxmox Container Instance #
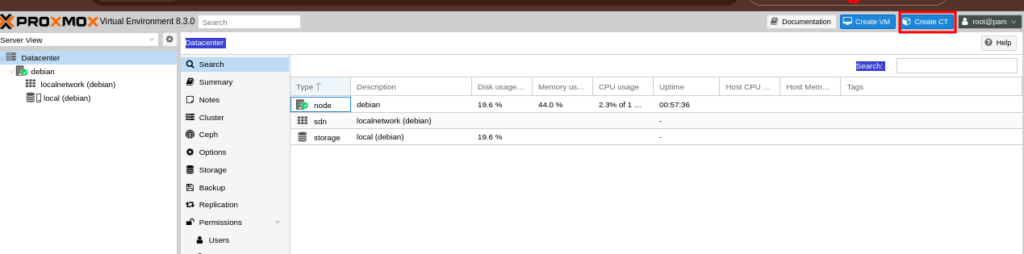
- Since you now have the container image downloaded, you can create a container by clicking the Create CT button that is at the top right corner.
- You will see an installation wizard, that needs you to fill in details relating to the container
- You will need to keep the password that you input, for later use.
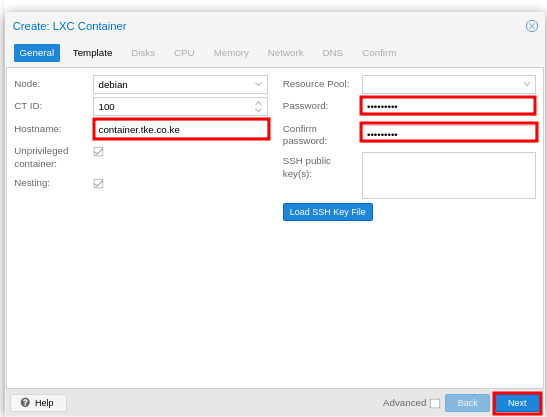
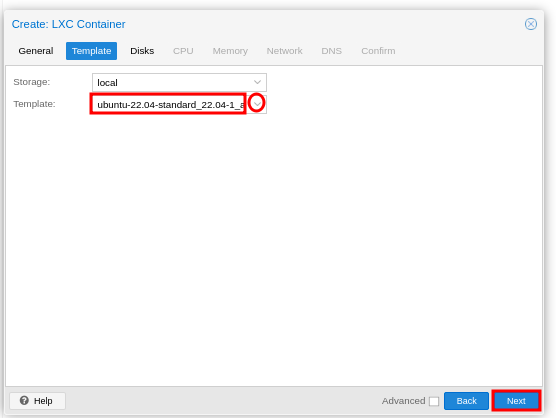
- In the template section, select the template that you want to install on the container, from the dropdown.
- Click on Next.
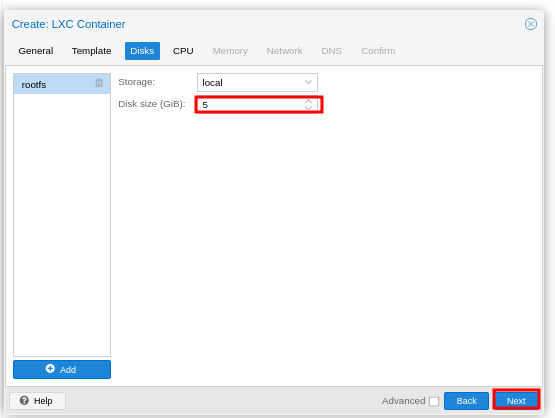
- You will now go the Disks section where you will specify the size of the container. The default size will be 8GB, but you can adjust it to a size of your preference, based on the storage that you have.
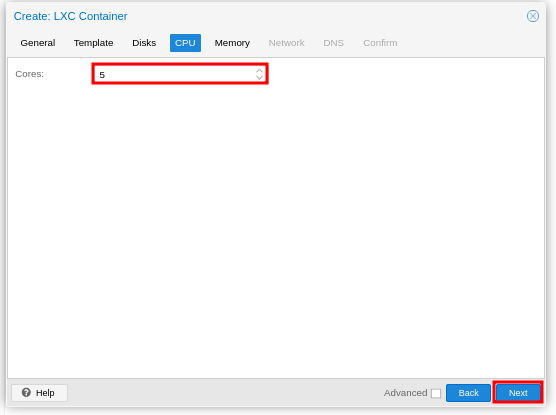
- In CPU section, specify the CPUs that you want the container to have
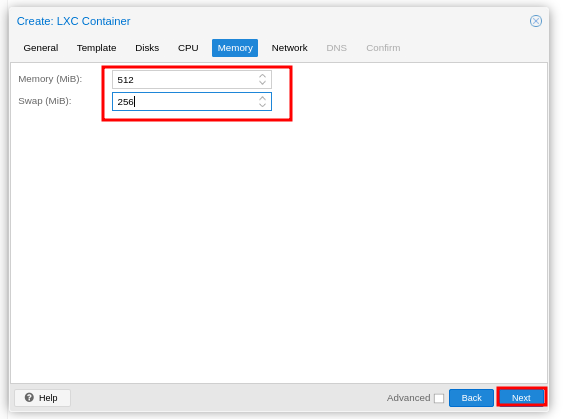
- The Memory section needs you specify the RAM of the container and also the SWAP. You can have the SWAP to be half the size of RAM.
- In the ‘Network‘ section specify the preferred network settings. We will go with DHCP settings for both IPv4 and IPv6 protocols.
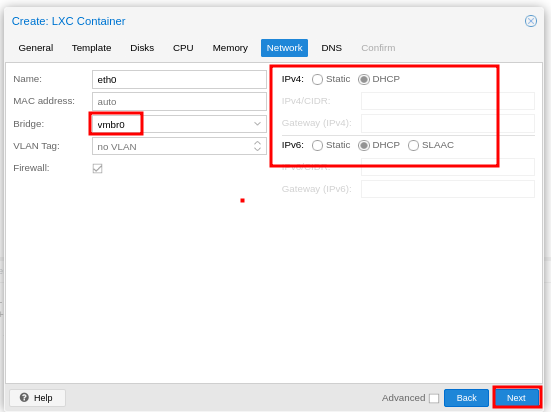
- You will also need to specify a Bridge, and if you do not have one, you can create it by navigating to proxmox‘ –> ‘Network‘ –> ‘Create‘ –> ‘Linux Bridge
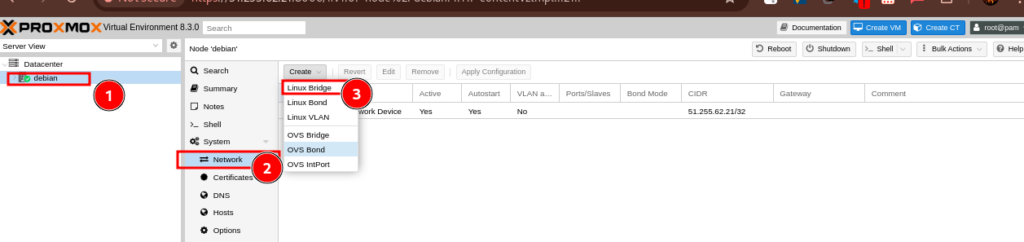
- Ensure to specify the IPv4 and CIDR that corresponds to your LAN and click ‘Create‘.

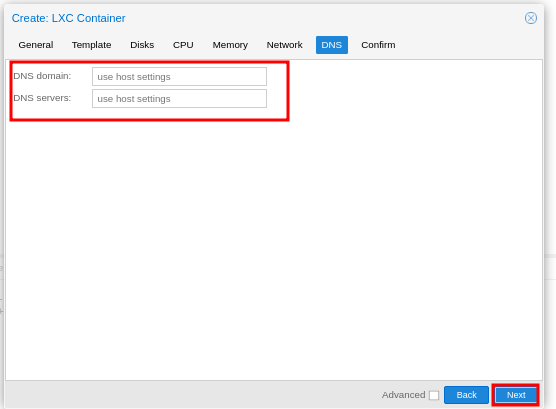
- For ‘DNS‘ settings, leave it blank to use the default DNS settings on your LAN network.
- Click ‘Next‘.
- Confirm if all your container settings look good, click ‘Finish.
- If you need to adjust, click on ‘Back‘ and make the necessary changes. You can check the ‘Start after created‘ checkbox to launch the container once created.
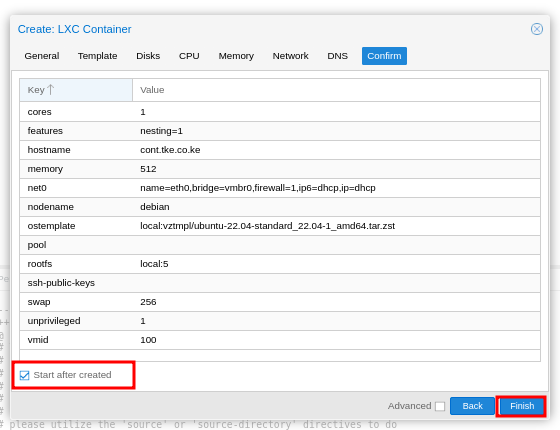
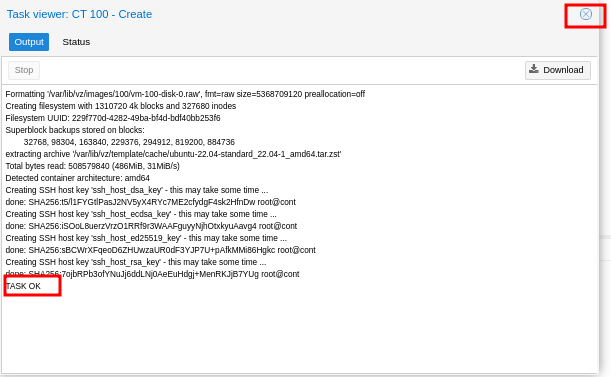
- Clicking the Finish button will show a pop-ip viewer showing progress of the creation process.
- Once done, you will see a notification saying TASK OK. Close the window once done.
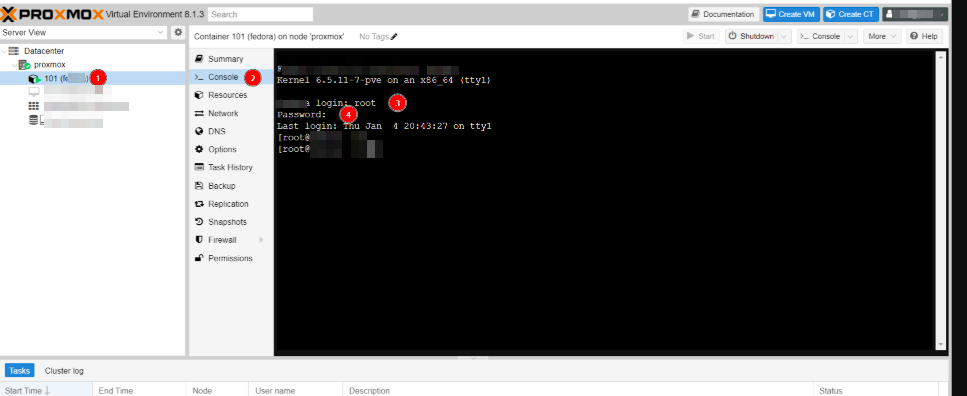
Step 3: Log in to the Proxmox Container Image #
- You can log in to the container that you just created by navigating to Proxmox >> Container_name >> Console
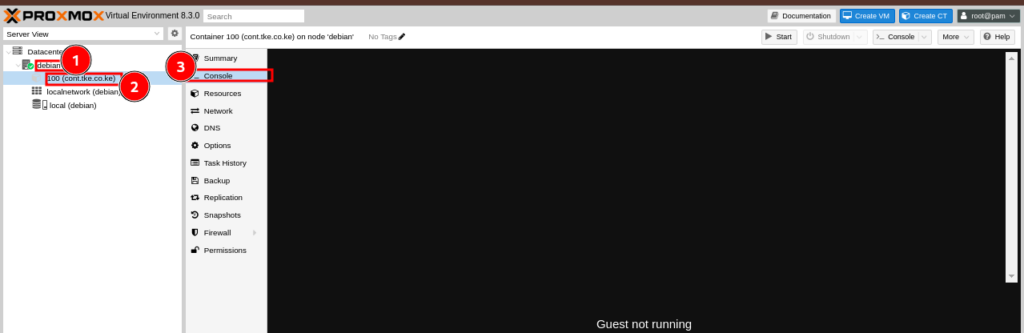
- Log in with user root, and the password that you specified earlier when creating the container
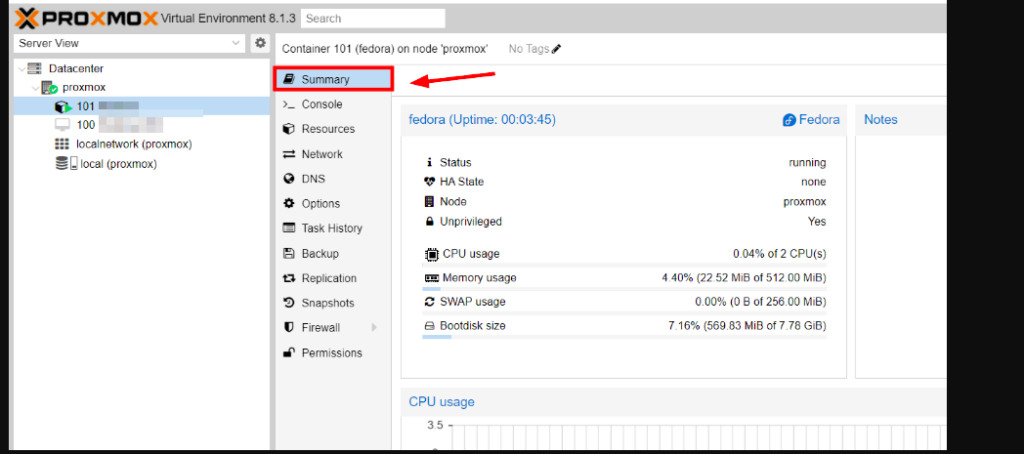
- You can also see an overview of the container by clicking on Summary.
Cheers, that will be all!
We have more articles on proxmox on our knowledge-base, you may check them out.