1. Log in to WHM #
- Log in to WHM either with the root or sudo reseller account. Normally you will use one of the URLs below;
http://your_server_ip:2087

https://your_server_hostname:2087
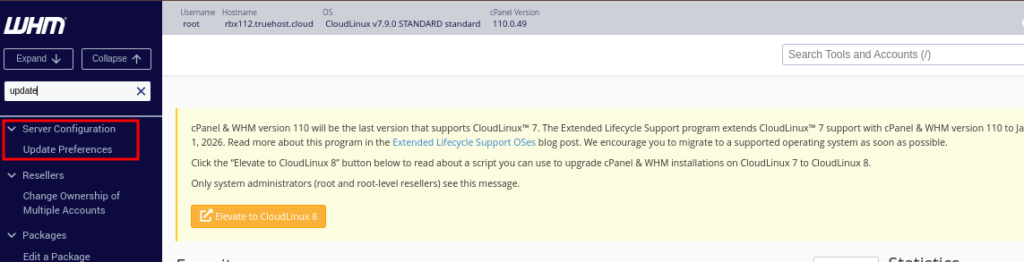
2. Access Update Preferences #
- In the WHM dashboard, search for “Update Preferences” in the search bar or navigate to: Home > Server Configuration > Update Preferences.
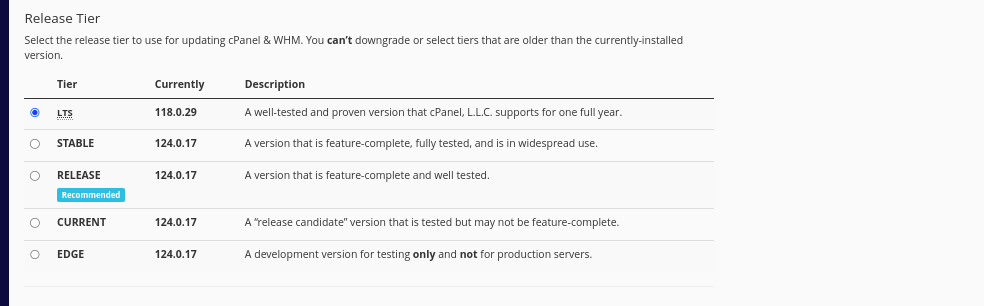
3. Configure Update Settings #
In the Update Preferences interface, you can configure the following:
- cPanel & WHM Updates:
- Choose the release tier that suits your environment:
- Release: Stable and tested updates.
- Current: Includes the latest features, but slightly less tested.
- Edge: Early releases for testing, not recommended for production.
- Select Automatic Updates to ensure updates are installed without manual intervention.
- Choose the release tier that suits your environment:
- Once you’ve configured your preferences, click Save to apply the changes.
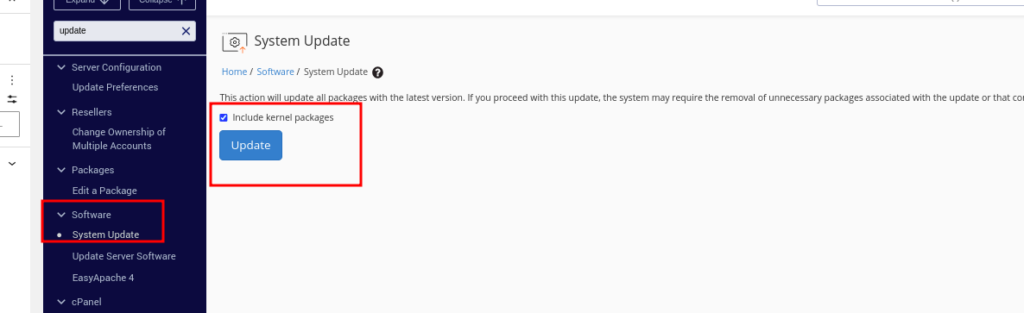
- System Update
- Navigate to Software >>System Updates and check the Include kernel packages checkbox
- Click on Update to start the process immediately, otherwise the packages will be updated at pre-set time
- This will update all packages with latest ones.
4. Update Server Software #
- Software packages are usually configured to update automatically.
- You can however run a manual update by navigating to Software >> Update Server Software
- Then click on Proceed
5. Verify Update Logs #
- After configuring automatic updates, periodically review update logs to ensure updates are running smoothly:
- Navigate to Home > Server Status > Update Log to view the update history.