Next.js is a powerful React framework that enables developers to build server-side rendered (SSR) and statically generated web applications. It offers features like automatic code splitting, optimized performance, and seamless API integration, making it a popular choice for modern web development.
However, deploying a Next.js app on a shared hosting platform like cPanel can be tricky, as it requires additional configuration compared to traditional static sites. This guide will walk you through the steps to deploy a Next.js app on cPanel.
NOTE: cPanel does NOT natively support Next.js. Thus additional steps are required to make it work.
Next.js is built on top of Node.js, so it requires a Node.js environment to run. Ensure that your cPanel hosting supports Node.js applications before proceeding. Ensure that also the Node.js versions you need are available before proceeding.
Next.js and Node.js Supported Versions #
Before deploying your Next.js app, ensure that your Node.js version is compatible with the version of Next.js you are using. Refer to the Next.js documentation for the latest compatibility information. As of October 2023:
- Next.js 13+ requires Node.js 16.8 or later.
- Next.js 12.x supports Node.js 12.22 or later.
Preparing a Next.js App for Deployment #
To deploy a Next.js app on cPanel, you need to:
Step 1: Create a Custom Next.js Server (server.js) #
Next.js apps typically use the built-in server for development. However, for deployment on cPanel, you need to create a custom server. Follow these steps:
- Create a
server.jsfile in the root directory of your project. - Add the following code to the file:
const { createServer } = require('http');
const { parse } = require('url');
const next = require('next');

const dev = process.env.NODE_ENV !== 'production';
const hostname = 'localhost';
const port = process.env.PORT || 3000;

const app = next({ dev, hostname, port });
const handle = app.getRequestHandler();

app.prepare().then(() => {
  createServer(async (req, res) => {
    try {
      const parsedUrl = parse(req.url, true);
      const { pathname, query } = parsedUrl;

      if (pathname === '/a') {
        await app.render(req, res, '/a', query);
      } else if (pathname === '/b') {
        await app.render(req, res, '/b', query);
      } else {
        await handle(req, res, parsedUrl);
      }
    } catch (err) {
      console.error('Error occurred handling', req.url, err);
      res.statusCode = 500;
      res.end('Internal server error');
    }
  })
    .once('error', (err) => {
      console.error(err);
      process.exit(1);
    })
    .listen(port, () => {
      console.log(`> Ready on http://${hostname}:${port}`);
    });
});
See attached below.
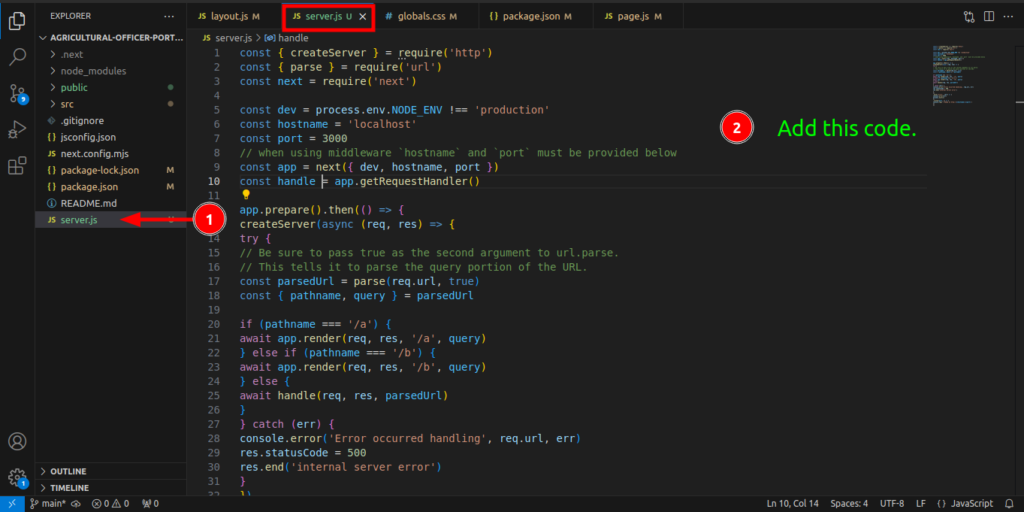
This code sets up a custom server to handle requests and serve your Next.js app.
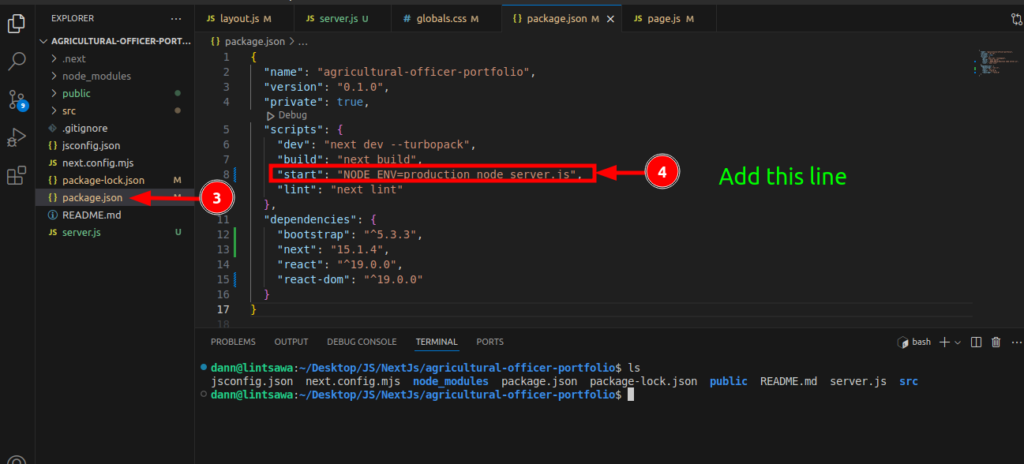
Step 2: Modify the package.json File #
Update the package.json file to use the custom server for production. Add to the start script with the following:
"start": "NODE_ENV=production node server.js",
This ensures that the custom server (server.js) is used when the app is deployed.
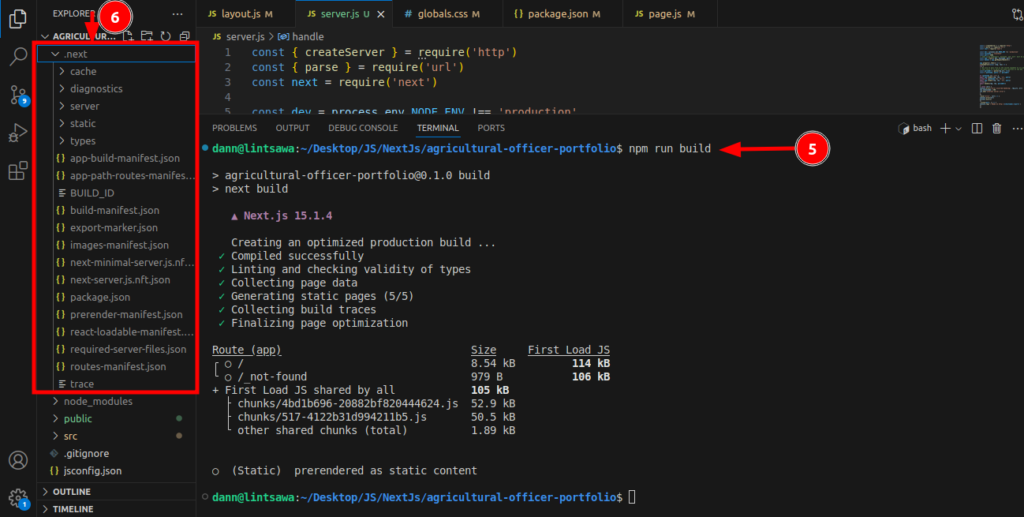
Step 3: Build the Next.js Application #
Before deploying, you need to build your Next.js app. Run the following command in your terminal:
npm run build
This generates an optimized production build of your app. Ensure there are no errors during the build process.
See Attached Image.
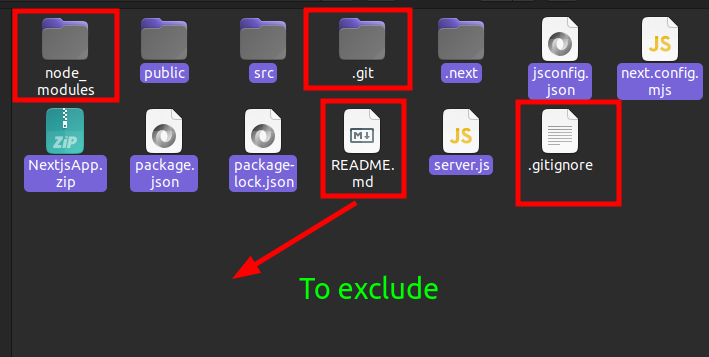
Step 4: Prepare Files for Deployment #
- Open your file manager or file explorer and locate your Next.js project files.
- Enable visibility for hidden files (if necessary).
- Exclude the following files and folders:
node_modules.gitREADME.md.gitignore
- Select all remaining files and folders, then create a ZIP archive.
Excluding node_modules is important because it reduces the size of the deployment package. The necessary dependencies will be installed on the server later.
Deploying the Next.js App on cPanel #
Step 1: Configure the Node.js App in cPanel #
- Log in to your cPanel account.
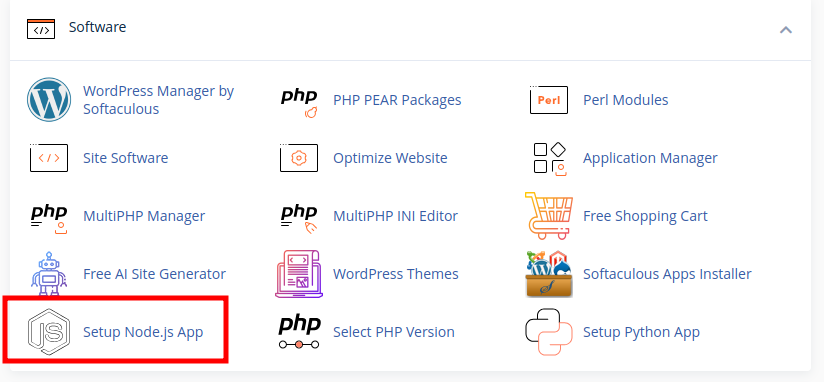
- Under the Software section, locate and click Setup Node.js App.
- Click + CREATE APPLICATION.
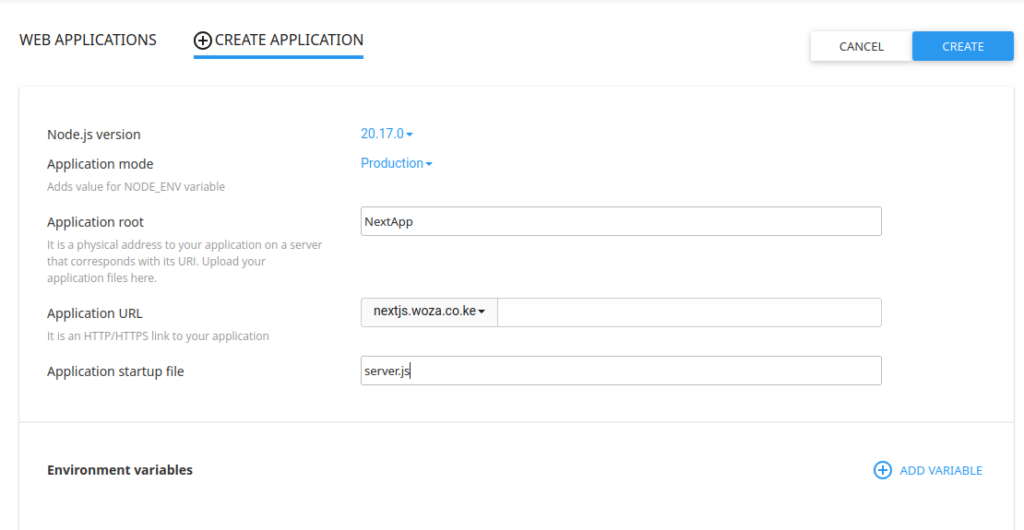
- Configure the application settings:
- Node.js version: Select the version that matches your local development environment.
- Application mode: Select Production.
- Application root: Specify the directory where your app will be uploaded (e.g.,
NextApp). - Application URL: Choose your domain or subdomain.
- Application startup file: Enter
server.js.
- If you have environment variables, add them under the Environment Variables section.
- Click CREATE to create the Node.js application.
Creating the Application.
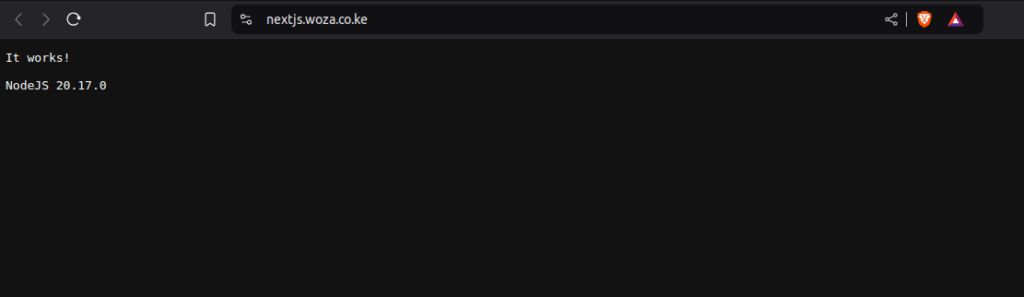
Access your domain. You will notice it will load with a page saying “It Works!”
Step 2: Upload Files to cPanel #
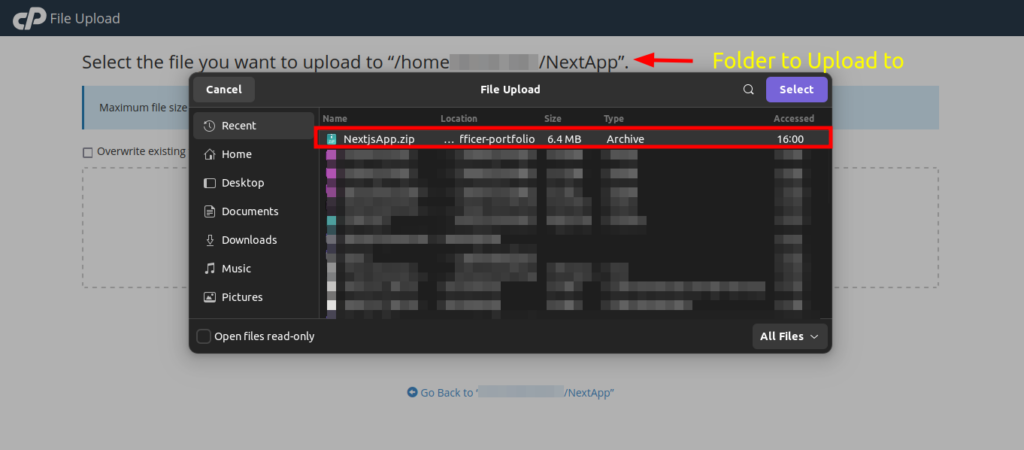
- In cPanel, navigate to File Manager.
- Go to the directory specified in the Application root field (e.g.,
NextApp). - Click Upload and select the ZIP file you created earlier.
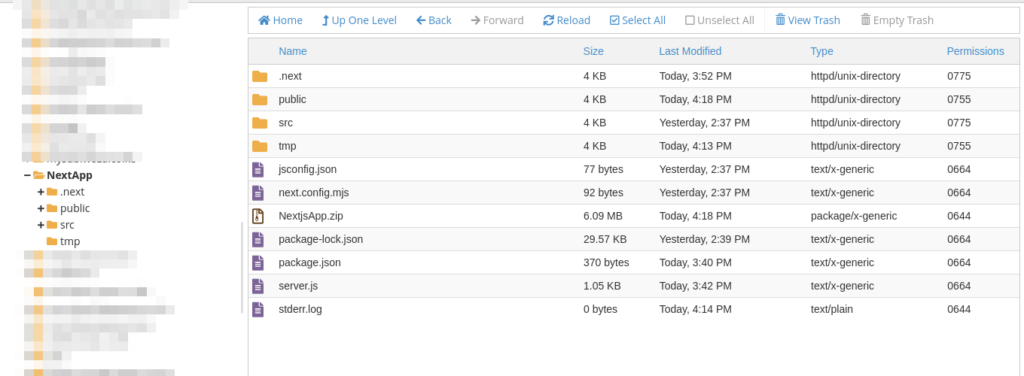
- After the upload is complete, right-click the ZIP file and choose Extract.
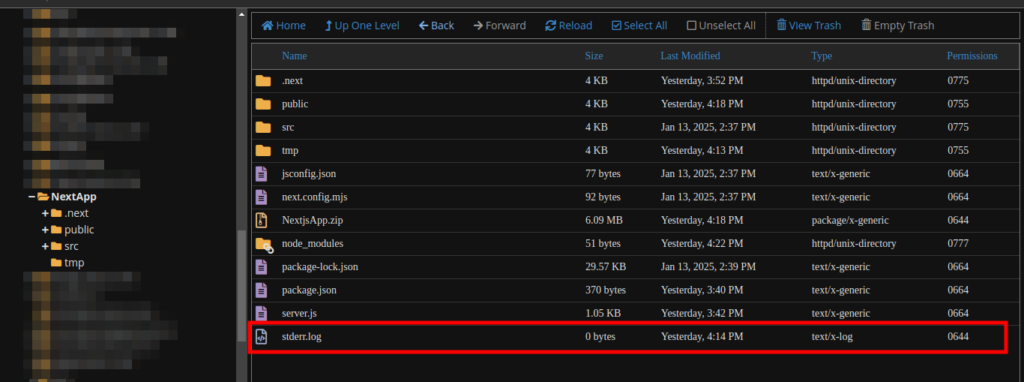
Extracted files.
Step 3: Install Dependencies and Start the App #
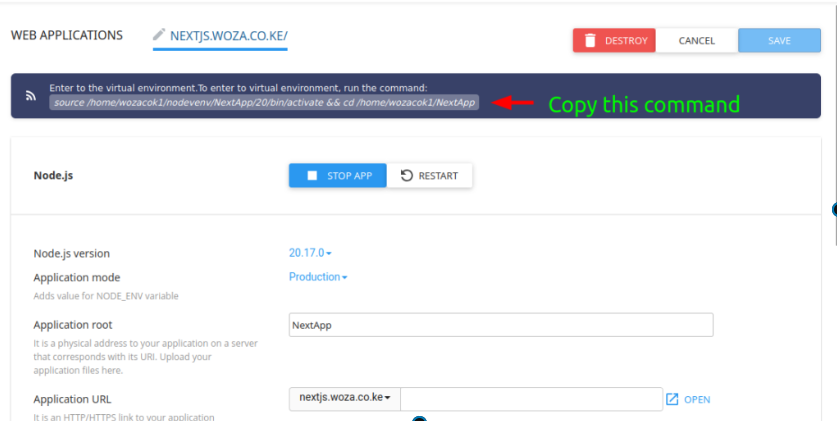
- Go back to the Node.js Setup section in cPanel.
- Copy the command provided to activate the virtual environment.
- Open the
Terminalon cPanel and paste the command to activate the virtual environment and navigate to the application root folder and run.
Run the npm install command.
npm install
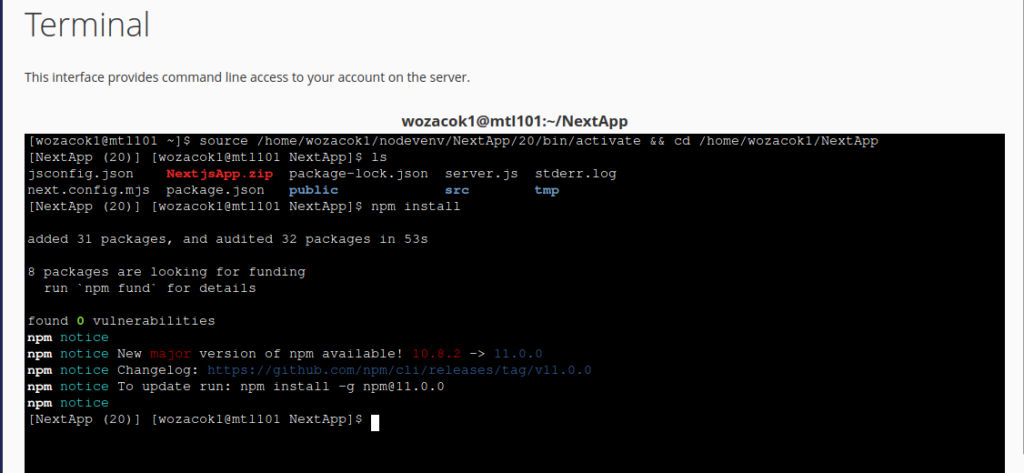
This installs the required dependencies.
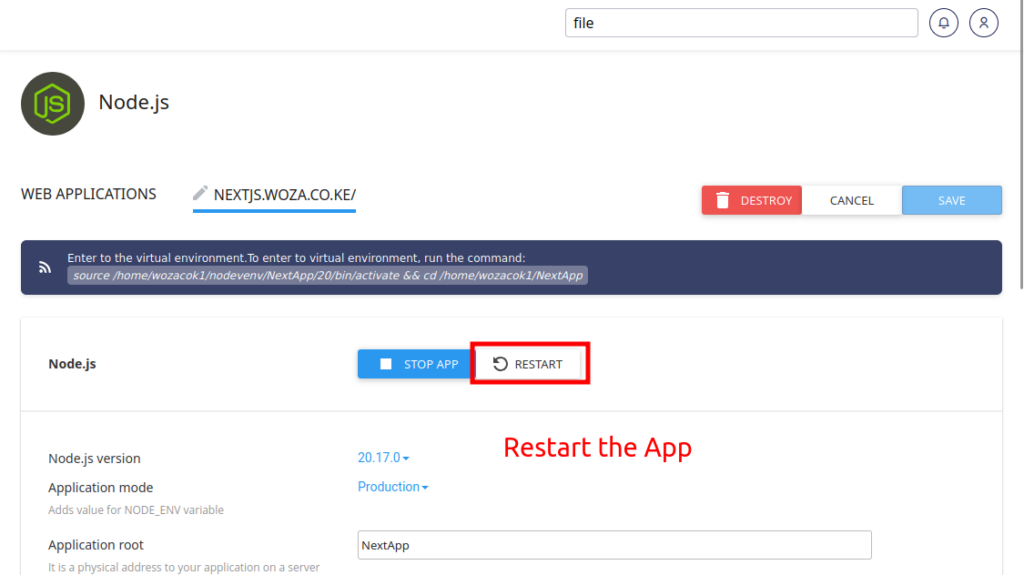
Restart your application from the Node.js Setup section.
Step 4: Access Your Deployed App #
Once the app is running, access it via your domain or subdomain. Your Next.js app should now be live!

Troubleshooting. #
In case of issues, You can check the error logs in the stderr.log file generated by the Node Setup on the cPanel.
Conclusion #
Deploying a Next.js app on cPanel requires a few extra steps compared to traditional static sites, but it’s entirely possible with the right configuration.
By creating a custom server, building your app, and configuring the Node.js environment in cPanel, you can successfully deploy your Next.js app on shared hosting.
If you encounter any issues, refer to the Next.js documentation or consult with other developers for assistance.
Happy Hosting! 🚀
i got an error that node_modules should not be in a separate dir virtual env.
Thank you for your reply.
Please ensure you do not upload node modules from your local computer.Uploading the same will cause an Error during npm install. This will be created for you upon running ‘
npm install‘. Cross check the guide on Part 1:Step 4.In case of issues, you can open a ticket or send an email to support@truehost.cloud.
*should be
Thank you for your reply.
This is because
npm installcommand creates a new node_modules folder. However, when it tries this, it finds the folder you had already uploaded. You will need to remove it or move it somewhere else then re-check.In case of issues, you can open a ticket or send an email to support@truehost.cloud