FastPanel is a powerful and user-friendly hosting control panel that simplifies server management. One of the key features of FastPanel is the ability to set up a custom hostname for your panel, which allows you to access it via a domain name instead of an IP address.
This guide will walk you through the steps to set up a hostname on FastPanel and secure it with an SSL certificate.
Additionally, we’ll emphasize the importance of ensuring that your panel address is properly pointed to your server’s IP address via DNS settings.
Step-by-Step Guide to Setting Up a Hostname on FastPanel #
Step 1: Log in to FastPanel #
- Open your web browser and navigate to your FastPanel login page.
- Enter your username and password to log in to the FastPanel dashboard.

Step 2: Access the Settings Menu #
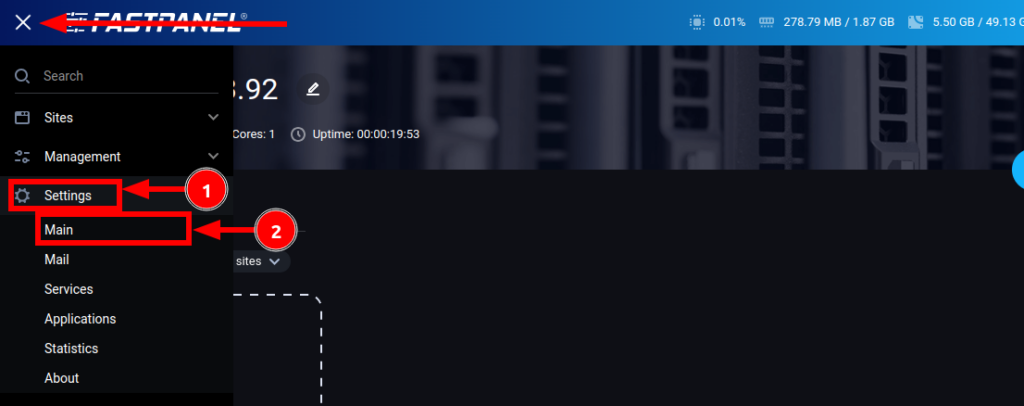
- On the left side of the dashboard, click on the Menu Icon ( represented by three horizontal lines).
- From the dropdown menu, navigate to Settings and then click on Main.
Step 3: Configure the Panel Address #
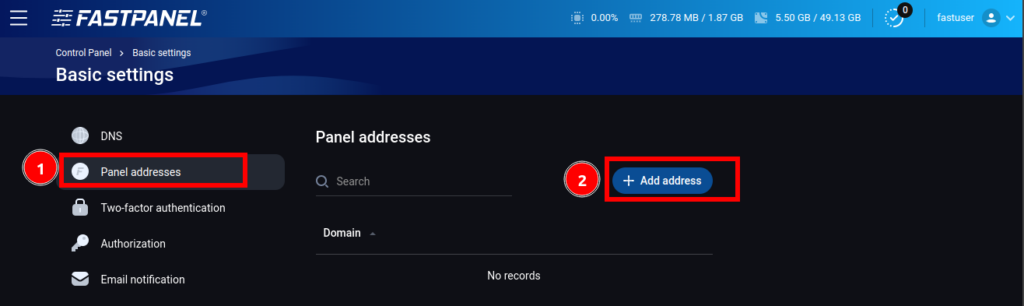
- In the Main Settings section, locate and click on Panel Address.
- Click on the Add Address button to set up a new hostname.
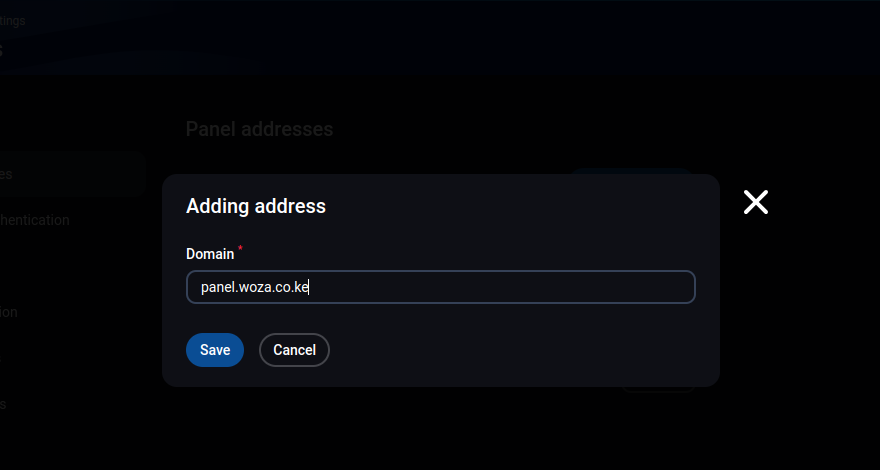
Step 4: Enter Your Preferred Hostname #
- In the provided field, enter your desired hostname in the format
host.domain.com. For example, you could usepanel.yourdomain.com. - Important: Before saving the hostname, ensure that the domain or subdomain you are using (e.g.,
panel.yourdomain.com) is properly configured to point to your server’s IP address. This is done by creating an A record in your domain’s DNS settings. For example:- Host:
panelType:AValue: Your server’s IP address (e.g.,123.45.67.89)TTL: Default
- Host:
Step 5: Save the Hostname #
- After entering the hostname and confirming that the DNS is properly configured, click the Save button to apply the changes.
Securing Your Hostname with SSL #
To ensure secure access to your FastPanel, it is recommended to issue an SSL certificate for your hostname. FastPanel supports Let’s Encrypt, a free and widely trusted SSL certificate provider.
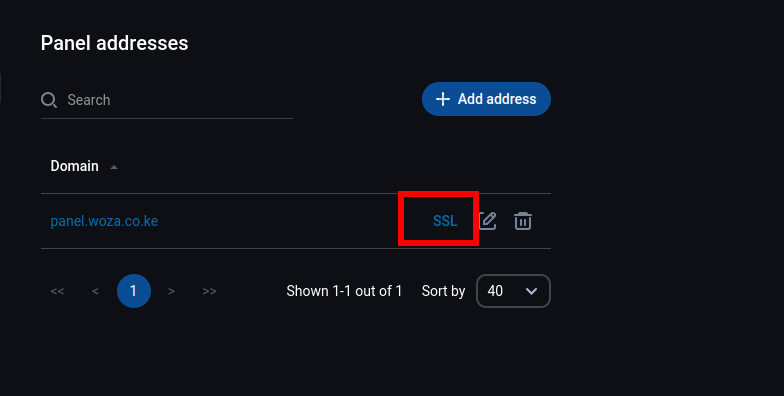
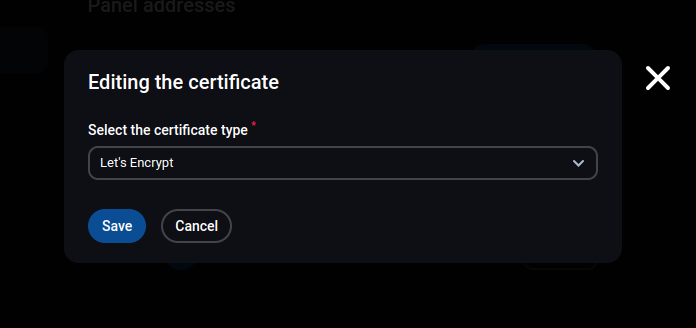
Step 6: Issue an SSL Certificate #
- In the Main Settings section, click on SSL.
- Select Let’s Encrypt as the SSL provider.
- Click Save to issue the SSL certificate for your hostname.
Select Let’s Encrypt.
Step 7: Verify the Setup #
- Once the SSL certificate is issued, you can access your FastPanel using the new hostname (e.g.,
https://panel.yourdomain.com). - Ensure that the connection is secure by checking for the padlock icon in your browser’s address bar.
- If you are unable to access the panel using the hostname, double-check your DNS settings to confirm that the domain or subdomain is correctly pointed to your server’s IP address. DNS changes may take a few minutes to several hours to propagate globally.
Conclusion #
Setting up a hostname on FastPanel is a straightforward process that enhances the accessibility and security of your control panel.
If you encounter any issues during the setup process, refer to the FastPanel documentation or contact support team for assistance.