In this guide, we will cover how to backup and restore Virtual Machines in Proxmox.
Prerequisites #
- You will need a server that has proxmox installed
- You will need to have created a virtual machine on proxmox
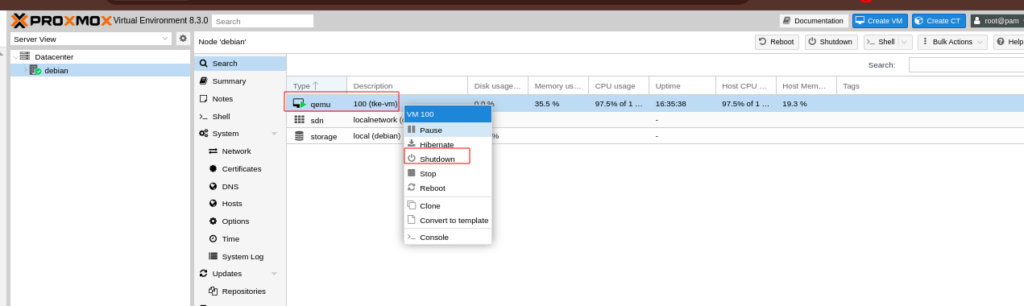
Step 1: Poweroff the VM in Proxmox #
- You will first need to power off the vierual machine before you can take its backup.
- To do that, go to your Proxmox dashboard and then navigate to the VM and right click on it, then click on Shutdown.
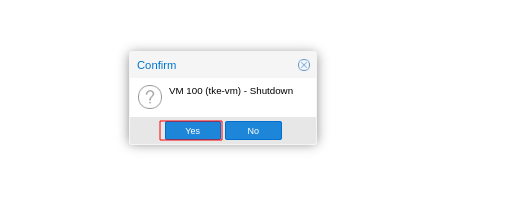
- You will be asked to confirmed to confirm then action. the VM will then shut down.
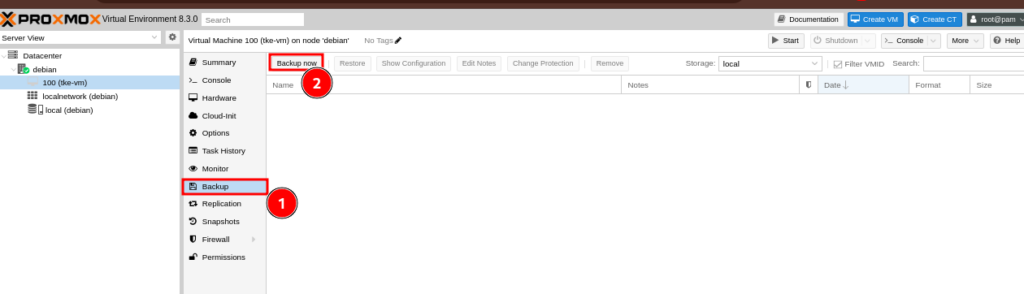
Step 2: Create Proxmox VM Backup #
- Next will be to create a backup of the VM. Right click on the shut down VM then click on Backup.
- Next will be to click on the tab labelled Backup now
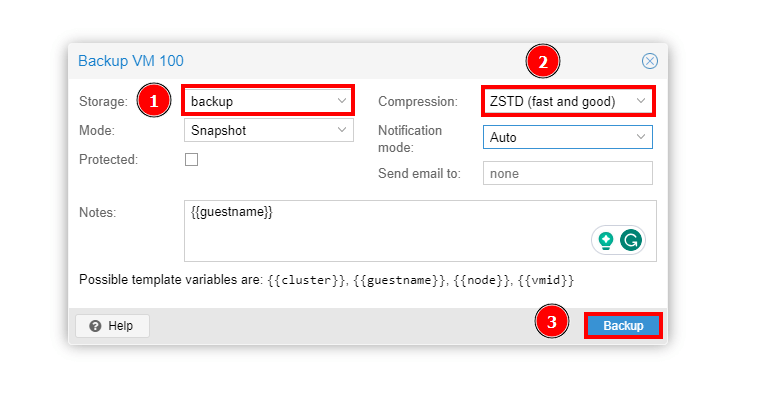
- You will see a pop up asking you to choose your backup location. If you have added a backup location, you will see it there, otherwise you will have an option to choose a local backup
- Note that it is safer to store a backup in a different location, and not on the very server whose backup you are creating. It is recommended that you consider that option.
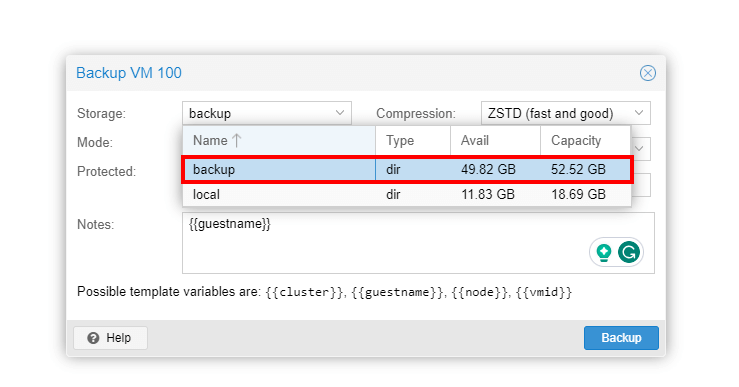
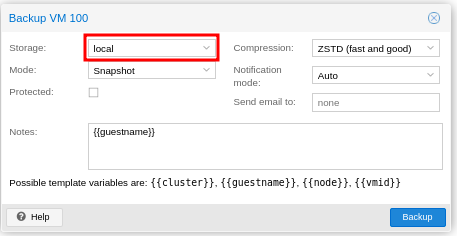
- For compression option, choose ZSTD option, which might be the pre-selected option, by default.
- Once done, click on Backup, to start the process.
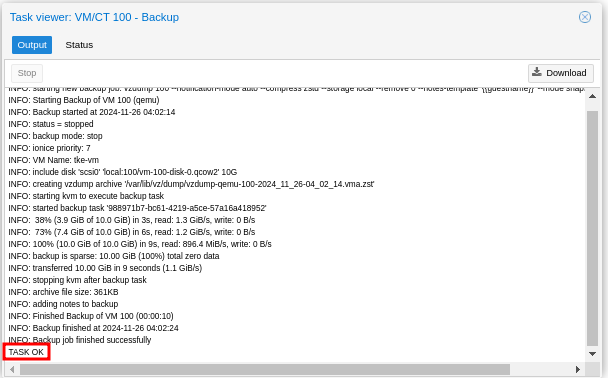
- The backup process will start and will be shown on the task viewer window
- Once the process is complete, you will see a message saying TASK OK
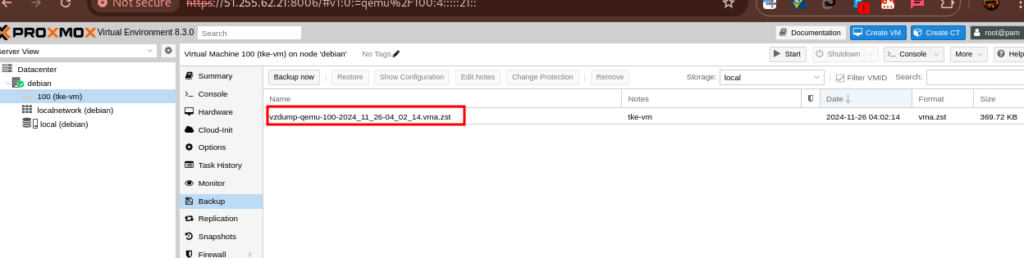
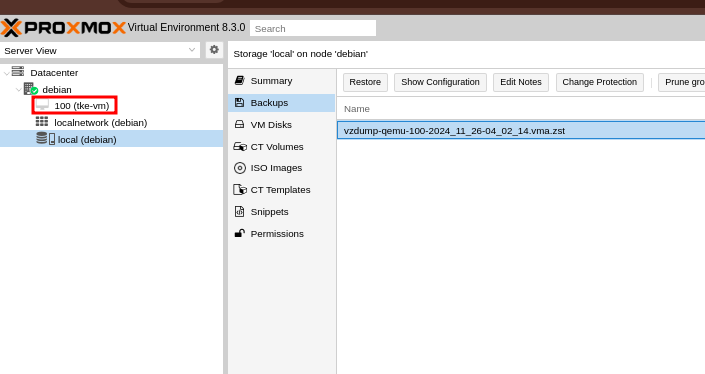
- Your backup will be displayed as a compressed file and will be saved in the location that you provided in the earlier step when choosing the backup location.
- Since the VM has backed up successfully, you can now remove it, so that you get to restore it.
- To do that, click on the VM icon, then on More then click on Remove.
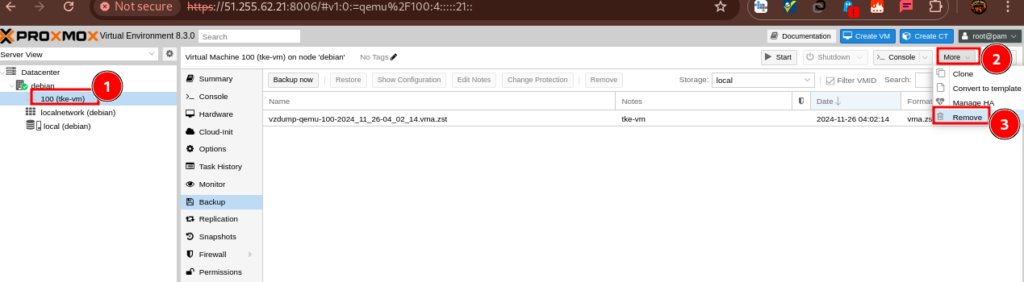
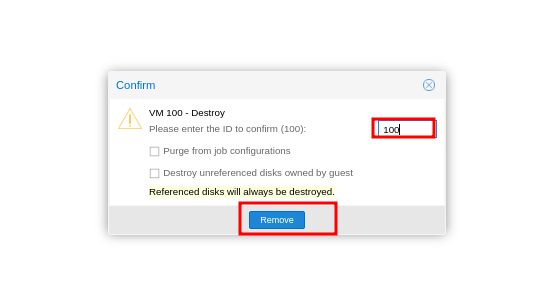
- You will be asked to provide the VM ID for the VM. Provide it, then click on Remove. In our case, the ID is 100
Step 3: Restore Proxmox Virtual Machine #
- Since we have a backup, you can restore the VM to it’s original state
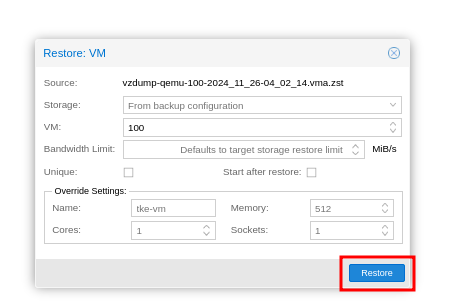
- Navigate to the Backup location and click on the Backup file, then click on the Restore option that is towards the top of the window.

- You will see a pop up dialogue box. Click on Restore option to begin the restoration process.
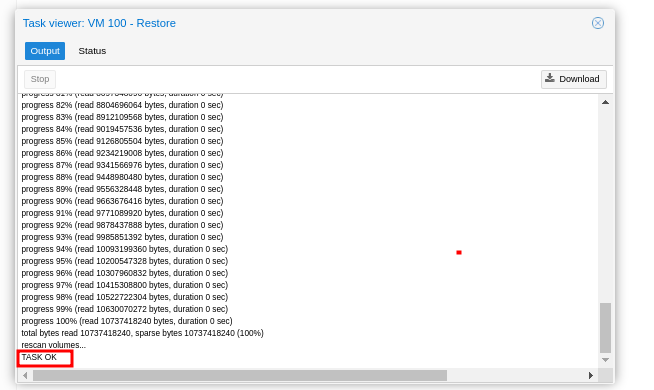
- You will also see a pop up task viewer with the restoration process details. Give it some time to complete the process.
- Upon completion of the process, you will see a message saying TASK OK. Close the pop-up.
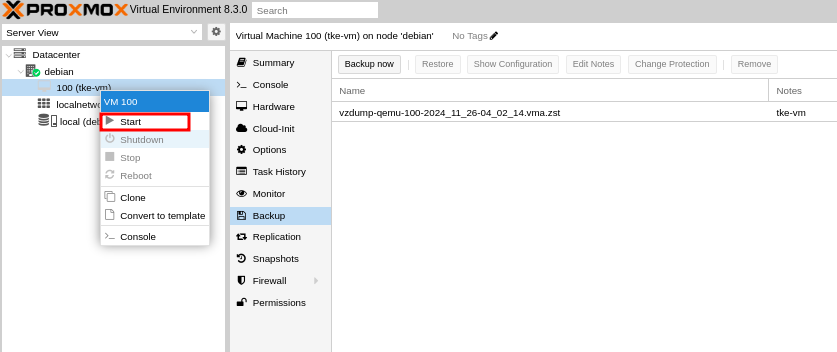
- You will now see the restored virtual machine on the dashboard.
- Right click on the VM, then click on Start to power it on and start using it.
Author’s Final Word #
The above steps have demonstrated the backup and restore process for your VM on proxmox. As mentioned in the guide, consider having your backup stored on a different server from the server that is being backed up to avoid loosing the live data and the backup, in case something goes wrong.