Configuring your CWP (CentOS Web Panel) server for email use involves setting up the necessary services like Postfix, Dovecot, and ensuring that proper DNS records are configured (such as MX, SPF, DKIM, and rDNS). This guide will help you set up email services on your CWP server, allowing you to send and receive emails via your domain.
Prerequisites: #
- A server with CWP installed properly. See this on how to properly do it.
- Root access to the server.
- A valid domain name pointing to your server.
- rDNS (reverse DNS) configured for your server’s IP address (if not, contact our support team to set it up to point to the server’s hostname then give it 3 hours to propagate. before proceeding). This is important.
Step 1: Log in to CWP Admin Panel using these steps
Step 2: Configure hostname SSL for your server.
This SSL Certificate will allow your webmail to be accessible via https and will also be used for TLS/SSL encryption for your emails
- If you did not, during CWP Installation, please configure your hostname using these steps.
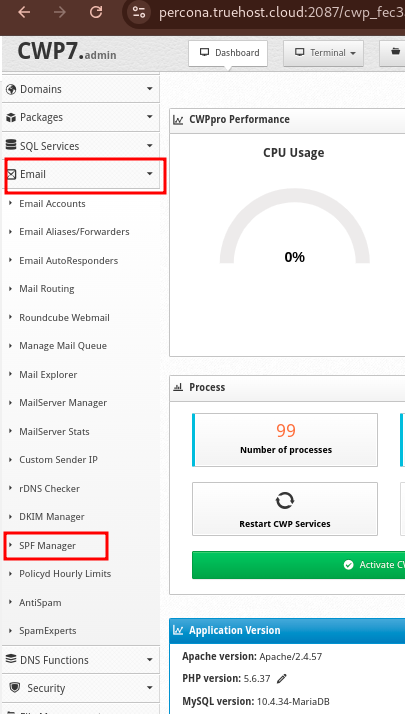
Step 3: Configure SPF Record
- Login as root to CWP and check the Navigation pane on the left side.
- Scroll down to Email -> SPF Manager.
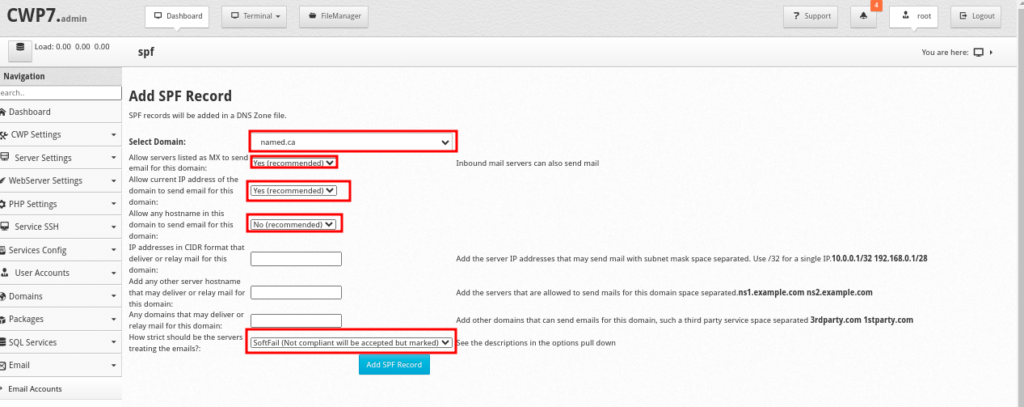
- Once you click on SPF Manager, you will see a form with the heading of Add SPF record
- Fill the form with the recommended settings as shown by red highlights in the image below. Each section has a drop-down, which you will use to select the right value. Leave the other ones blank, unless if they are applicable to you.
- Once done, click on the blue button labeled Add SPF Record
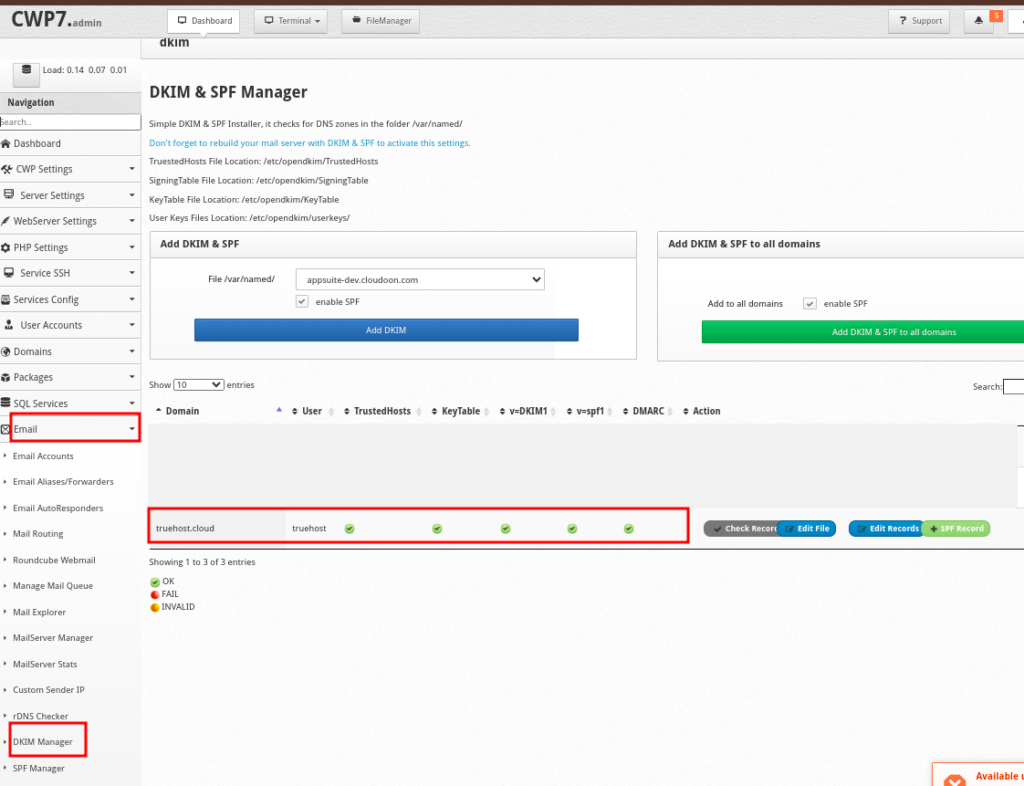
Step 4: Configure DKIM Record
- While logged in to CWP Admin, on the Navigation pane, click DKIM Manager.
- Select your domain name and click Add DKIM button. Once added, you should see the domain having 5 green ticks as shown below.
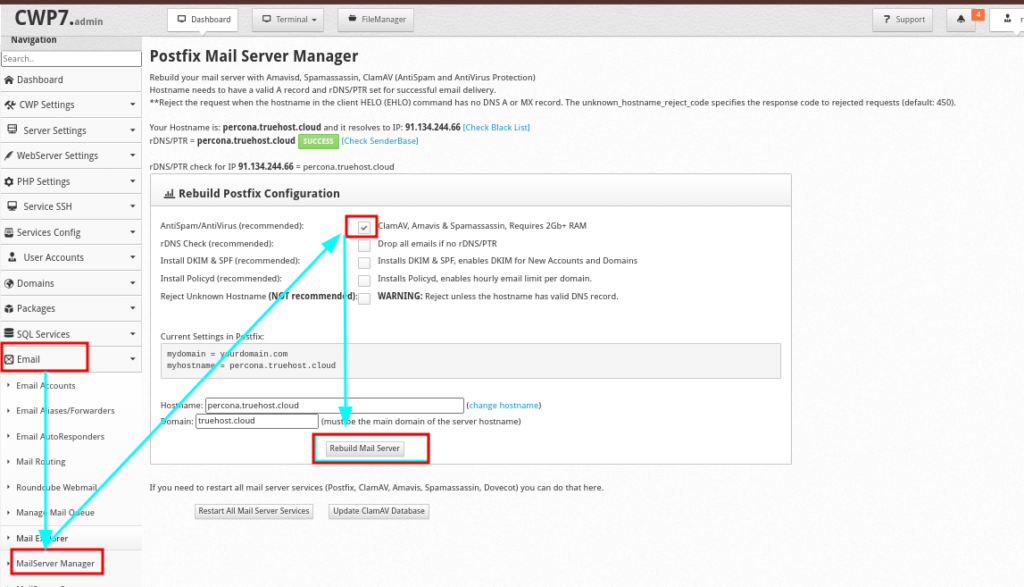
Step 5 Configure Antispam and Antivirus
- CWP provides three free antispam fighting tools in SpamAssassin, ClamAV and Amavis
- To enable these services go to the Navigation Pane and click MailServer Manager
- Under Rebuild Postfix Configuration section, select AntiSpam/AntiVirus (recommended) and click Rebuild Mailserver. Once done, Restart All Mail Server services.
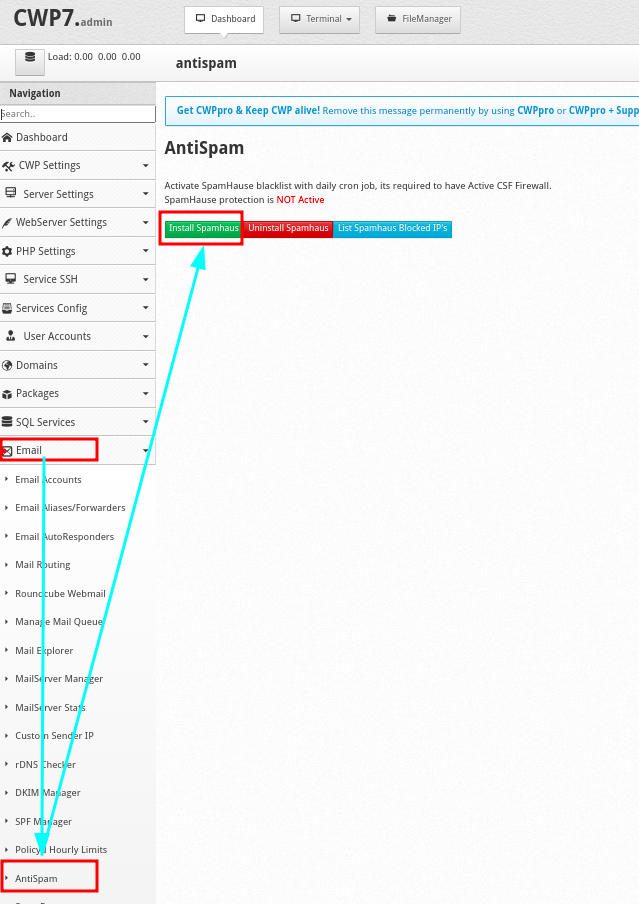
- Additionally, enable SpamHaus by clicking AntiSpam on the Navigation Pane. Then Install SpamHaus. Note that this needs you to activate CSF Firewall.
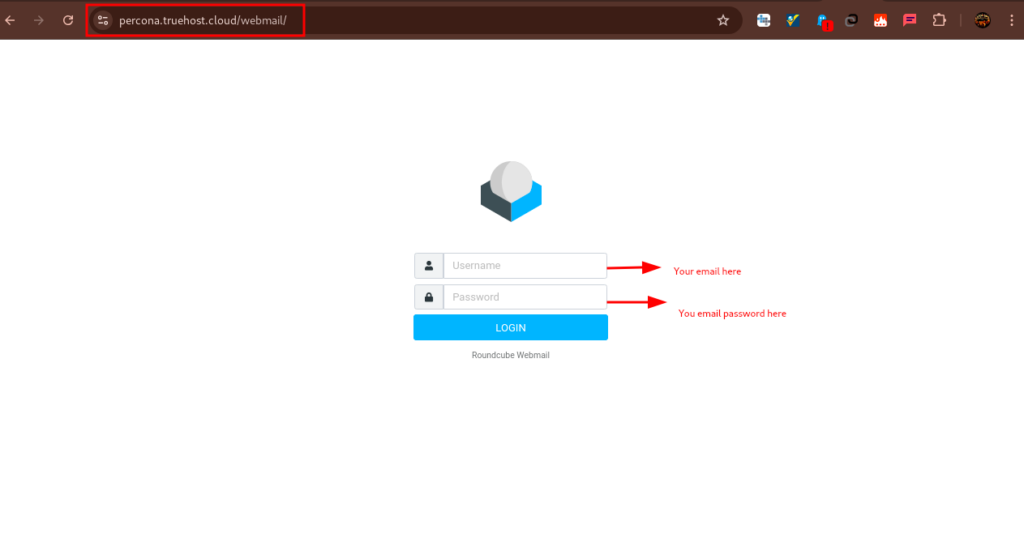
- You can now create your emails then access your them from web using the following URLs
https://yourhostanme/webmail E.g. https://percona.truehost.cloud/webmail

OR

http://your_server_ip/webmail, E.g  or http://91.134.244.66/webmail