Prerequisites #
Before creating email accounts, make sure the following prerequisites are met:
- Ensure that you have installed CyberPanel Installed and configured it for email use: See this guide on how to:
Step-by-Step Guide to Create Email Accounts on CyberPanel #
Step 1: Log in to CyberPanel – Open a web browser and log in to CyberPanel as guided here
Step 2: Navigate to Email Section
- Once logged in, find the Email section in the left-hand menu.
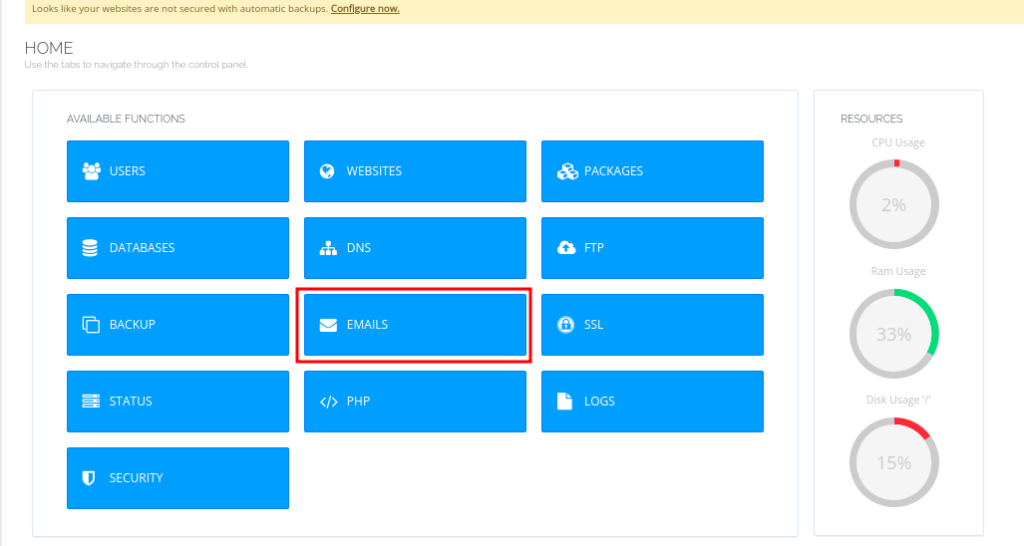
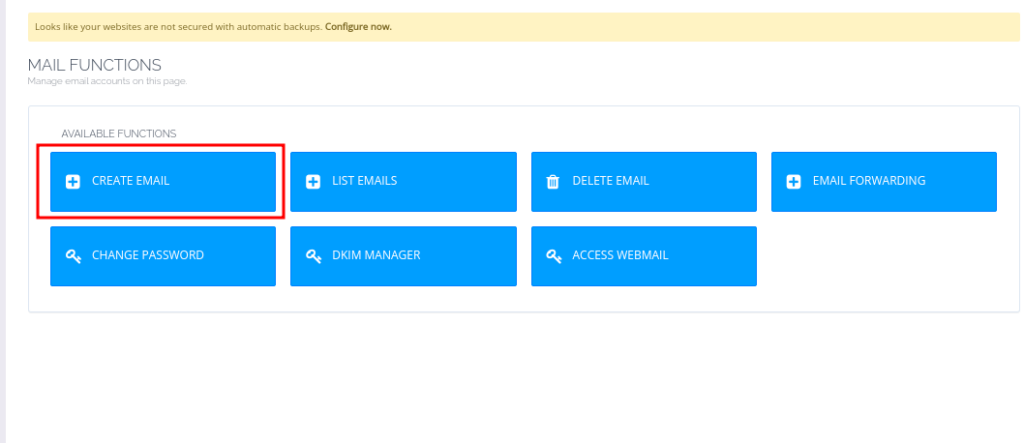
- Click on Create Email to begin setting up a new email account.
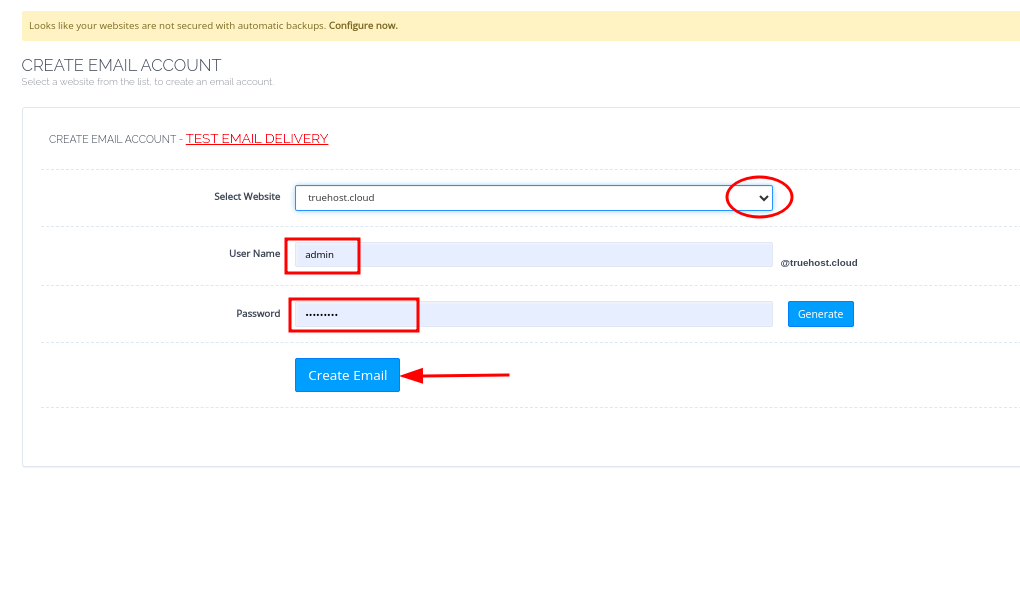
Step 3: Select Your Domain, fill in the needed and create the email
In the Create Email page, select the domain for which you want to create an email account from the drop-down menu.
After selecting the domain, you will be prompted to fill out the necessary details for the new email account:
- Email Address: Enter the local part of the email address (e.g.,
admin). The domain name will be automatically appended to the address. - Password: Create a strong password for the email account. You can use CyberPanel’s password generator by clicking Generate Secure Password.
- Once you have filled in the details, click Create Email.
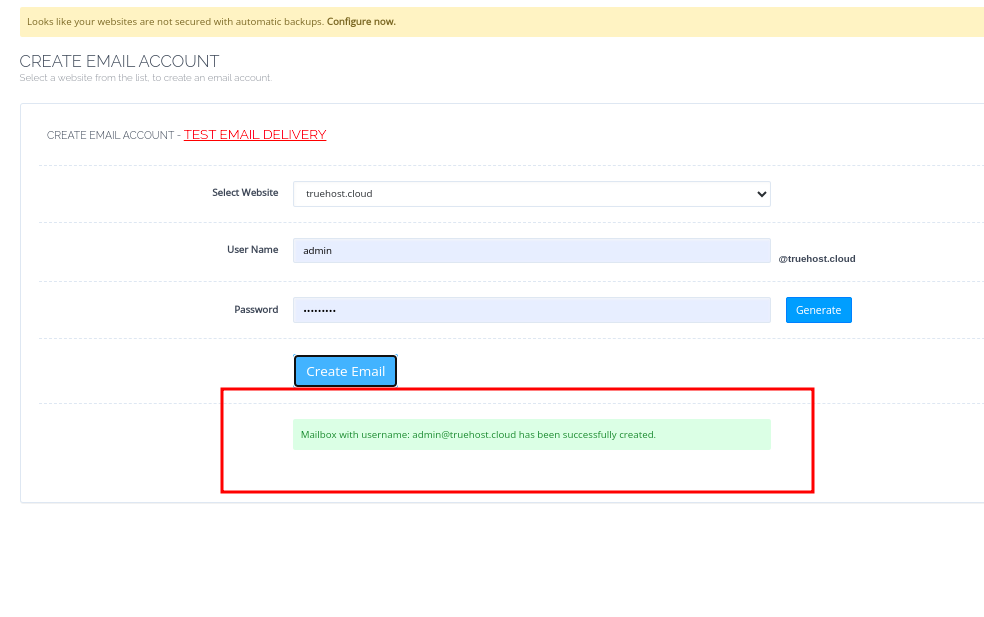
Step 5: Verify Email Creation
After clicking Create Email, CyberPanel will process your request and display a success message indicating that the email account has been successfully created.
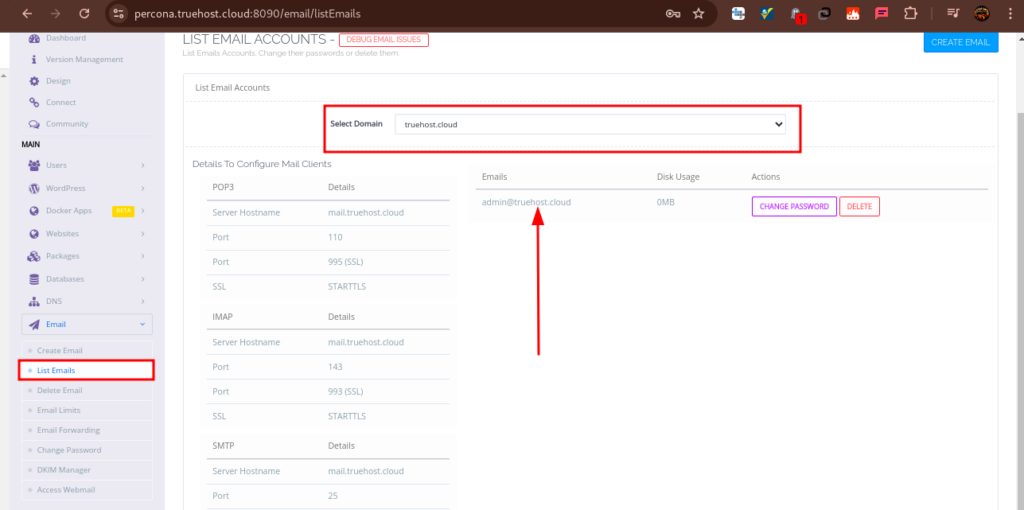
You can now see the newly created email account in the list of email accounts under the List Email section. Select the domain whose email you want to see and the mailboxes will be displayed right there.
Step 6: Access Your Email Account
To access the created email account, you have two options:
A. Using Webmail (RainLoop): CyberPanel includes RainLoop as its webmail client. You can access it by navigating to the following URL:
https://<your_hostname>:8090/rainloop OR http://<your_server_ip>:8090
In my case, my server hostname is percona.truehost.cloud and IP is 91.134.244.66.
So, I can access emails using either https://percona.truehost.cloud:8090/snappymail OR https://91.134.244.66:8090/snappymail/
The link with your IP could throw an SSL error. IN that case click on Advanced, then Proceed to the URL
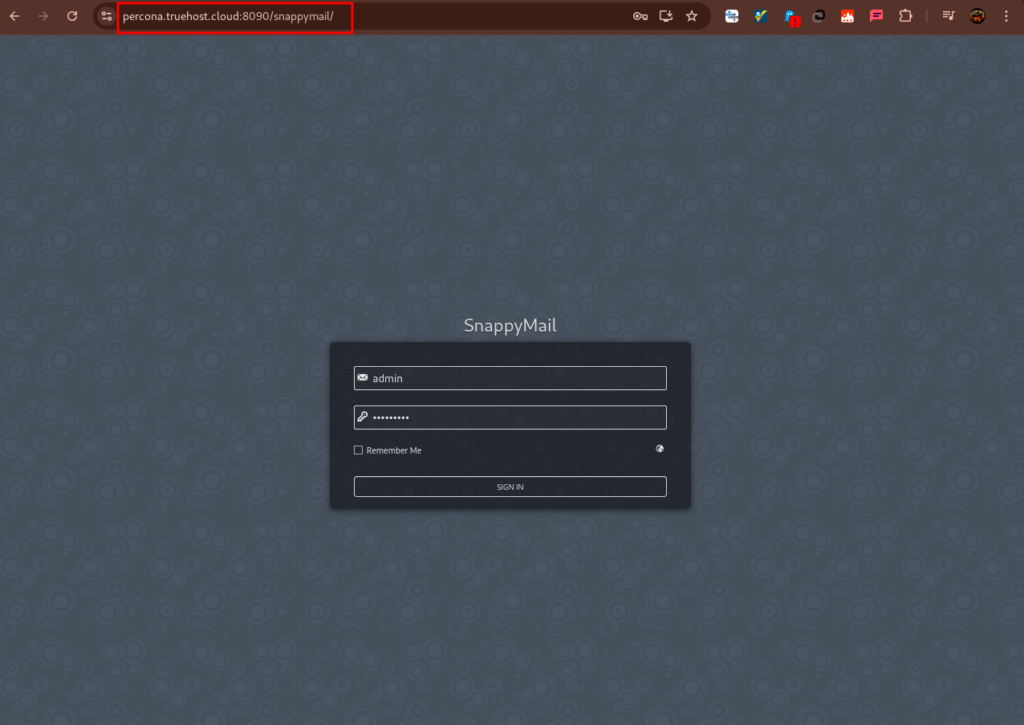

Enter the email address and password you just created to log in and manage your email account.
B. Using an Email Client: You can also configure the email account in an email client (e.g., Outlook, Thunderbird) using the following server details:
You can also configure the email account in an email client (e.g., Outlook, Thunderbird or Gmail) using the following server details:
Outgoing Mail Server: yourServerHostname e.g in percona.truehost.cloud in my case
Port: 587
Encryption: TLS or STARTLS
Username: your email that you’re configuring
Password: Password for the email above
Incoming Mail Server: yourServerHostname e.g percona.truehost.cloud in my case
Port: 993 (IMAP) OR 995 (POP3)
Encryption: SSL
Username: your email that you’re configuring
Password: Password for the email above
You can check this guide on management of exiting emails