As an administrator, you can use DirectAdmin to create or restore an admin backup to safeguard user files and maintain essential data.
Creating an Admin Backup #
- Log in to your DirectAdmin reseller account.
- Navigate to Reseller Tools and select Manage User Backups.

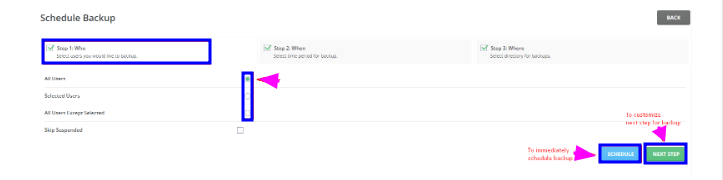
3. Click SCHEDULE BACKUP to start scheduling a backup for chosen users.

- DirectAdmin provides three options for user selection:
- All Users: Backup all user accounts.
- Selected Users: Backup only specific user accounts.
- All Users Except Selected: Exclude certain users and back up the rest.
4. Choose the preferred option and select SCHEDULE or NEXT STEP to customize further.
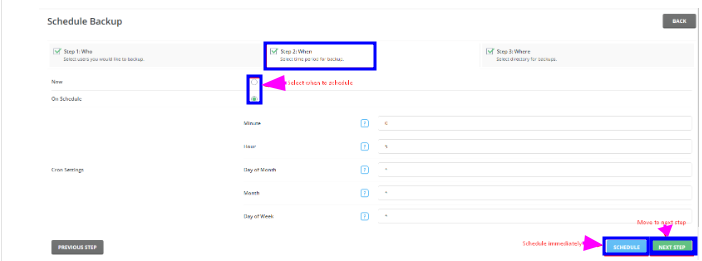
5. Schedule when the backup will occur (e.g., immediately or on a specified schedule). If scheduling, set up Cron Settings to have the backup happen at your preferred time.
6. Choose a storage location—either the Local directory or an FTP server if backing up on a remote server. Configure FTP Settings if needed.
- Set the desired backup retention time from the dropdown list.
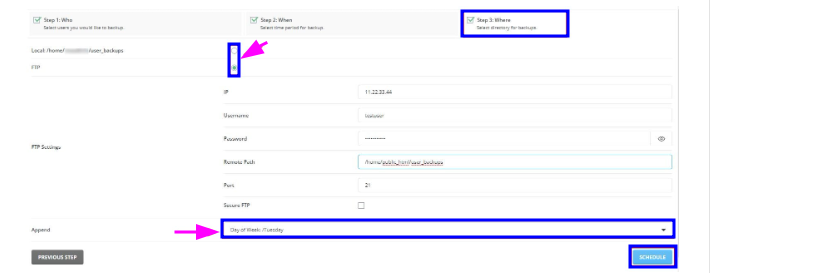
7. After confirming settings, click SCHEDULE to finalize the backup. You’ll receive an on-screen confirmation.
Restoring an Admin Backup #
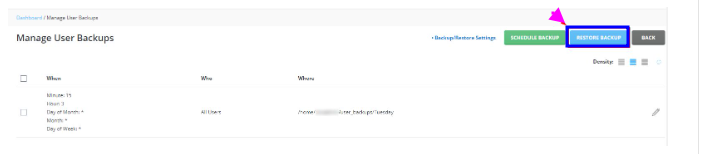
- In the Reseller Tools section, go to Manage User Backups to view scheduled backups.

2. Click RESTORE BACKUP to begin the restoration process.
3. Select the backup location—Local or FTP
- If you choose FTP, you will need to configure FTP Settings if necessary then click on Next.

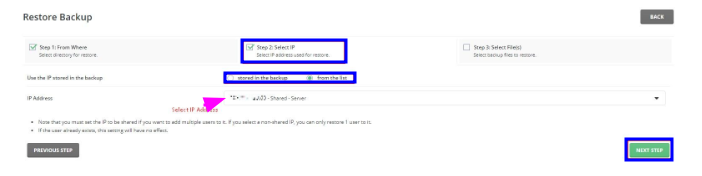
4. Choose the IP address for the restoration:
- Stored in the backup: Use the IP saved within the backup (for the same server).
- From the list: Pick an alternative IP from the available list (for a different server).
- Once you choose, click Next
5. Select specific backup files to restore, then click RESTORE.

- DirectAdmin will queue the restoration process and notify you when complete.
This process enables seamless backup creation and restoration within your DirectAdmin reseller account.