ClamAV is an open-source antivirus software toolkit widely used for detecting malware and viruses on Linux servers. Installing and setting up ClamAV is straightforward, and it provides a powerful tool to scan files and directories for potential threats. Here’s how to install and configure ClamAV on a Linux system for malware scanning.
Prerequisites #
- A Linux sever with at least 2GB RAM
- Almalinux operating system should be installed on the server
- Sudo SSH access to the server (either with user root or a sudo user)
Step 1: Update Your System #
Before installing any software, it’s always good practice to update your package lists:
sudo dnf update -yStep 2: Install ClamAV #
Almalinux base repo does not contain packages for installing Clamv. However, we can get them from the EPEL repo (Extra packages for Enterprise Linux). Hence, add that first.
sudo dnf install epel-release -y

sudo dnf install clamav clamd clamav-update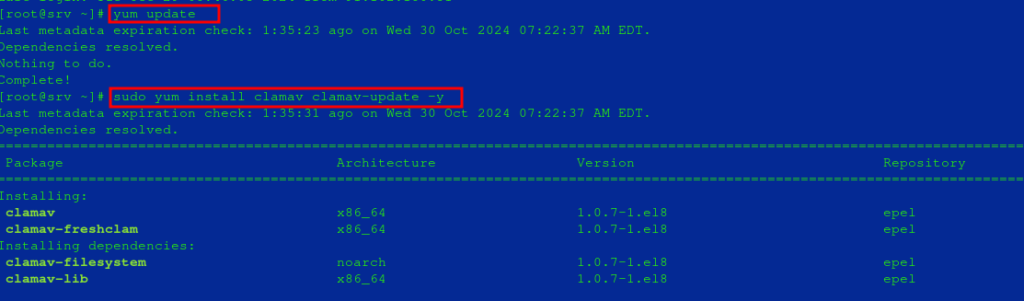
Step 3: Add ClamAV user on Rocky Linux or AlmaLinux #
sudo groupadd clamav
sudo useradd -g clamav -s /bin/false -c "Clam Antivirus" clamav
Step 4: Update ClamAV Virus Definitions #
After installing ClamAV, you should update the virus definitions to ensure ClamAV has the latest signatures for detecting threats.
sudo freshclamStep 5: Enable LocalSocket #
If you are setting up a simple, local clamd instance, then enable the LocalSocket option in its scan configuration file.
sudo sed -i 's/#LocalSocket \/run/LocalSocket \/run/g' /etc/clamd.d/scan.confStep 6: Create Systemd file freshclam #
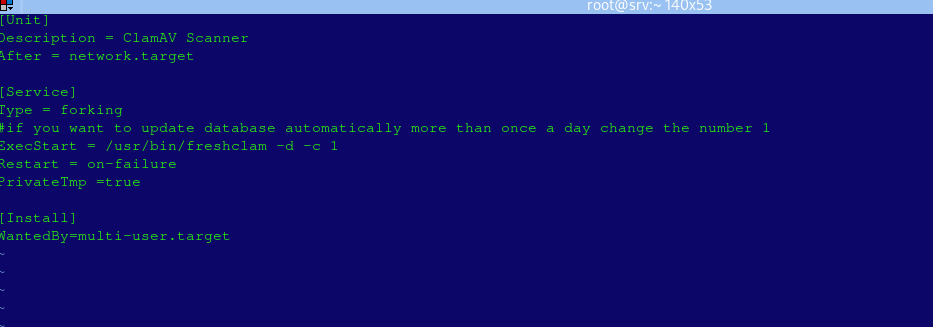
- Create a service file for Freshclam to run as a background service.
sudo vi /usr/lib/systemd/system/freshclam.service- Add the following configuration:
[Unit]
Description = ClamAV Scanner
After = network.target

[Service]
Type = forking
ExecStart = /usr/bin/freshclam -d -c 1
Restart = on-failure
PrivateTmp = true

[Install]
WantedBy=multi-user.target- Save and close the file.
Step 7: Start FreshClam and Clamd scanner services #
Starting the clamd service allows you to perform scans without initializing ClamAV each time.
Start and Enable freshclam
sudo systemctl start freshclam
sudo systemctl enable freshclam
You can also check its statuses
sudo systemctl status freshclam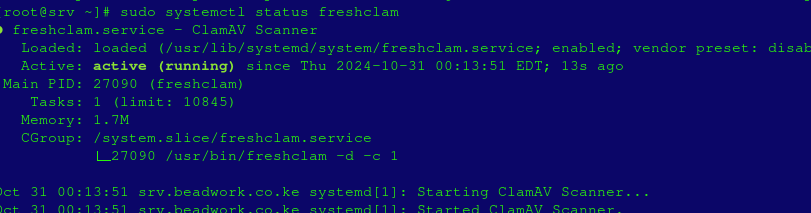
In case you want to stop the service
sudo systemctl stop freshclamStart and Enable Clamd Scanner service
sudo systemctl start clamd@scan
sudo systemctl enable clamd@scan
You can also check its statuses
sudo systemctl status clamd@scan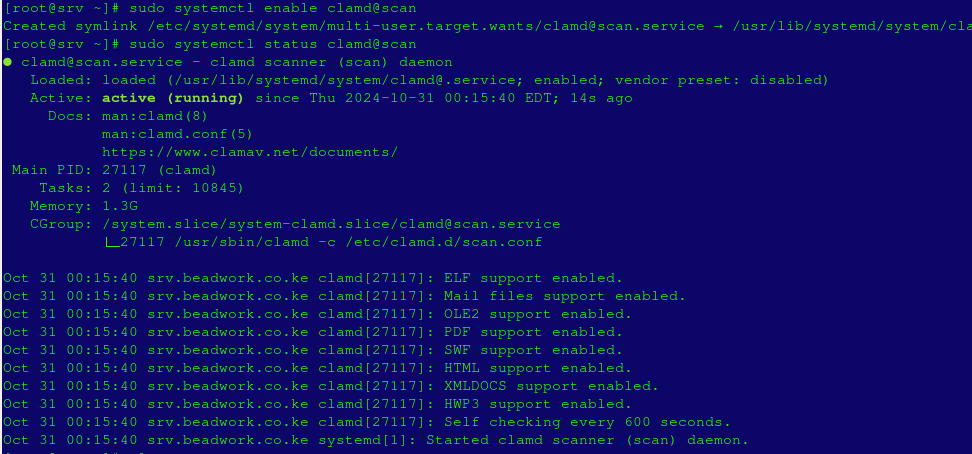
In case you want to stop the service
sudo systemctl stop clamd@scanStep 8 : Run a Scan #
You can scan directories or specific files with the clamscan command.
- Scan a file
sudo clamscan filename- Scan a Directory:
- The
-rflag performs a recursive scan, scanning all subdirectories within the specified path.
- The
clamscan -r /path/to/directory- Scan and Remove Infected Files/Directories:
- The
--removeoption will delete infected files (use with caution).
- The
sudo clamscan --remove filename
sudo clamscan -r --remove directoryname
Scan and Generate a Log:
- This command saves scan output to
/var/log/clamav/scan.logfor later review.
clamscan -r /path/to/directory | tee /var/log/clamav/scan.logStep 9: Schedule Regular Scans (Optional) #
To automate scans, set up a cron job. For example, to scan /home daily:
- Open the cron editor:
crontab -e- Add the following line to schedule a scan at midnight each day:
0 0 * * * /usr/bin/clamscan -r /home | tee -a /var/log/clamav/daily_scan.logStep 10: Enable On-Access Scanning (Optional) #
- On-Access scanning provides real-time protection by monitoring specific directories for malicious files. Follow the steps below to enable it.
- Stop clamd service
sudo systemctl stop clamd@service- Now, enable On-Access in the ClamAV scan configuration file:
sudo sed -i 's/#OnAccessPrevention yes/OnAccessPrevention yes/g' /etc/clamd.d/scan.conf
- With the above command, we enabled this service in the Scan.conf file. If you want the Scanner to monitor some directory or file, declare that in the Scan.conf file as well by manually editing this file /etc/clamd.d/scan.conf and declaring your folder/file in the format below
OnAccessIncludePath path-to-folder- If not like above, you can also do it as below. Let’s say I want to enable On-Access scan monitoring for my Home directory.
sudo sed -i 's/#OnAccessIncludePath \/home/OnAccessIncludePath \/home/g' /etc/clamd.d/scan.conf- You also want to exclude your Clamd user from scanning to make sure it will not get blocked accidentally:
sudo sed -i 's/#OnAccessExcludeUname clamav/OnAccessExcludeUname clamscan/g' /etc/clamd.d/scan.conf- Start Daemon and On-Access Scanner service manually:
sudo su - clamav -c "/usr/local/bin/clamd"
sudo clamonacc- Run clamd service as well:
sudo systemctl start clamd@service
In case you get the following error while starting the Clamd service, then follow the steps further to resolve this error.
sudo systemctl start clamd@service Job for clamd@service.service failed because the control process exited with error code. See "systemctl status clamd@service.service" and "journalctl -xeu clamd@service.service" for details.- Create a New Service Configuration File: If the Clamd service file does not already exist on your system, then create the one using:
sudo vi /etc/clamd.d/service.confAdd the following basic configuration and save the file by pressing Ctrl+X, Y, and Enter keys.
# Example ClamAV Daemon configuration file
LogFile /var/log/clamd.service.log
LogFileMaxSize 2M
LogTime yes
LogVerbose yes
PidFile /var/run/clamd.service.pid
DatabaseDirectory /var/lib/clamav
TCPSocket 3310
TCPAddr 127.0.0.1- Set file correct permissions and ownership
sudo chmod 644 /etc/clamd.d/service.conf
sudo chown clamav:clamav /etc/clamd.d/service.conf- Update the Systemd Service Unit
sudo vi /etc/systemd/system/clamd@service.serviceMake sure it includes this below
[Service]
ExecStart=/usr/sbin/clamd --config-file=/etc/clamd.d/service.conf- Save and close file.
- Reload systemd and Restart the Service
sudo systemctl daemon-reload
sudo systemctl start clamd@service.service
Verify the Service Status
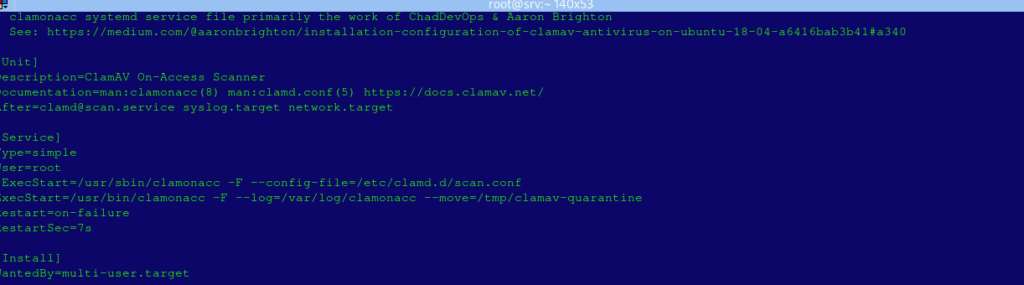
sudo systemctl status clamd@service.serviceCreate clamonacc Service file (optional)
- To ensure the On-Access Scanner service starts automatically after a system reboot, you need to create a systemd file.
sudo vi /usr/lib/systemd/system/clamonacc.service- Copy-paste the below-given line in the file:
[Unit]
Description=ClamAV On Access Scanner
Requires=clamd@service
After=clamd.service syslog.target network-online.target

[Service]
Type=simple
User=root
ExecStart=/usr/bin/clamonacc -F --log=/var/log/clamonacc --move=/tmp/clamav-quarantine
Restart=on-failure
RestartSec=7s

[Install]
WantedBy=multi-user.target- Save the file by pressing ESC followed by :wq and then Enter.
- You also need to create a log file and Quarantine directory declared in the above lines:
sudo touch /var/log/clamonacc
sudo mkdir /tmp/clamav-quarantine- Start and Enable clamonacc service
sudo systemctl daemon-reload
sudo systemctl start clamonacc
sudo systemctl enable clamonacc
- Check status of the service
sudo systemctl status clamonacc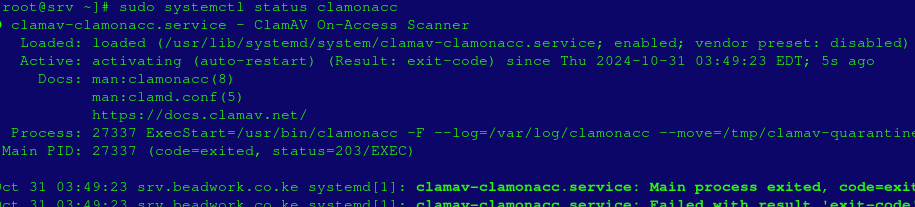
- You can use the command below to check what are services of this Antivirus running on our system, run:
ps -ef | grep clamStep 11: Uninstall (optional) #
- If you need to uninstall ClamAV from your AlmaLinux, then run:
sudo dnf remove clamav clamd clamav-updateAuthor’s final word #
ClamAV provides a robust antivirus solution for Linux systems, and with these steps, you can efficiently configure it to protect your system from malware. Regular updates, scheduled scans, and log reviews ensure comprehensive protection.
To learn more about the ClamAV scanner and its commands, you may check their Official Documentation.