MariaDB is an open-source relational database management system often used as a substitute for MySQL in the widely-used LAMP stack (Linux, Apache, MySQL, PHP/Python/Perl). It is designed to serve as a drop-in replacement for MySQL.
To install MariaDB on Ubuntu 22.04, you can follow these steps:
Prerequisites #
- A server running Ubuntu 22.04
- SSH Access to the server with root or a sudo user
You could also check our tutorial on First Server Setup with Ubuntu to get set with the initial set up.
Step 1: Update the System
- Before installing MariaDB, ensure that your package index is updated to the latest available versions by running:
sudo apt updateStep 2: Install MariaDB
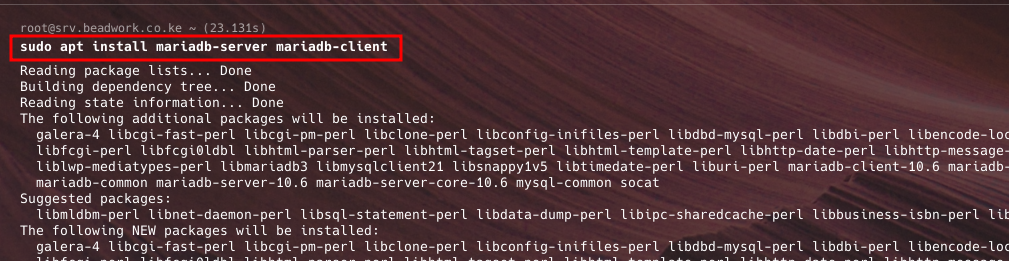
- The MariaDB packages are available in the official Ubuntu repositories. You can install it using the
aptpackage manager:
sudo apt install mariadb-server mariadb-client- The above command installs both the MariaDB server and the MariaDB client.

Step 3: Start and Enable MariaDB
- Once MariaDB is installed, start the service and enable it to automatically start on boot.
- Start the MariaDB service:
sudo systemctl start mariadb- Enable MariaDB to start at boot:
sudo systemctl enable mariadb- Verify that the service is running:
- You should see output indicating that MariaDB is active and running.
sudo systemctl status mariadb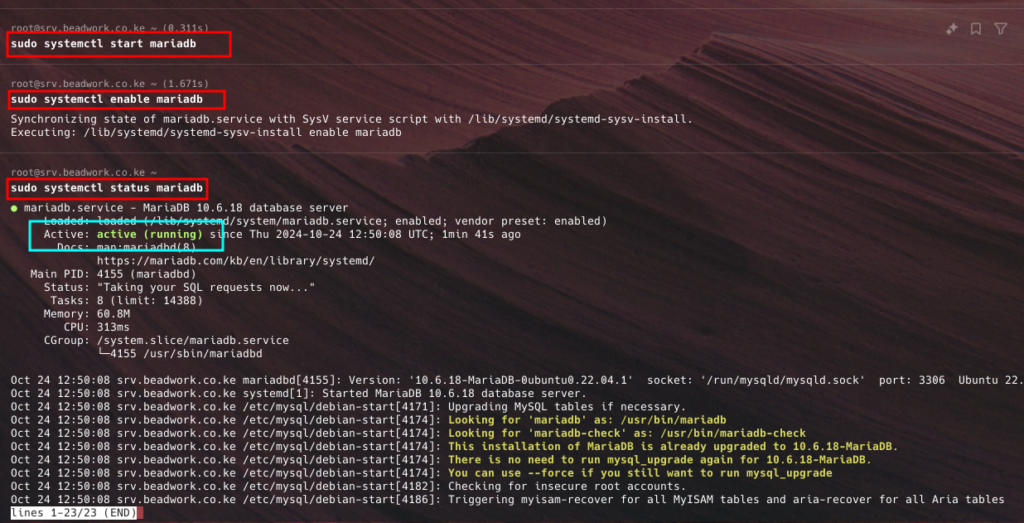
Step 4: Secure the MariaDB Installation
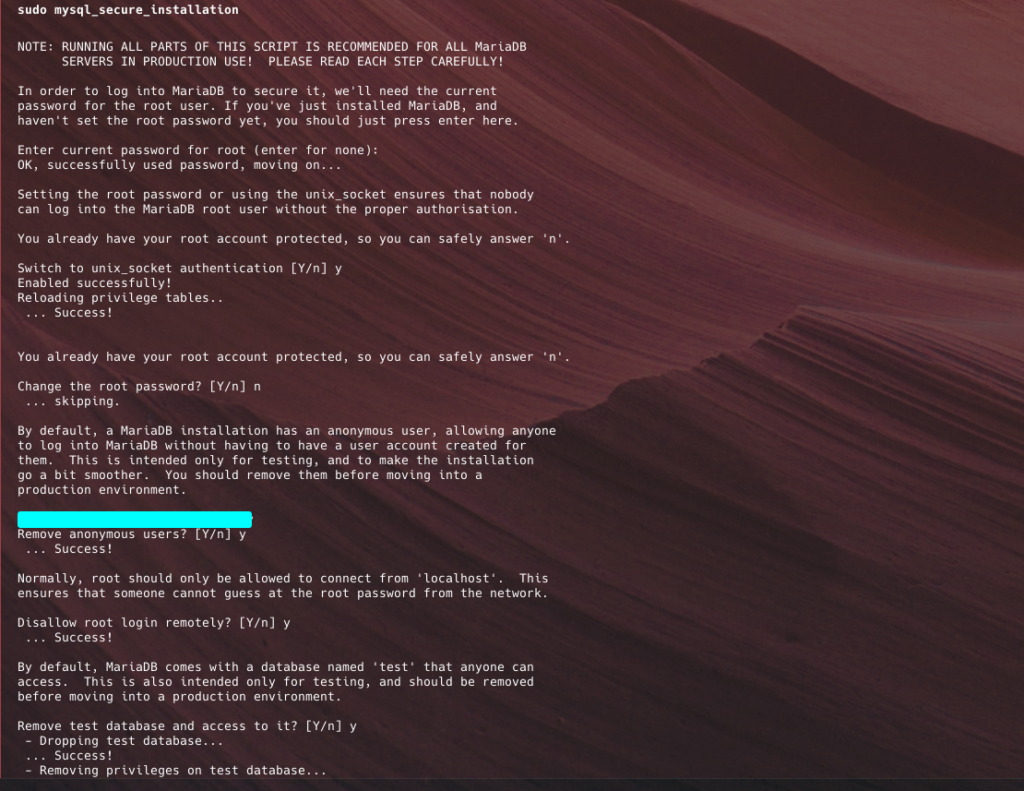
MariaDB includes a security script that can remove some insecure defaults, like anonymous users and test databases. To run the script:
sudo mysql_secure_installationThe script will prompt you to perform several security-related tasks:
- Enter current password for root: Press Enter
- Switch to unix_socket authentication: Answer
Yto switch - Set/Change the root password: You will be asked whether to set a root password. On new installations, you may not need to, as MariaDB on Ubuntu may use the
unix_socketplugin for root access. Press Enter or Answer n
- Remove anonymous users: Answer
Yto remove anonymous users.
- Disallow remote root login: Answer
Yto disallow root login remotely.
- Remove the test database: Answer
Yto remove the test database.
- Reload privilege tables: Answer
Yto reload the privilege tables.
Step 5: Verify MariaDB Installation
- To verify that MariaDB is installed correctly, log into the MariaDB shell:
sudo mysql- Once inside the MariaDB shell, check the version: You should see the MariaDB version number.
SELECT VERSION();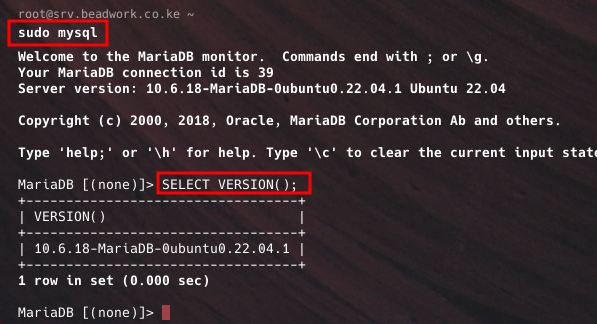
- Exit the shell using the exit command
exit
Step 6: Creating an Administrative User that Employs Password Authentication (Optional)
On Ubuntu systems running MariaDB 10.5, the default root user is configured to authenticate via the unix_socket plugin, instead of using a password. This improves security and ease of use, especially for local access, but it can be inconvenient when external programs (such as phpMyAdmin) require administrative access
It is advised to create a separate administrative account specifically for password-based access. To create this new administrative account, follow these steps:
- Access the MariaDB prompt from your terminal:
sudo mariadb- Create a new user named
adminwith root-level privileges and password authentication. Replaceadminandpasswordwith your preferred username and password respectively.
GRANT ALL PRIVILEGES ON *.* TO 'admin'@'localhost' IDENTIFIED BY 'password' WITH GRANT OPTION;
- Save the changes by flushing the privileges:
FLUSH PRIVILEGES;
- Exit the MariaDB shell:
exit
Step 7: Confirm that MariaDB Installation is running
- To verify that MariaDB is installed correctly, log into the MariaDB shell:
sudo systemctl status mariadb
- If MariaDB is not running, you can start it with:
sudo systemctl start mariadbThat’s it! You’ve successfully installed and secured MariaDB on Ubuntu 22.04.