Servers that run Panels like Cyberpanel or Control Web Panel may not have an auto-installer for Moodle and if you are to add an installer like Softaculous, you will be needed to pay for it.
If your web hosting provider doesn’t have an auto-installer for Moodle, follow this step-by-step guide on installing it manually.
In this tutorial, we’ll use the File Manager in Control Web Panel (CWP), but the steps are similar across most hosting control panels, like Cyberpanel.
Prerequisites #
Before you start, make sure to:
- You need to have a panel installed on your server. I have CWP installed on my server.
- You need to have added a domain name or created a subdomain on your server.
- Your server/domain should be running on PHP 8.1 and above. For CWP change using these steps
- For CWP or Cyberpanel, you need mariadb version 10.6.7 and above. Click the links to upgrade.
- You need access to the server’s Panel because you will need file manager and Database manager.
Prepare for the Moodle™ Installation #
Before you start, make sure to:
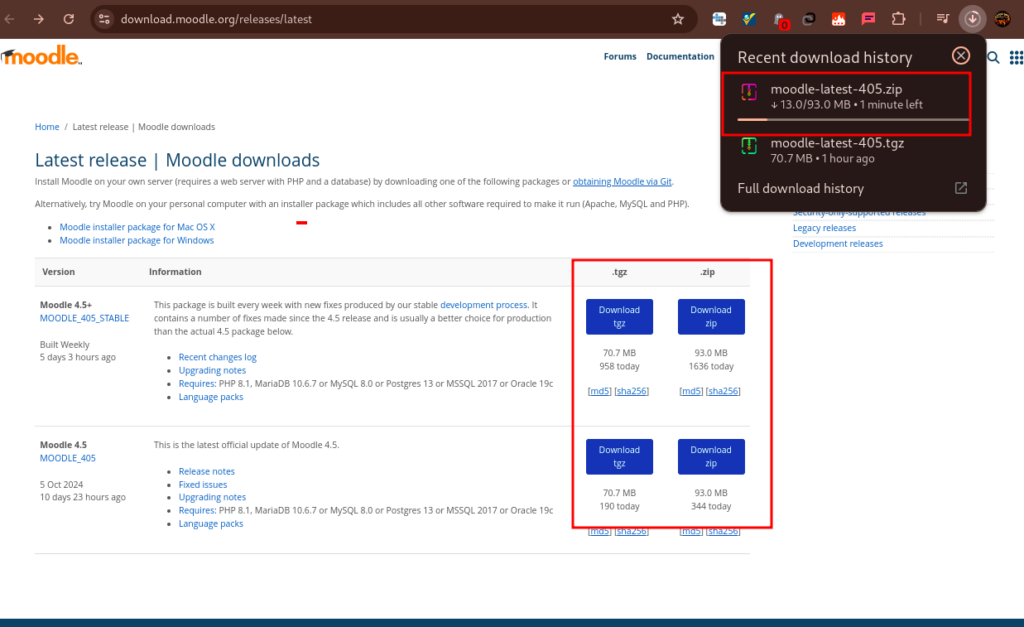
- Download the latest Moodle™ package from their official Moodle website.
- Upload the Moodle™ files to your server, either using your web hosting control panel or an FTP client like FileZilla.
- Upload the file to the root directory of your moodle domain or subdomain
- If you use CWP, access the admin panel then to to the user panel OR access user panel directly using these steps.
Database Creation
- You will need to access you hosing panel and create a database for moodle. Also create a user and give them access to the database. Save the database details somewhere for later use
- If you use CWP, check these steps on database creation, and save the database details later use.
Download Moodle and Upload to your Server
- Download the latest Moodle™ package from their official Moodle website. The file downloads to your computer
- Upload the file to the root directory of your moodle domain or subdomain. The interface could vary depending on your hosting panel.
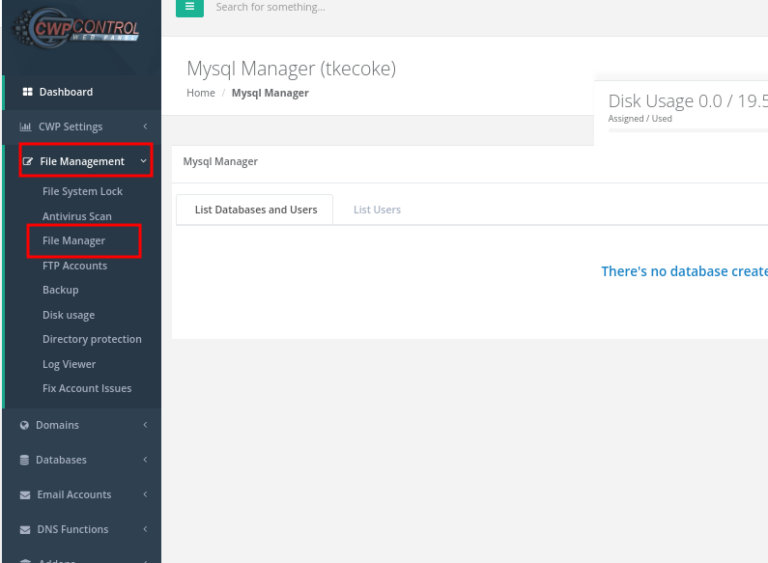
- For CWP user panel, on the left side of pane, go to File Management->File Manager and click on File Manager
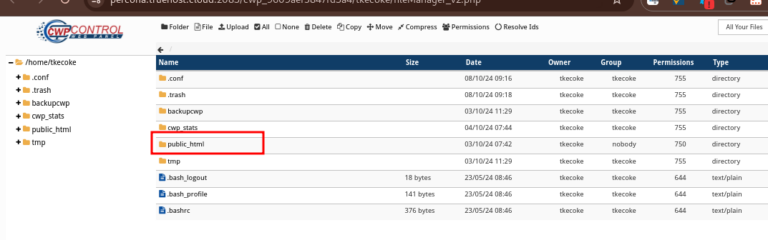
- You will see a window with the server’s file system files. Since this is a user panel, you will be shown files that are in the user’s home directory. These will include the user’s public_html and addon/subdomain folders
- Click on public_html to enter the domain’s root folder, otherwise click on the addon/subdomain folder for the domain/subdomain that you want to deploy Moodle on.
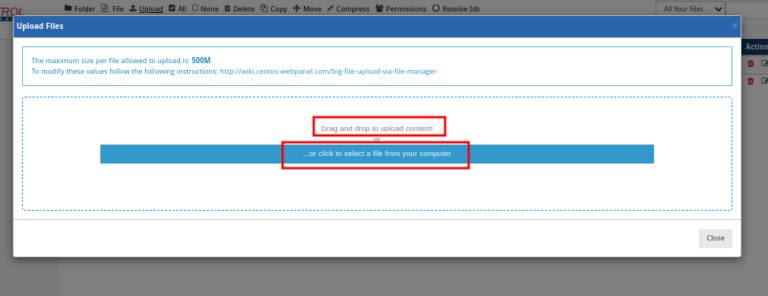
- While in public_html or the addon/subdomain, click on upload button at the top of the window.
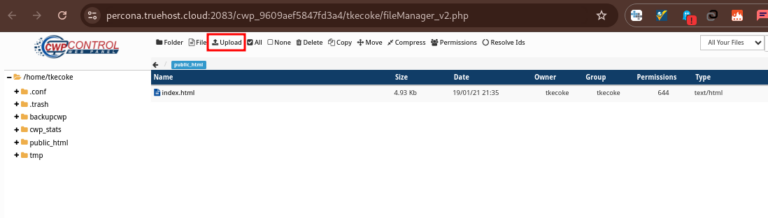
- You will be presented with an upload window, where you drag and drop a file to uplaod or choose the file to upload from your computer. We are uploading the Moodle file that you had downloaded.
- Drag and drop or select the file to upload it. Give it time to upload
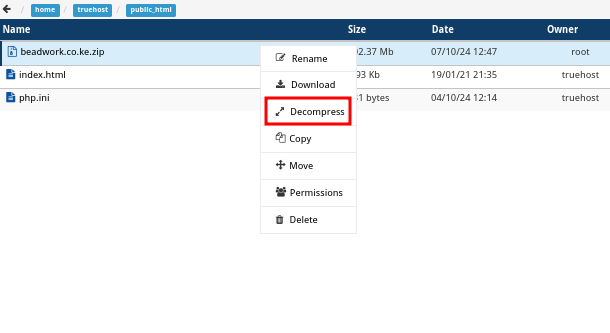
- Extract the ZIP file. close the uploaded and go back to public_html or to the directory where you uploaded the file and right click on the file and select Decompress and confirm the decompression.
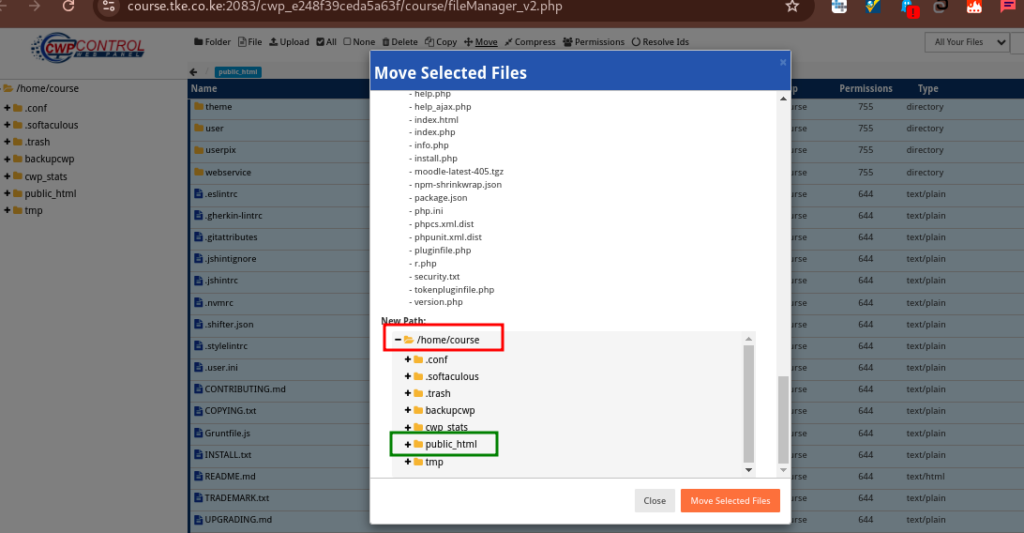
- After extraction, move the contents from the
moodlefolder into the domain’s/subdomain’s document root folder (if they are not already there). In my case, I will move contents of moodle to public_html - Go inside the extracted folder and use the Select All option at the top of the window to select everything.


- Click on Move option found at the top of the widow, then, in the resulting box, you will a section for New Path. Expend the boxes until you reach your new destination then click on it, then click on Move
- Give them time to move.
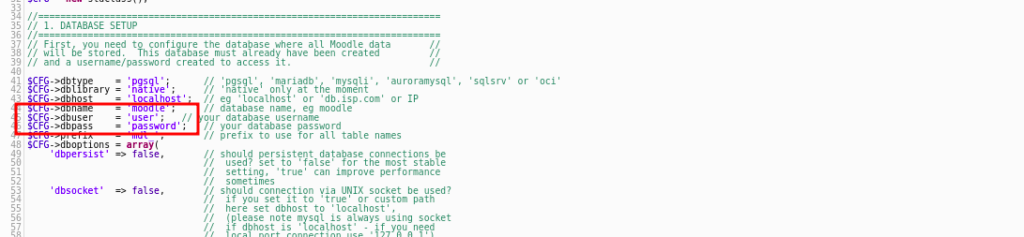
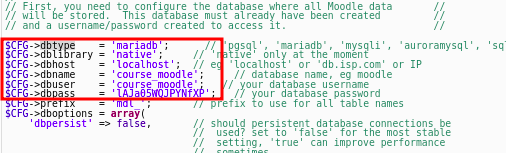
- Return to the File Manager, click public_html and locate config-dist.php. Create a copy of the file and edit the database information.
- Carefully replace the dummy databse details with the actual database details, that you had created and saved earlier.
- Also, if you are using mysql or mariadb database, change dbtype from pgsql to mysql or mariadb respectively. For CWP or Cyberpanel, use mariadb
Install Moodle #
Now that you’ve uploaded all the files on a MySQL database server, let’s install Moodle. Ow! Wait! You mean all that while you mean we hadn’t even installed it? Well, here we go…
- Access the URL of the Moodle™ files in your domain. If they are located in the public_html folder, access it as it is: www.yourdomain.com. You will be redirected to the installation page
- If they are installed on a subfolder named moodle, then you will have www.yourdomain.com/moodle
- If they are on a subdomain like moodle.yourdomain.com, then access that on your browser.
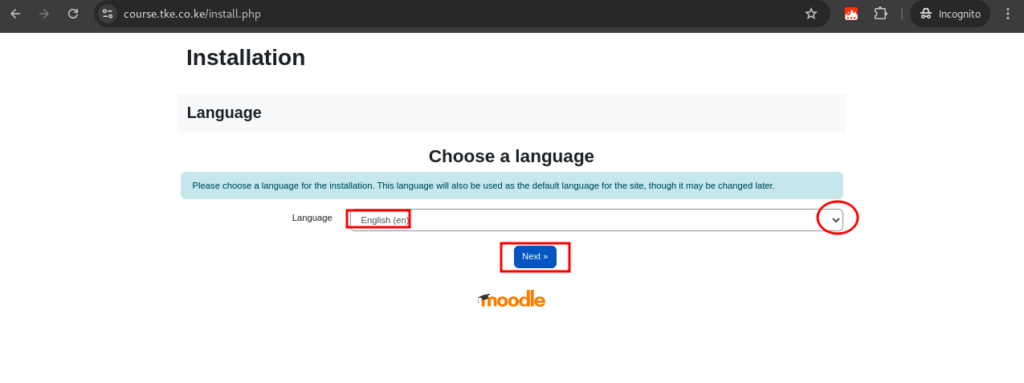
- Select a language and click Next.
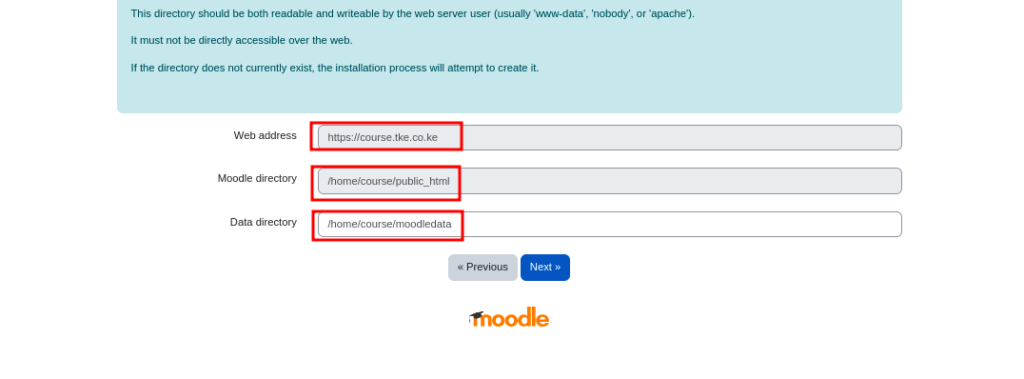
- Make sure the correct Web address and Moodle directory are displayed. Leave the Data directory as it is, or change the location.
- Return to your File Manager and open the copy of config-dist.php you’ve made earlier. Scroll down to find Web Site Location and Data Files Location.
- Edit the wwwroot and dataroot values with your Web address and the Moodle Data directory according to how you have them in the above step. Also ensure that the folder exists in that location and if not there, create it.

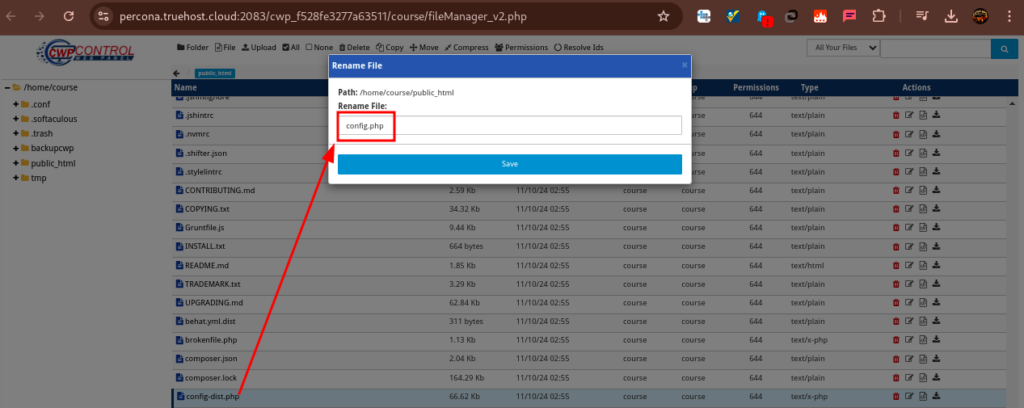
- Save and Rename the file to config.php.
- Return to the Moodle™ setup page and select Next.
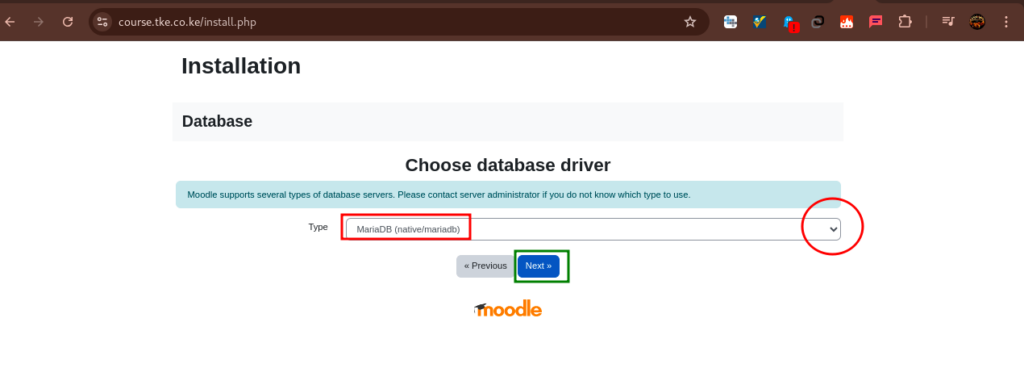
- If everything is well set, you will see a windows that needs you to choose the Database Driver. Choose accordingly from the drop-down. For CWP or CyberPanel, choose MariaDB(native/mariadb) then click on Next.
- You will see a page that asks you to confirm having read moodle conditions.
- Click in Continue

- As you go through he installation, you may be some adjustments so that your system can be fully ready for moodle set-up.
- Some of the adjustments could be
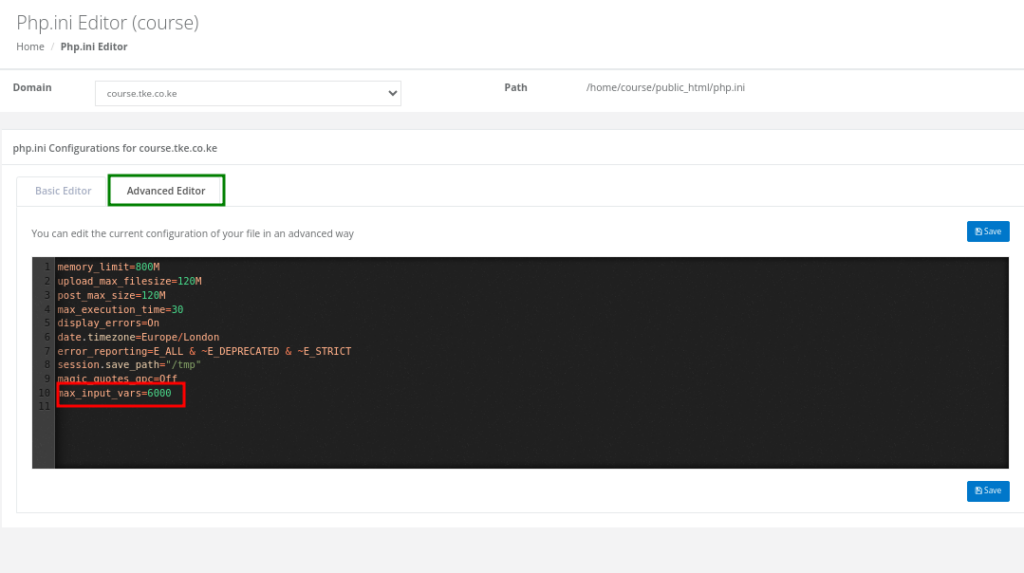
- Adjustment of PHP INI values to required minimum, e.g PHP setting max_input_vars must be at least 5000. Check this guide on how to.
- To update max_input_vars, go to PHP INI section on your panel, as per the guide, then select Advanced Editor
- Then manually input this value max_input_vars=6000 as in the image below
- Then click on Save
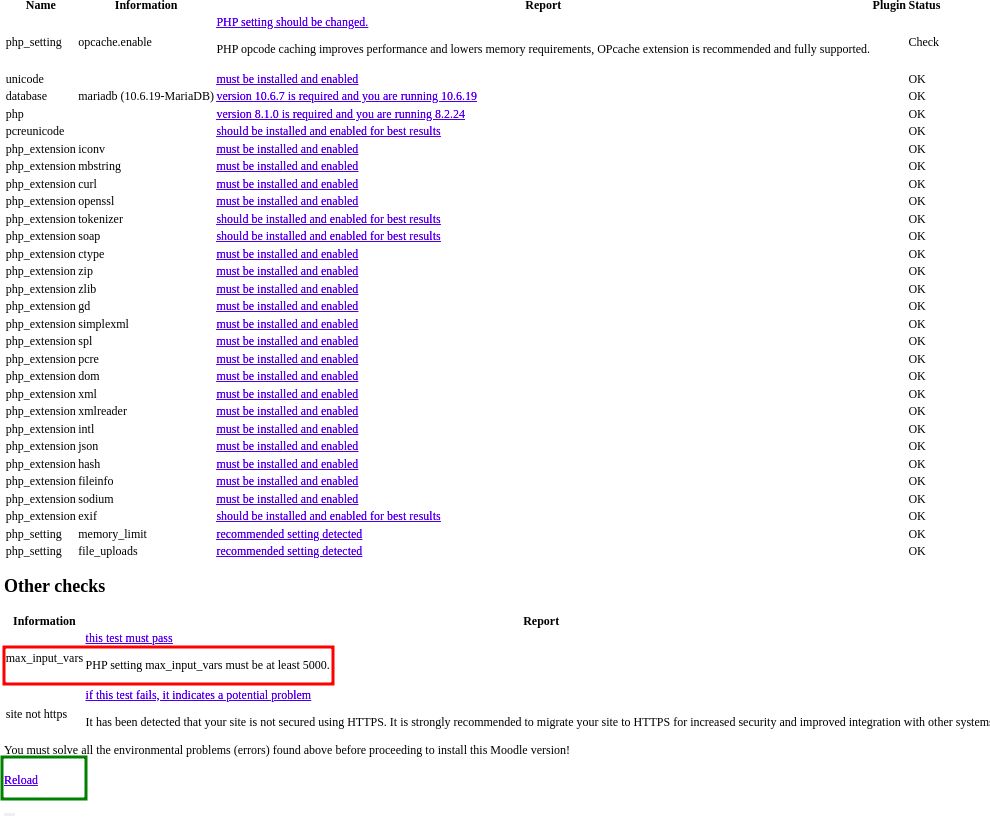
- Another Adjustment that you may make, if you haven’t is the database upgrade to a higher version like in the message below. If so, refer to this guide
mariadb (10.4.34-MariaDB)version 10.6.7 is required and you are running 10.4.34
- Do the adjustments as needed then reload the page, then click on Reload
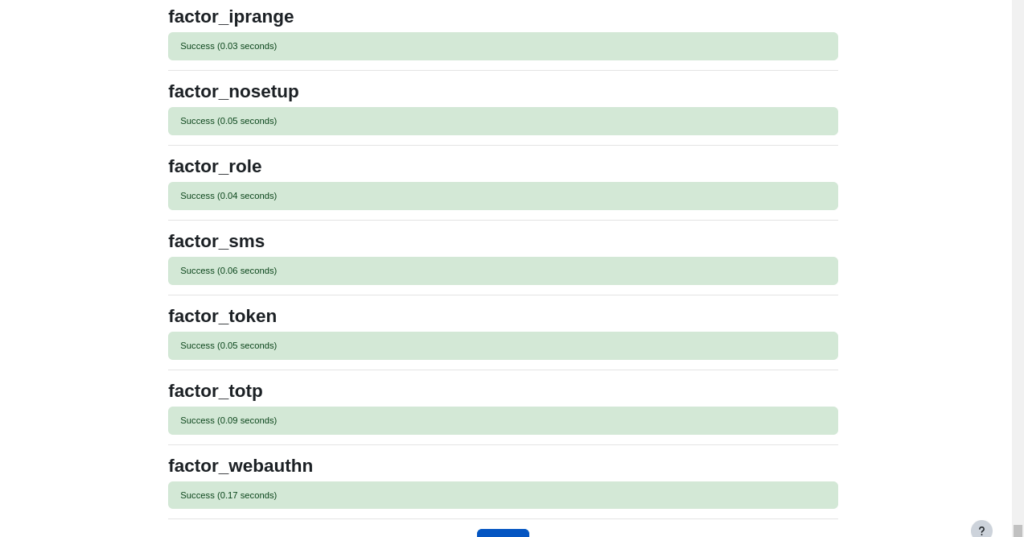
- Once all system requirements are met, you will see a message as in the image below
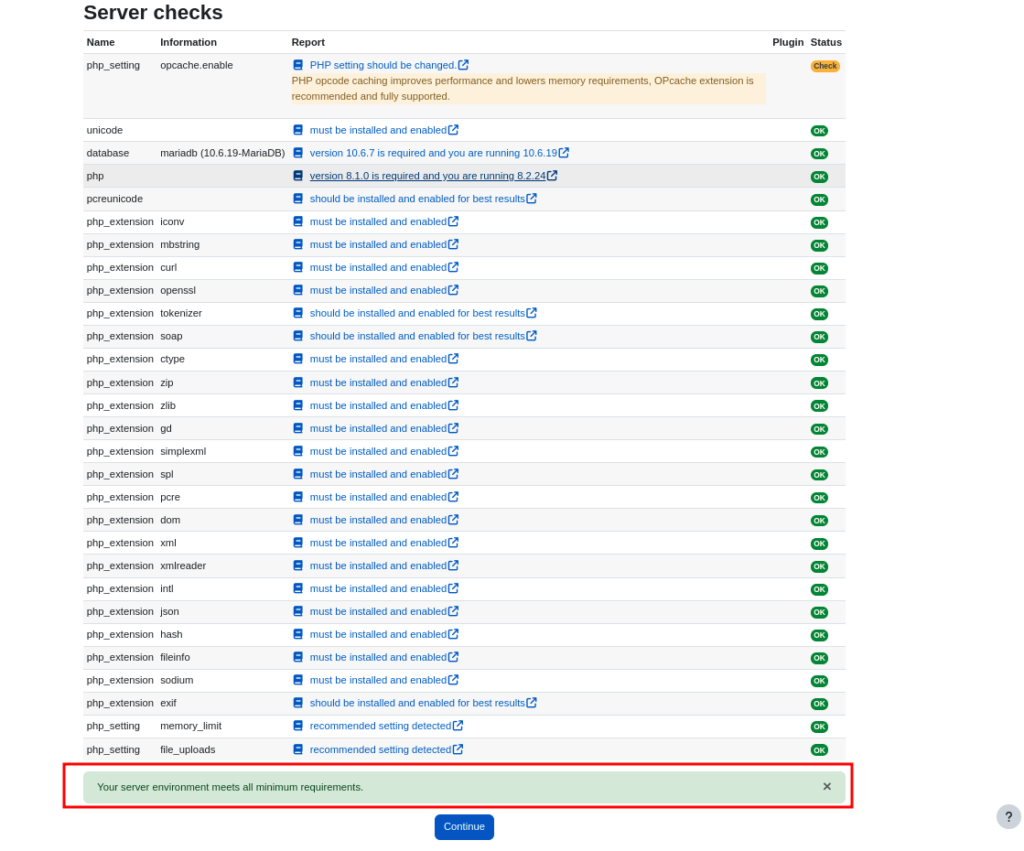
- Click on Continue, and give it time to confirm the settings again. You will see a window showing status information like in the image below
- Click on Continue
- You will then be taken to a page where you set up admin account details.
- Input the needed details then click on Update
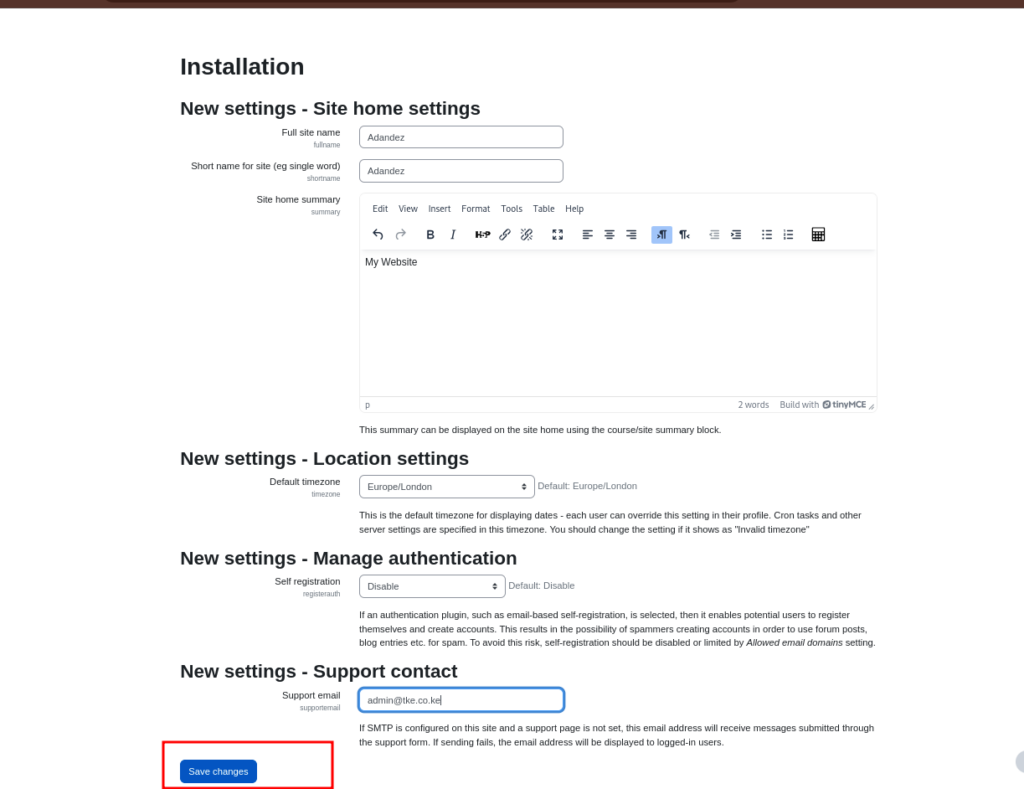
- Next will be to input website details
- Fill in the details then click on Save Changes
- The next step will need you to complete your site registration, by inputting needed details.
- Fill in the details, then check the box to agree to Moodle terms of service.
- You can optionally check the other box, to be notified of new releases or to receive newsletters from moodle
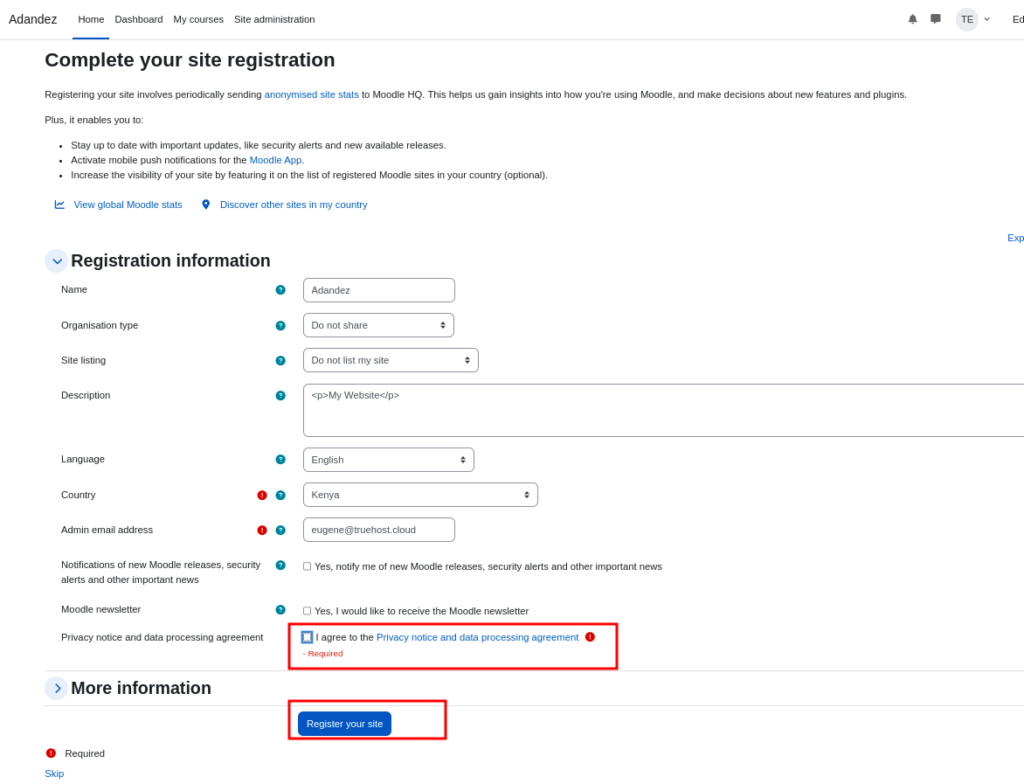
- Then click on Register your site
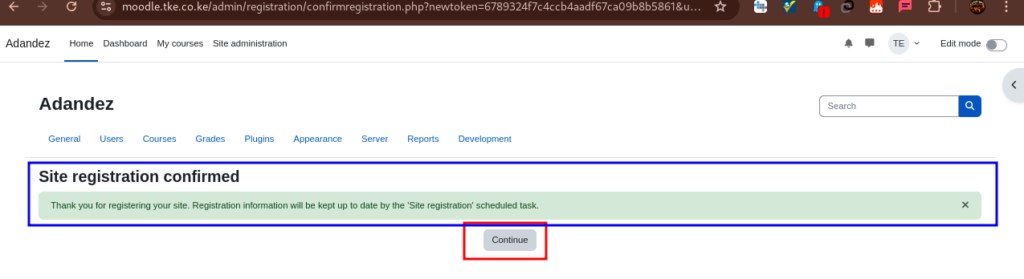
- Congratulations! You have successfully installed Moodle.
- You will now be logged into your admin account and you can now customize your installation as you desire.
