While CyberPanel has an easy one-click WordPress installer, you may sometimes need to install WordPress manually, especially if you want more control over the installation process.
Prerequisites #
This guide expects that you have WordPress website files locally on your computer and you want to deploy them on your Cyberpanel server. If you want install fresh WordPress on the server, please check this guide
Before you begin, ensure the following:
- CyberPanel Installed: You should already have CyberPanel installed on your server.
- Domain or Subdomain: You should have a domain or subdomain added to CyberPanel for hosting the WordPress site.
- FTP Access: Make sure you have FTP access to the server, or you can use CyberPanel’s File Manager.
- MySQL Database: Cyberpanel already has MariaDB on it and that will work just fine.
- PHP: Ensure that your server supports PHP (version 7.4 or higher is recommended). Mostly this is taken care of. No further action from you.
Step-by-Step Guide to Manually Deploy WordPress on CyberPanel #
Step 1: Log in to Cyberpanel using these steps
Step 2: Create a Website in CyberPanel – This is the URL where your WordPress will be displayed. You will use these steps to create a website
Step 3: Create a MySQL Database for WordPress. You can check these steps on how to do that. Ensure to save the database name, username and password. You will need them later in step 7 of this guide.
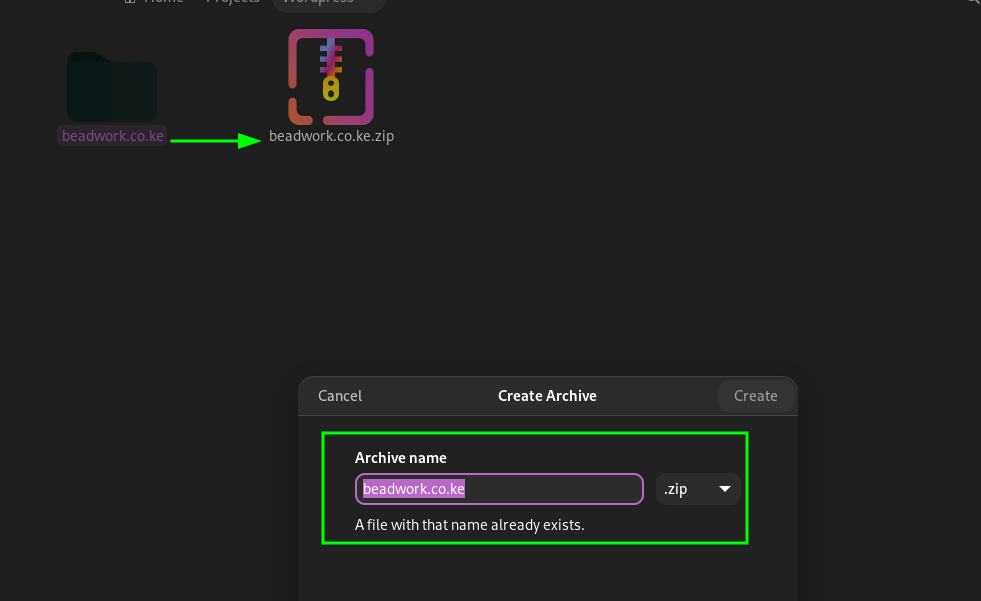
Step 4: Compress the Files on your computer
You now need to compress all your WordPress files to to one file, like a .zip file or .tar.gz or any other valid compression. Below, we have compressed a folder called beadwork, which has all our files, to beadwork.zip. This makes it easy to upload all the files to the server as one file
Step 5: Upload WordPress to the Server – You can upload the compressed WordPress ZIP file using CyberPanel’s File Manager or via FTP.
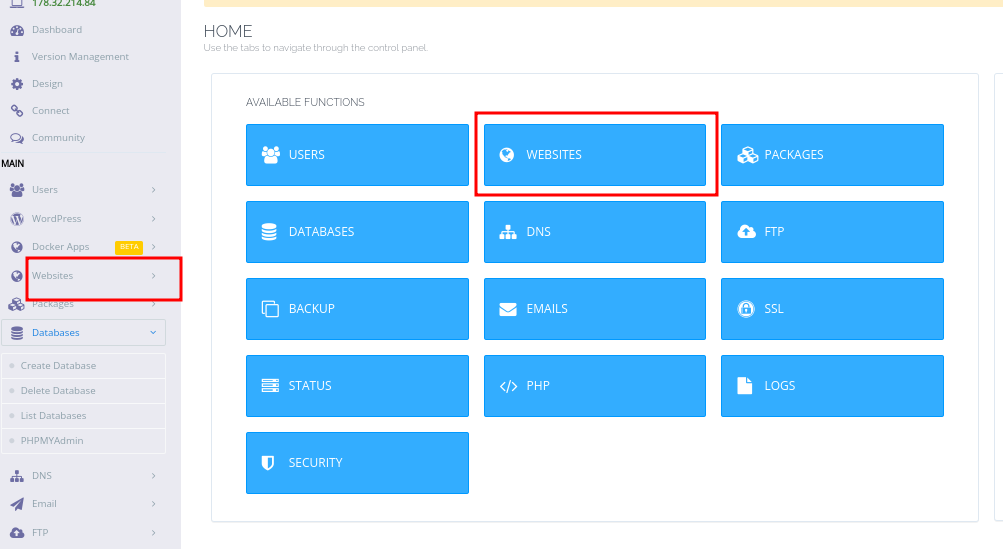
- On your Cyberpanel, go to Websites – List Websites
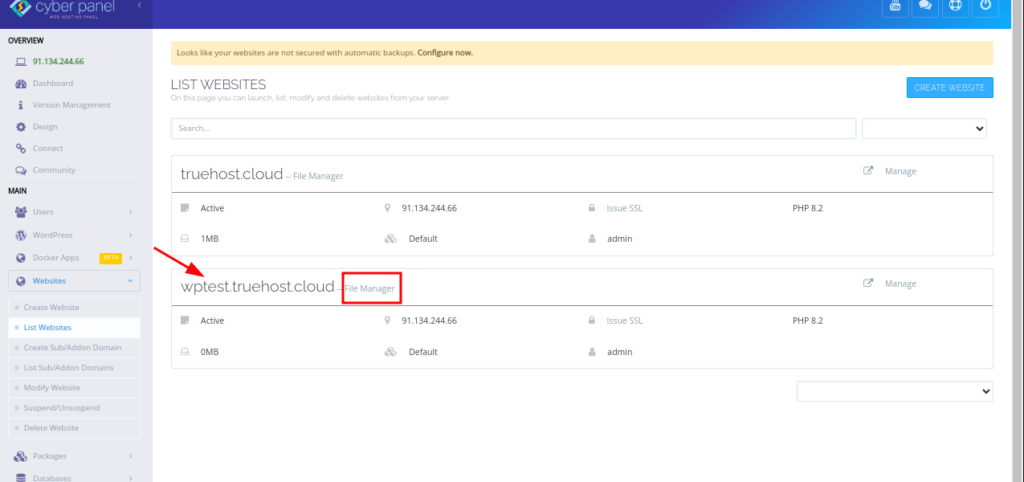
- Locate the website that you created earlier. Mine is wptest.truehost.cloud
- Navigate to File Manager under the website you created in CyberPanel.
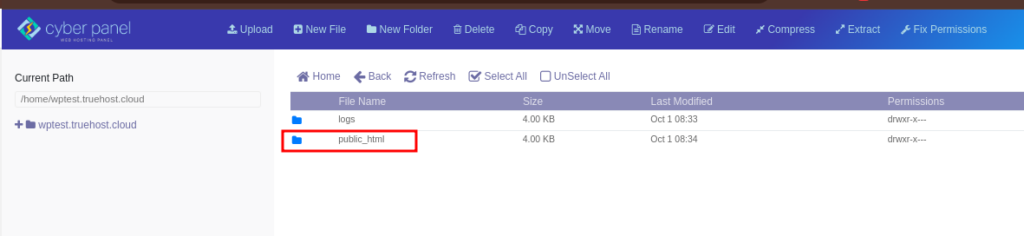
- Go to the public_html folder (this is the web root for your site) and Click on Upload to upload the WordPress ZIP file.
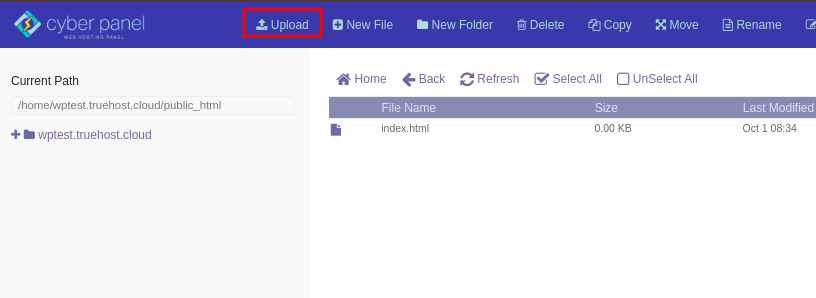
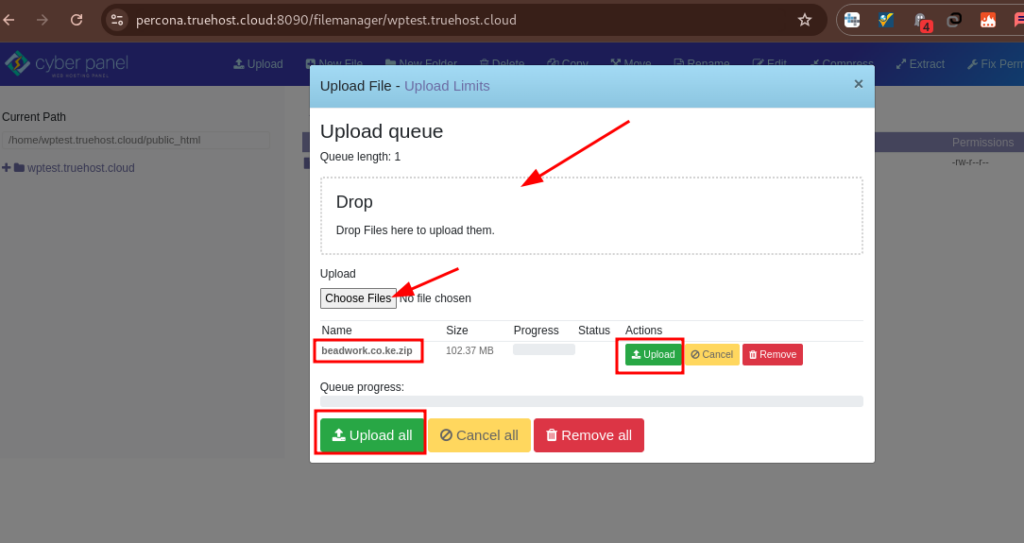
You can drag and drop the zip file to the uploader, then click on Upload all or click on the Choose File option to navigate to where you saved it on your computer an select it, then click on Upload.
You will see a progress bar showing progress of the upload process
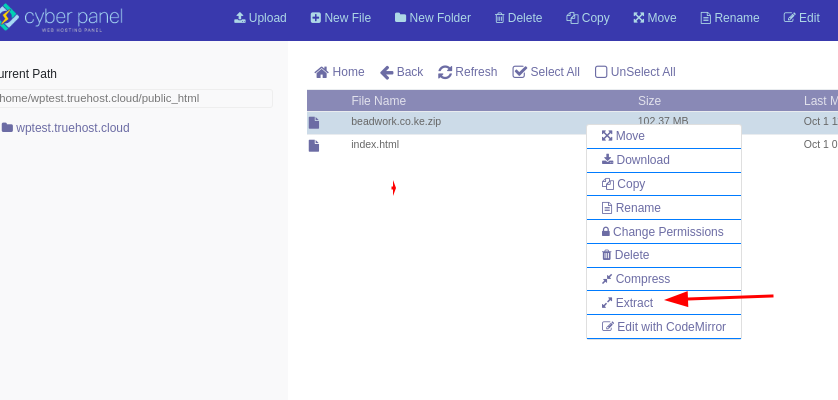
Step 6: Extract the ZIP file
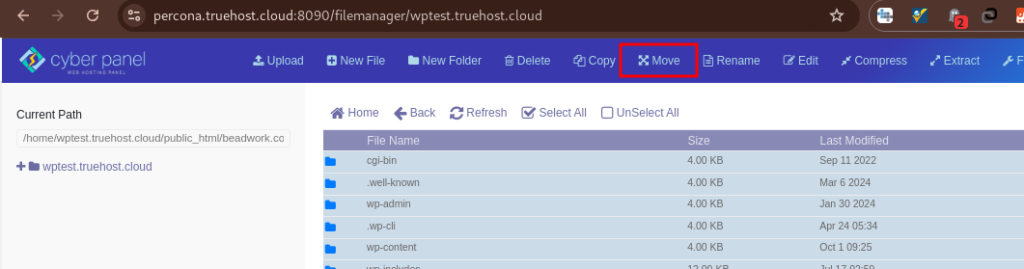
- Once uploaded, close the uploaded and go back to public_html where you uploaded the file and right click on the file and select Extract
- After extraction, move the contents from the
wordpressfolder into the public_html directory (if they are not already there). In my case, I will move contents of beadwok to public_html - Go inside the extracted folder and use the Select All option at the top of the window to select everything

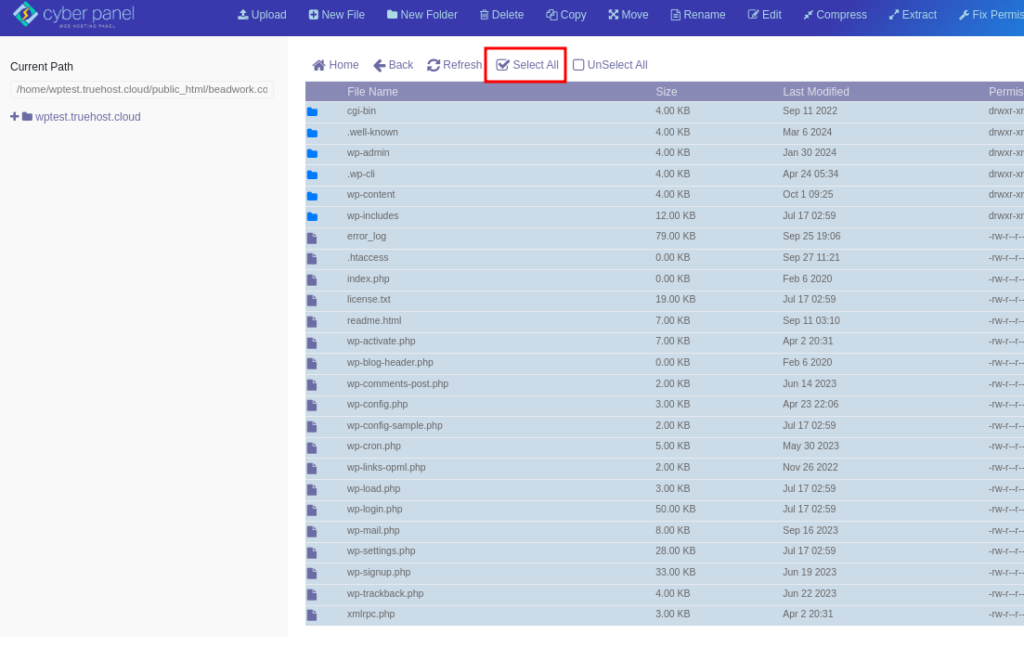
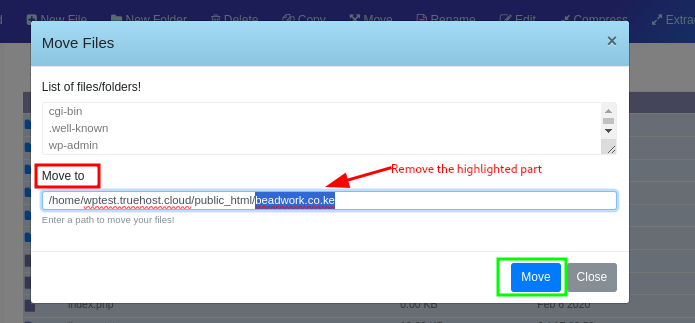
- Click on Move option found at the top of the widow, then, in the resulting box, in the Move to field, delete the extra path and only leave the name of the new destination. In our case, we delete to the point of public_html and click on Move
Step 7: Configure WordPress
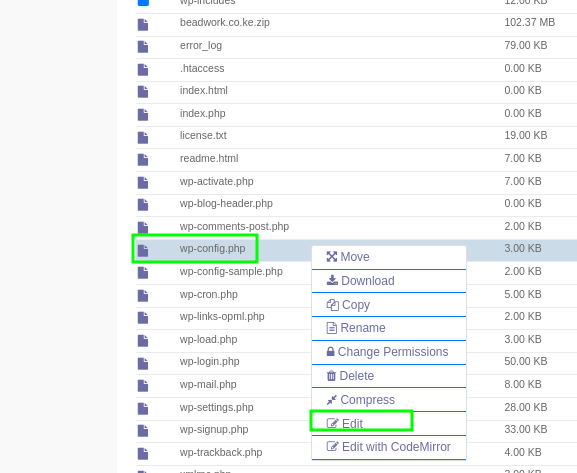
- Navigate to the public_html directory and find the file named
wp-config.php - Right-click and rename it and click on Edit
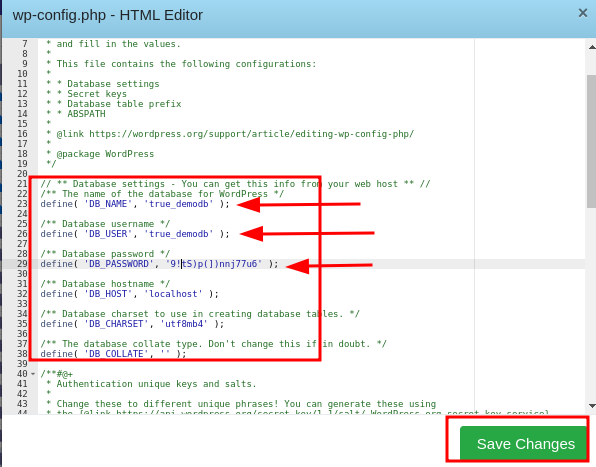
- Find the section of the file that has database details then carefully edit them to match the database that you created in step 3 of this guide.
- You will edit the DB_NAME, DB_USER, DB_HOST aand also set DB_HOST to localhost, if not set already then click on Save Changes.
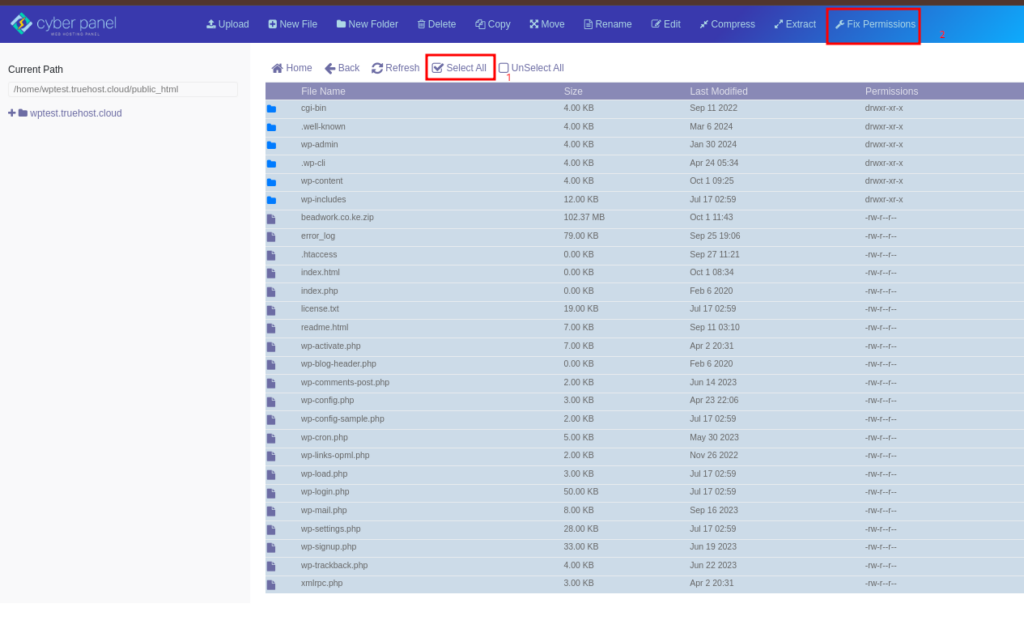
Step 8: Set Correct File Permissions
Ensure that the WordPress files have the correct file permissions to avoid issues with uploads, plugin installations, and updates.
Go back to File Manager>public_html and again click the Select all option at the top, followed by Fix Permissions
Step 9: Import DB file in phpMyAdmin
- Other than WordPress files, you also have a database in .sql format, which you want to upload to the server. You can do that using these steps.
Step 10: Update home_url and site_urls in phpMyAdmin
Also you need to update the home_url an site_url values of your database to match your domain name/subdomain
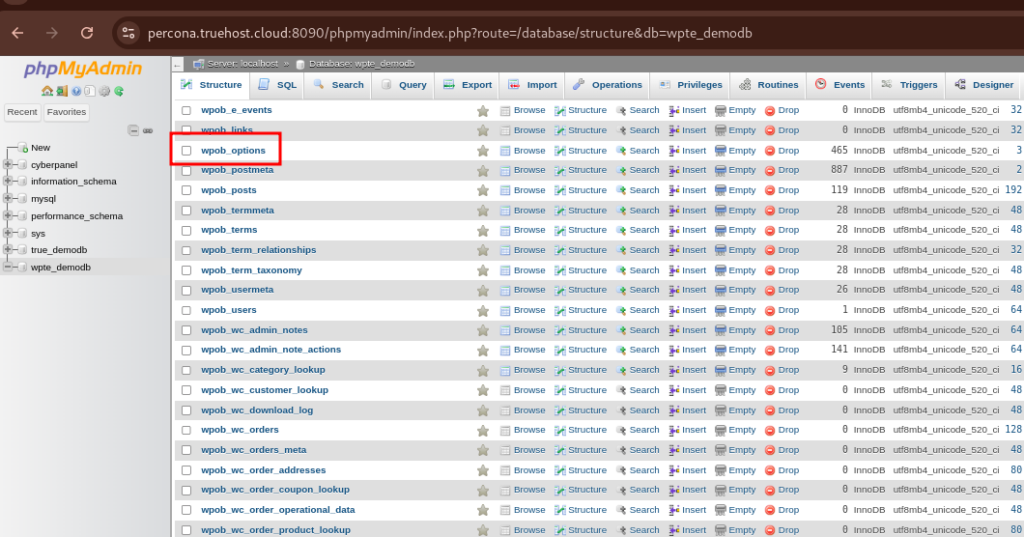
- Go to Databases->phpMyAdmin and click on your website’s database
- Locate the options table. I may be called wp_options or if you have a custom database prefix, it could be called different, even though it has the name options. In my case it is wpte_demodb
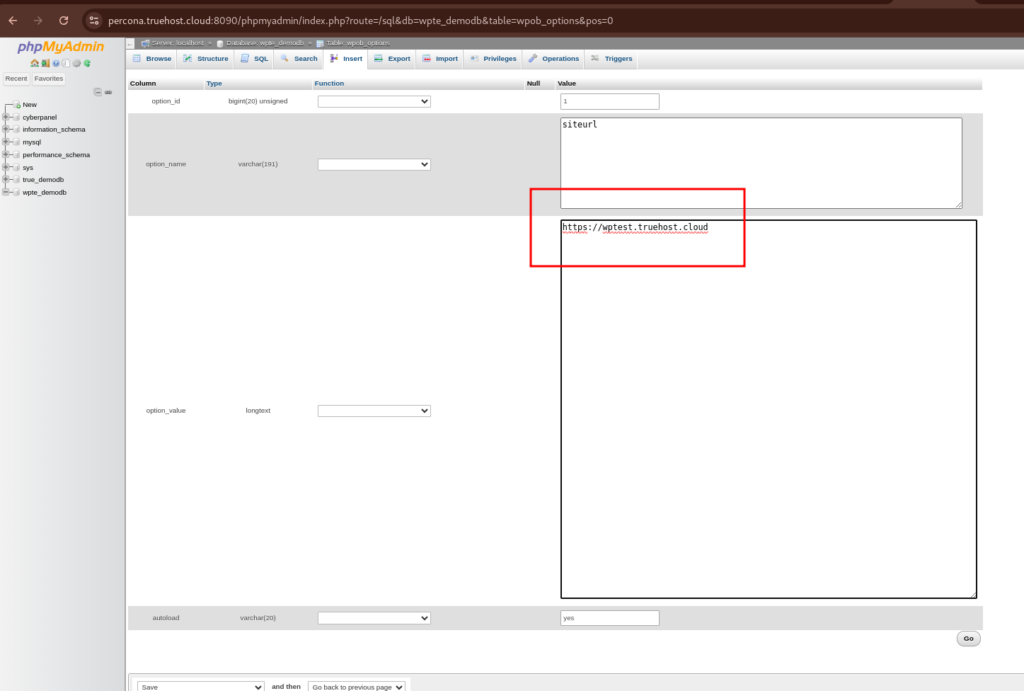
- Click on the table and locate a locate rows called siteutl and home
- Click on Edit buttons besides each of them.
- Modify the URLs; delete what is there and replace with the full URLs if the domain/subdomain that has your website. I will remove https//beadwork.co.ke & replace with https://wptest.truehost.cloud.
Step 11: Fix Permalinks in WordPress structure #
- You will need to access WordPress admin dashboard.
- If you have forgotten your logins, please reset them as guided here
- Once logged in, Go to Settings > Permalinks.
- Set the permalink structure to Postname and click Save Changes
- If the permalink is already Postname. ensure to just click on Save Changes, anyway.
12. Access your domain on your browser to see the website
In case you face a challenge, please check with our support team .