Postfix is a popular, secure, and easy-to-configure open-source mail transfer agent (MTA) used to route and deliver emails. If you’re looking to set up a mail server on Ubuntu using Postfix, this guide will walk you through the process.
Managing and maintaining your own mail server can be complex and time-intensive. For many users, it’s more practical to use a paid email service instead. If you’re thinking about running your own mail server, we recommend reviewing this article on the potential drawbacks of doing so.
However if you are sure you want to set up your own mail server, you may proceed with the article.
Prerequisites: #
- A running instance of Ubuntu server (we will use ubuntu 22.04)
- sudo or root access to the server.
- A domain name configured to point to the server. (We will use beadwork.co.ke)
- Ensure that port 25 (SMTP) is open for outgoing and incoming mail traffic.
You could check these steps on First Server Setup with Ubuntu
Step 1: Update Your Server #
- Before setting up Postfix, it is crucial to update your server with the latest security patches and software packages.
sudo apt update && sudo apt upgrade -yStep 2: Install Postfix #
Postfix is included in the Ubuntu package repositories, so it can be installed easily with the apt package manager. We recommend that you add the DEBIAN_PRIORITY=low variable to the command so that it can promt you to add some additional configurations
sudo DEBIAN_PRIORITY=low apt install postfixThis installation process will open a series of interactive prompts. For the purposes of this tutorial, use the following information to fill in your prompts:
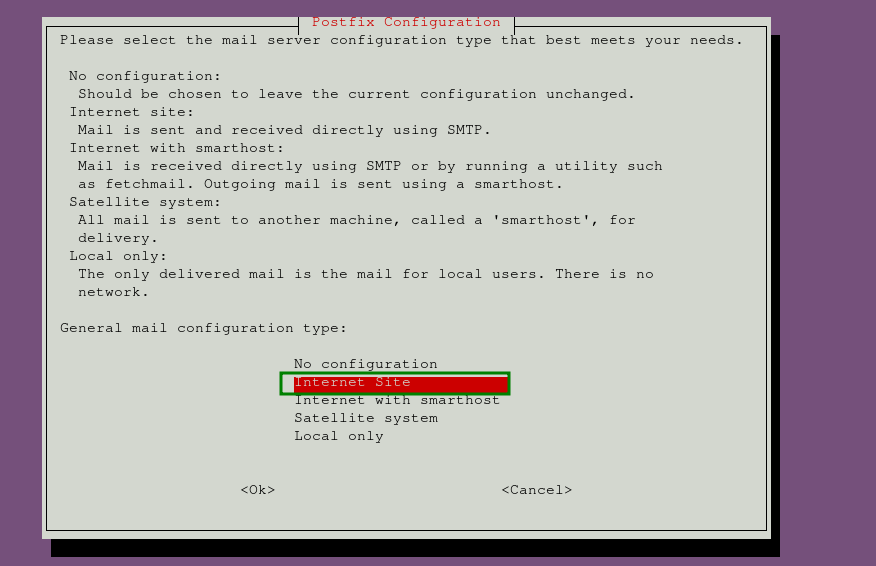
- General type of mail configuration: Select Internet Site
- System mail name: This is the base domain used to create valid email addresses when only the account portion of the address is provided. For example, if your server’s hostname is
srv.beadwork.co.ke, you will likely want to set the system mail name tobeadwork.co.ke. This way, with the usernametke, Postfix will use the email addresstke@beadwork.co.ke

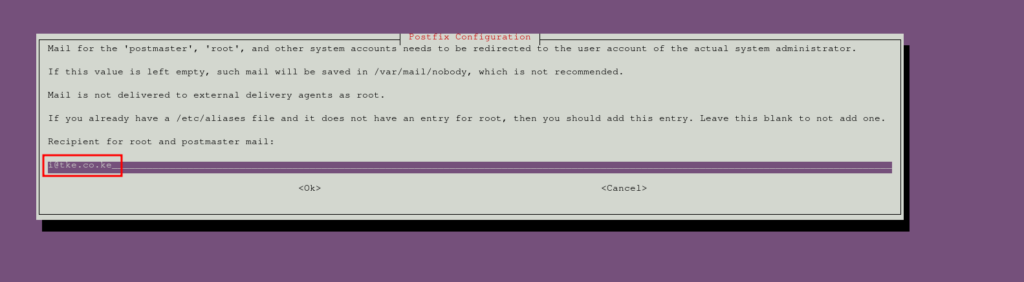
- Root and postmaster mail recipient: This is the Linux account that will receive mail addressed to
root@andpostmaster@. Use your primary account for this. In this case, it would bei@tke.co.ke
- Other destinations to accept mail for: This defines the domains for which this Postfix instance will accept mail. If you need to add other domains that this server will handle, do so here. Otherwise, the default settings will suffice.

- Force synchronous updates on mail queue?: Since you are likely using a journaled filesystem, accept No here.

- Local networks: This is a list of networks for which your mail server is set to relay messages. The default settings will work in most cases. If you modify it, ensure you restrict the network range appropriately

- Mailbox size limit: This setting limits the size of incoming messages. Set it to 0 to disable any size restrictions.

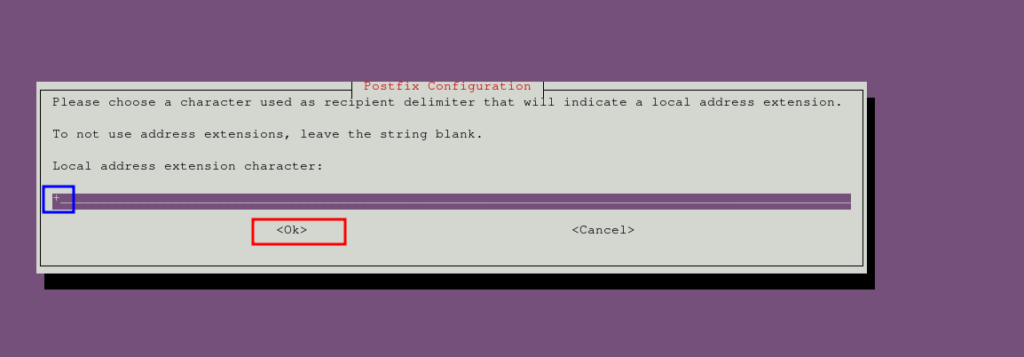
- Local address extension character: This character separates the main address from an extension, used to create dynamic aliases. The default,
+, will work for this guide.
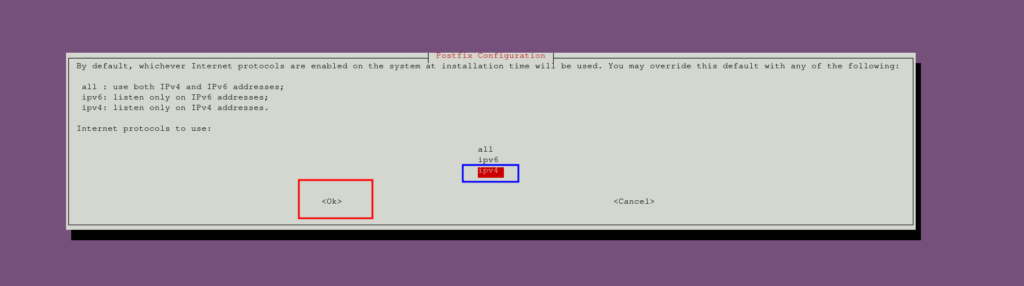
- Internet protocols to use: Choose whether to restrict the IP version that Postfix supports. I will go with ipv4.
- If you need to change the above setting that you put during installation, you can do so by running the command below
sudo dpkg-reconfigure postfixStep 3: Configure Postfix #
After installation, you may need to adjust the Postfix configuration for your specific mail server and to add what was not prompted during installation.
Postfix stores its configuration in the /etc/postfix/main.cf file.
Mailbox settings:
Configure where email will be stored. Use Maildir format (which stores each email as a file) for better compatibility:
sudo postconf -e 'home_mailbox= Maildir/'
Next, define the location of the virtual_alias_maps table, which maps email addresses to Linux system accounts. Run this command to set the table location to a hash database file at
sudo postconf -e 'virtual_alias_maps=hash:/etc/postfix/virtual'
Now that you’ve defined the location of the virtual maps file in the main.cf file, create the file and start mapping email accounts to Linux system accounts. Open the file in a text editor:
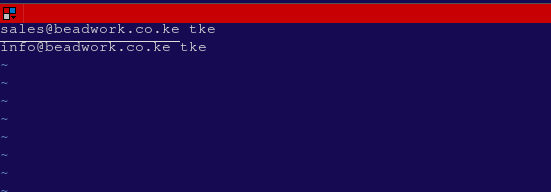
sudo vim /etc/postfix/virtualList any email addresses you wish to accept mail for, followed by a whitespace and the Linux user who will receive the mail.
For example, to accept mail at sales@beadwork.co.ke and info@beadwork.co.ke and deliver it to the tke user, you could configure the file as follows:
sales@beadwork.co.ke tke
info@beadwork.co.ke tke
After mapping all addresses, save and close the file (with vim, press wq, then press ENTER).
To apply the changes, run:
sudo postmap /etc/postfix/virtual
Restart the Postfix service to apply your changes:
sudo systemctl restart postfixSince UFW blocks external connections by default, you need to add a rule to allow Postfix connections:
sudo ufw allow Postfix
At this point, Postfix is ready to accept external connections, but you’ll need a mail client to interact with the mail being delivered to your server.
Step 4 — Installing the Mail Client and Initializing the Maildir Structure #
To interact with mail, install the s-nail package, a feature-rich email client that correctly handles the Maildir format.
First, ensure that the MAIL environment variable is set correctly. This will allow s-nail to find the mail for your user. Set the variable in the /etc/bash.bashrc file and create a file in /etc/profile.d/ so it is available to all users:
echo 'export MAIL=~/Maildir' | sudo tee -a /etc/bash.bashrc | sudo tee -a /etc/profile.d/mail.shTo read the variable into your current session, run:
source /etc/profile.d/mail.sh
Now, install s-nail using APT:
sudo apt install s-nail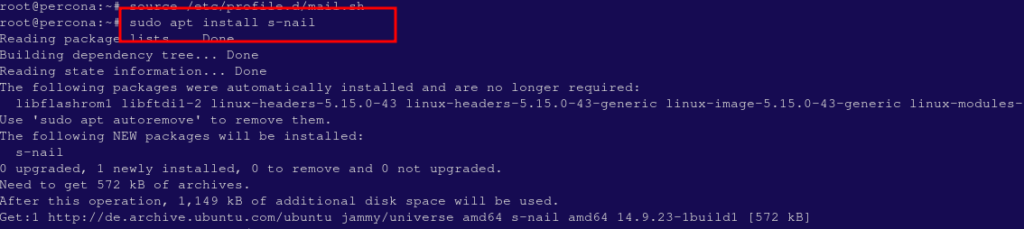
Before using the client, adjust a few settings by editing the /etc/s-nail.rc file:
sudo vi /etc/s-nail.rcAdd the following options at the bottom of the file:
set emptystart
set folder=Maildir
set record=+sent
set emptystart: Allows the client to open with an empty inbox.set folder=Maildir: Defines the Maildir directory as the folder.set record=+sent: Creates asentmbox file for storing sent mail

Save and close the file.
To create the Maildir structure, send an initial email to your Linux user. Since the sent file is unavailable before Maildir creation, disable writing to it using the -Snorecord option. Send the email by piping a string into the s-nail command:
echo 'init' | s-nail -s 'init' -Snorecord tke
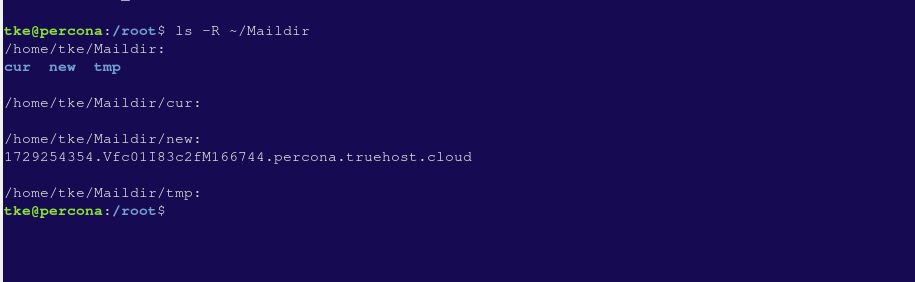
Afterward, verify the Maildir structure was created:
ls -R ~/MaildirYou should see directories for cur, new, and tmp under ~/Maildir, with a message file in the ~/Maildir/new directory.
Step 5 — Testing the Mail Client #
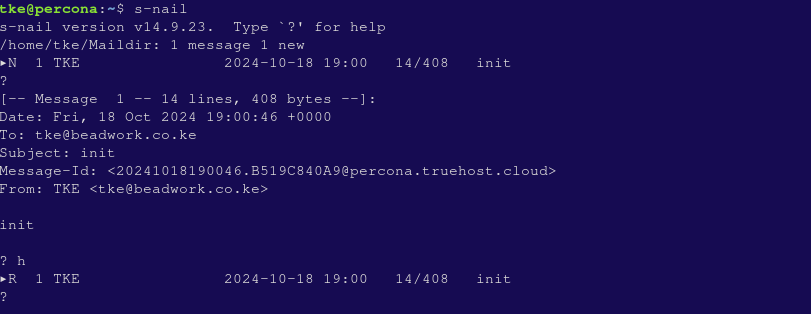
Now, test the mail client by opening s-nail:
s-nailYou will see the init message in the inbox. Press ENTER to view it, and h followed by ENTER to go back to the message list. Press d and ENTER to delete the message.
To test sending mail to an external address, create a test message:
vi ~/test_messageEnter some text, save, and close the file.
Send the message using the s-nail command:
cat ~/test_message | s-nail -s 'Test email subject line' -r contact@beadwork.co.ke tke@beadwork.co.ke

Check your external email inbox for the test message.
Finally, to view sent messages, open s-nail and type:
file +sentYou’ve successfully configured Postfix on your server. Managing email servers can be challenging, but this setup provides the basic functionality to get started with sending and receiving emails.