This article will guide you through the process of installing a free SSL certificate on your website using Let’s Encrypt within the FastPanel control panel.
Step I: Login to FastPanel account: #
Access your FastPanel account by entering your credentials.
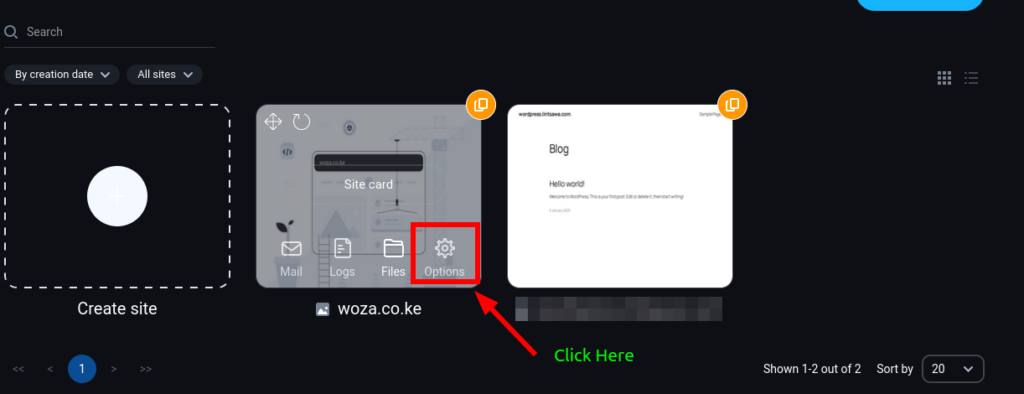
Step II : Select the site: #
Locate and hover over the domain name of the website for which you want to install the SSL certificate.
Click on the “Options” button that appears when you hover over the domain.
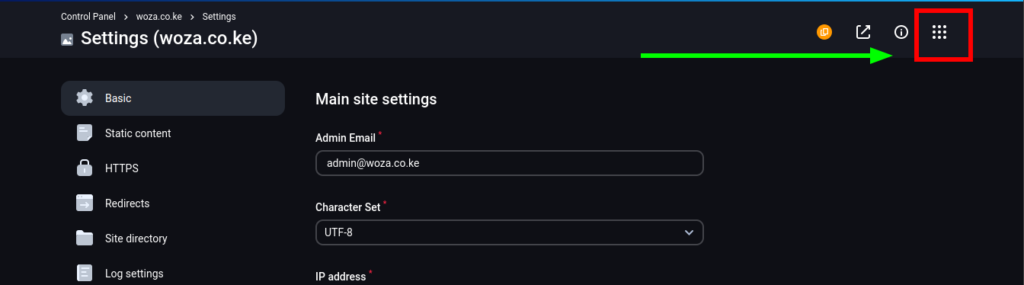
Step III: Navigate to Site Management: #
In the settings page that opens, click on the “Site Management” menu located on the far right.
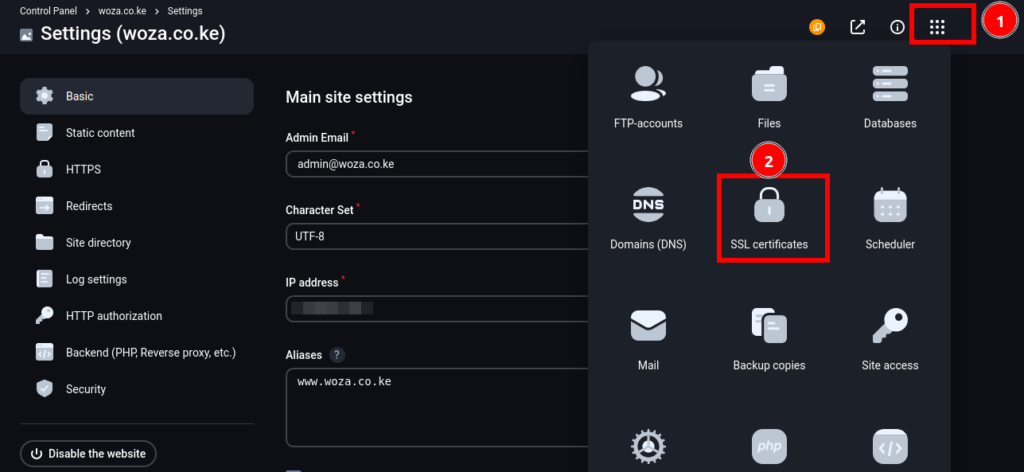
Step IV: Open SSL Certificates: #
Within the Site Management tab, click on the “SSL Certificates” option.
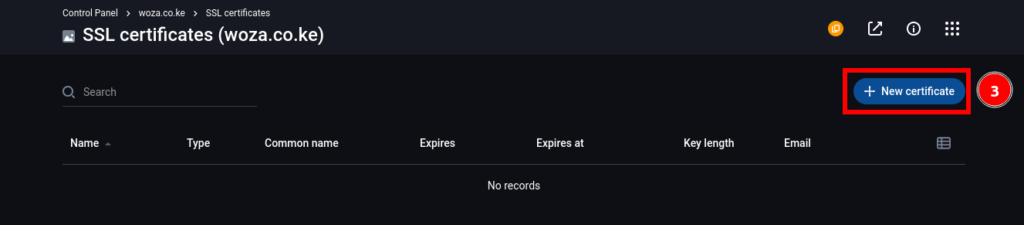
Step V: Create New Certificate #
Click on the “New Certificate” button to initiate the SSL installation process.
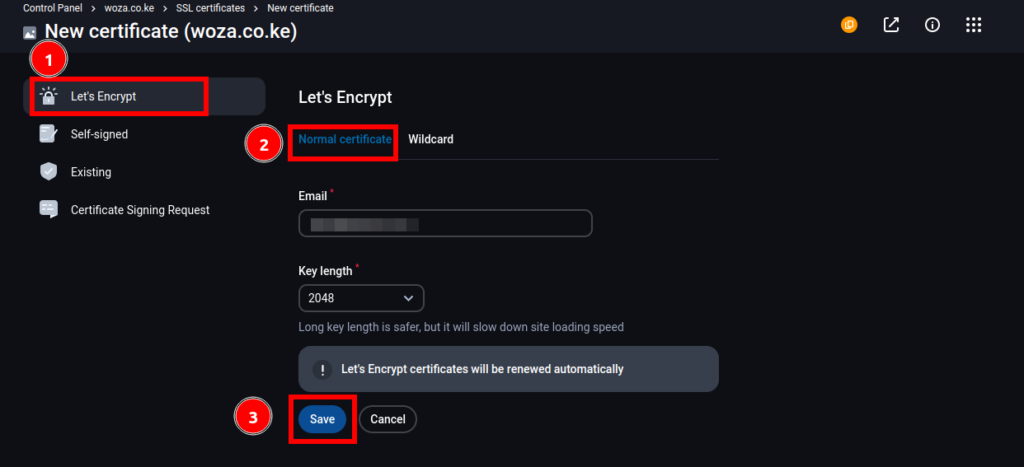
Step VI: Select Let’s Encrypt #
Choose “Let’s Encrypt” as the certificate authority and select “Normal Certificate.”
Click “Save” to proceed.
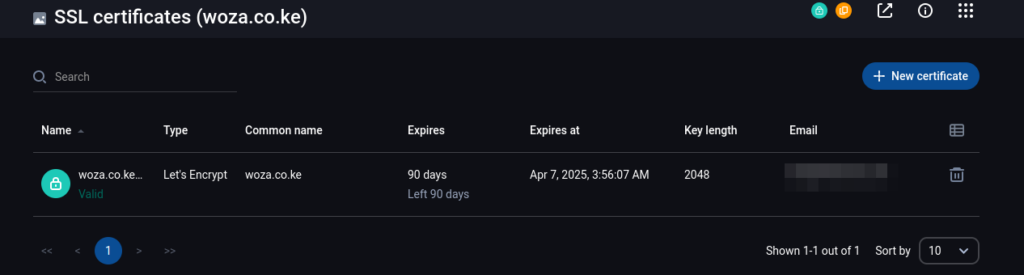
Monitor Certificate Issuance:
You will observe the SSL certificate being created.
The process may take a few seconds.
Once the process is complete, the certificate status should display as “VALID.”
Access Your Site:
Your website is now secured with a free SSL certificate.
You can access it normally.
That’s it. You’ve successfully issued a Free SSL on your domain.
Note:
Ensure your domain is properly configured with DNS records (A record and CNAME records) pointing to your server’s IP address.